1 set the wp-501, Set the wp-501, Figure 4: the setup internal panel – Kramer Electronics WP-501 User Manual
Page 10: N 5.1
8
WP-501 - Using Your WP-501
5.1
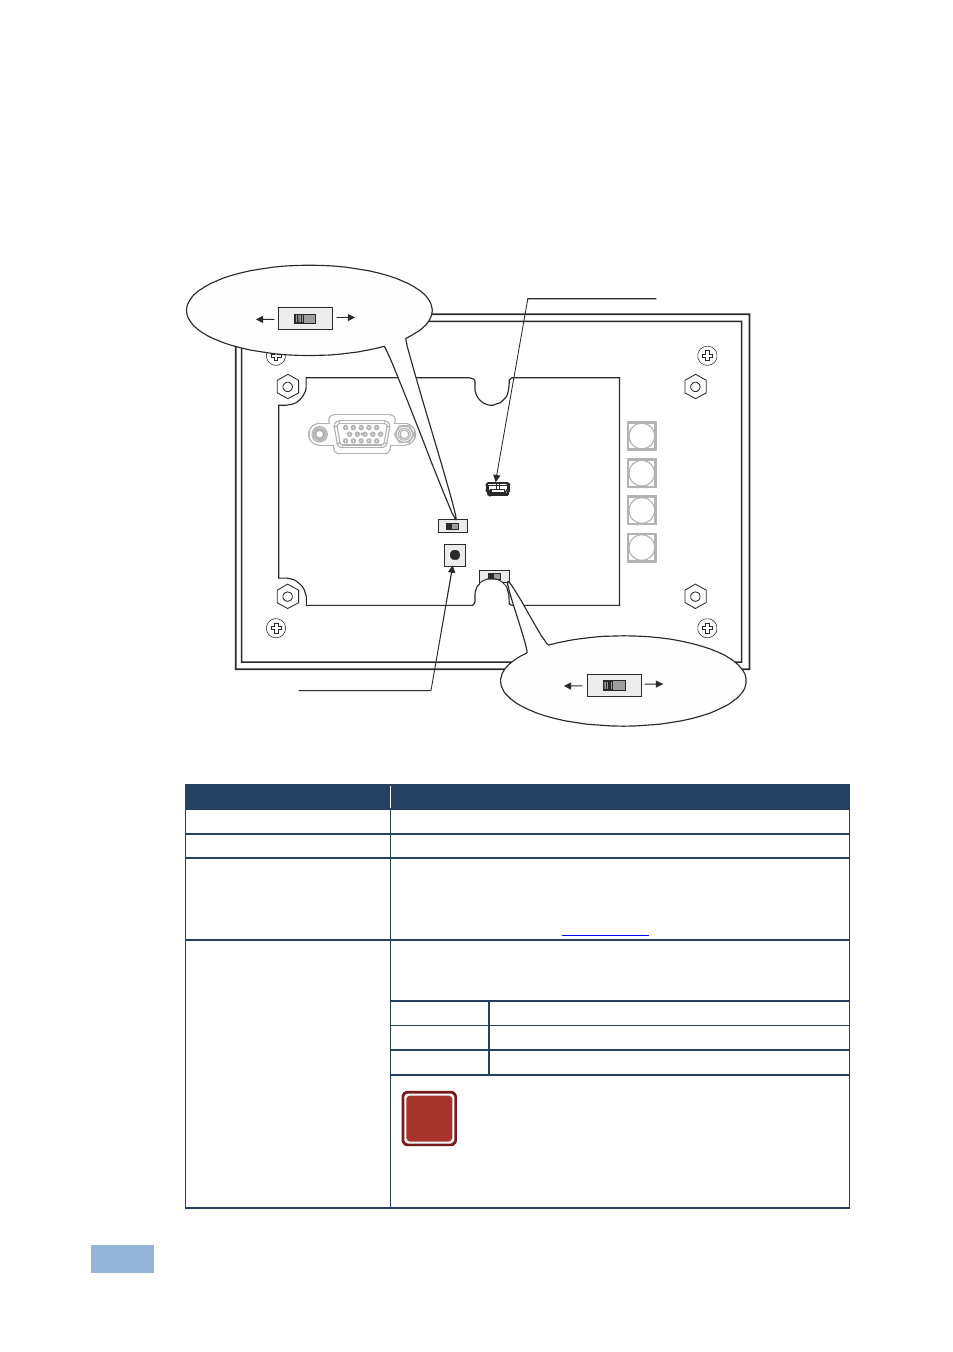
Set the WP-501
Before installing the front panel and mounting it on the wall, you need to setup the
WP-501. This section defines the relevant internal panel components, viewed from
the front panel side:
Figure 4: The Setup Internal Panel
Feature
Function
Program Switch
For firmware upgrade
USB port for configuration Use the USB port to configure the unit (for system integrator)
Mic Mode Switch
Set the microphone mode switch to dynamic or condenser (by
default, this switch is set to dynamic).
It is recommended to set the mic mode switch before mounting the
WP-501 front panel (see
Section 5.2.1
Factory Reset Button
Disconnect the power and then connect it while pressing the
Factory Reset button (using a small screwdriver). The unit will
power up and load its memory with the factory default definitions
IP Address: 192.168.1.39
Mask:
255.255.0.0
Gateway:
0.0.0.0
This operation should be carried out by
authorized Kramer technical personnel or by an
external system integrator, and requires
removal of the device from the wall by
unscrewing the four wall mount screws
USB for Configuration
Factory Reset Button
Program Switch
Program
Normal
Mic Mode Switch
Condenser
Dynamic
!