4 connecting the k-net port, Connecting the k-net port, Figure 5: k-net pinout connection – Kramer Electronics RC-76M User Manual
Page 15: Figure 6: inserting the rc-76m/rc-712m
12
RC-76M/ RC-712M - Installing the RC-76M/RC-712M
4.4
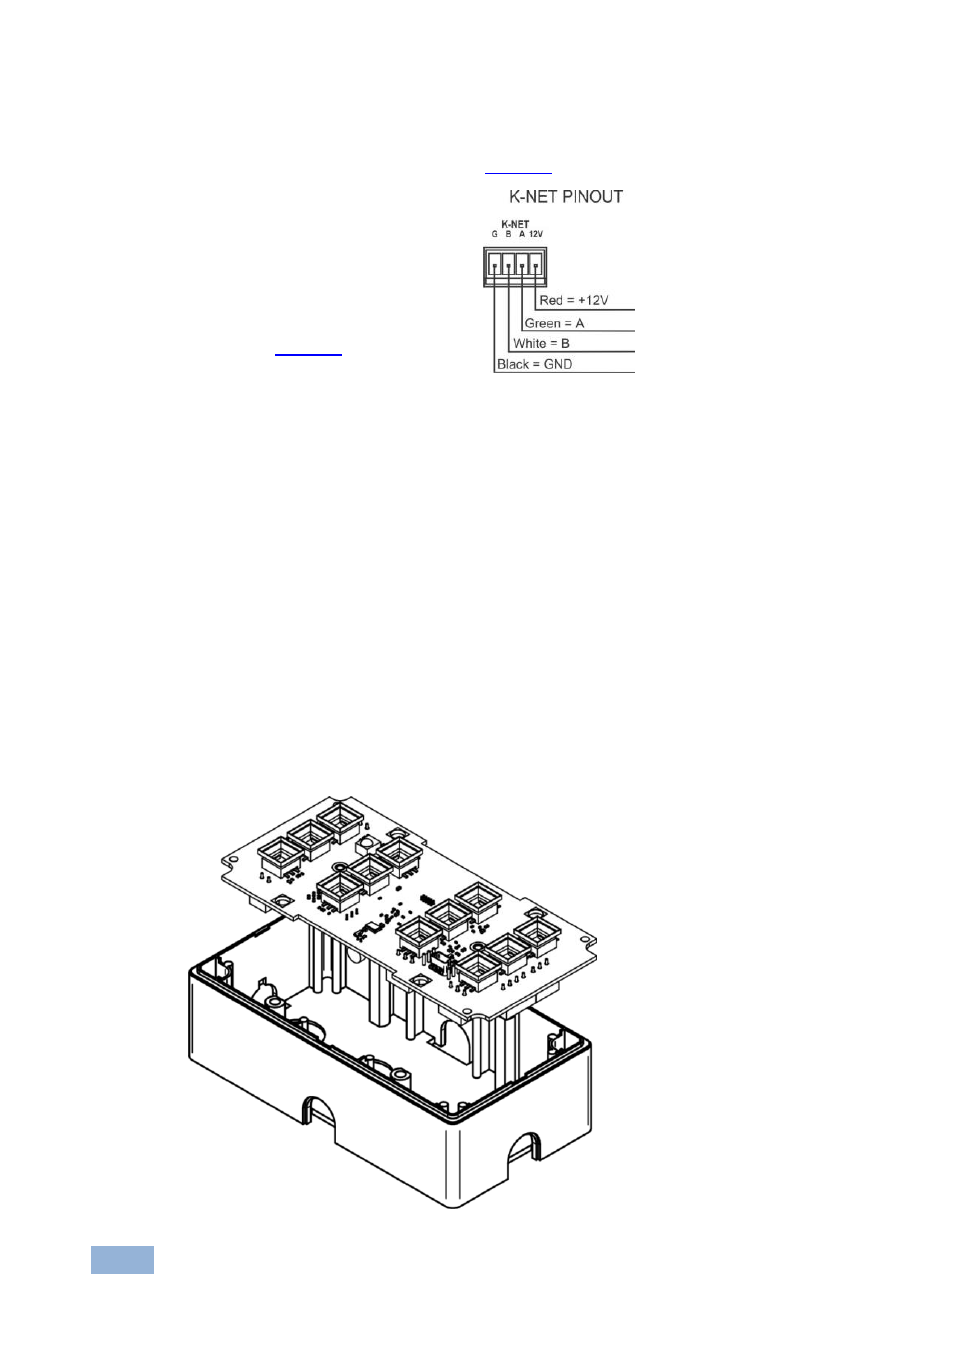
Connecting the K-NET Port
The K-NET port is wired as shown in
If your device is the first or last
device on the line, slide the
K-NET termination switch up;
otherwise make sure it is set to
Figure 5: K-NET PINOUT Connection
4.5
Mounting the RC-76M/RC-712M onto the Merten Housing
After the cables are connected you can mount the device onto the housing. Note
that the illustrations in this section do not show the cables that are already
connected to the device and passing through the housing cable openings.
To mount the RC-76M/RC-712M:
1. Reconnect the detachable terminals to the rear panel
2. Gently place the RC-76M/RC-712M inside the housing, making sure that all
cables remain connected.
Figure 6: Inserting the RC-76M/RC-712M