5 connecting the tp-219hd and tp-220hd, Connecting the tp-219hd and tp-220hd, Figure 4: tp-220hd (underside panel) – Kramer Electronics tp-219hd User Manual
Page 10: Table 4: tp-220hd (underside panel) features, An xga
KRAMER: SIMPLE CREATIVE TECHNOLOGY
Connecting the TP-219HD and TP-220HD
8
and
define the TP-220HD underside panel:
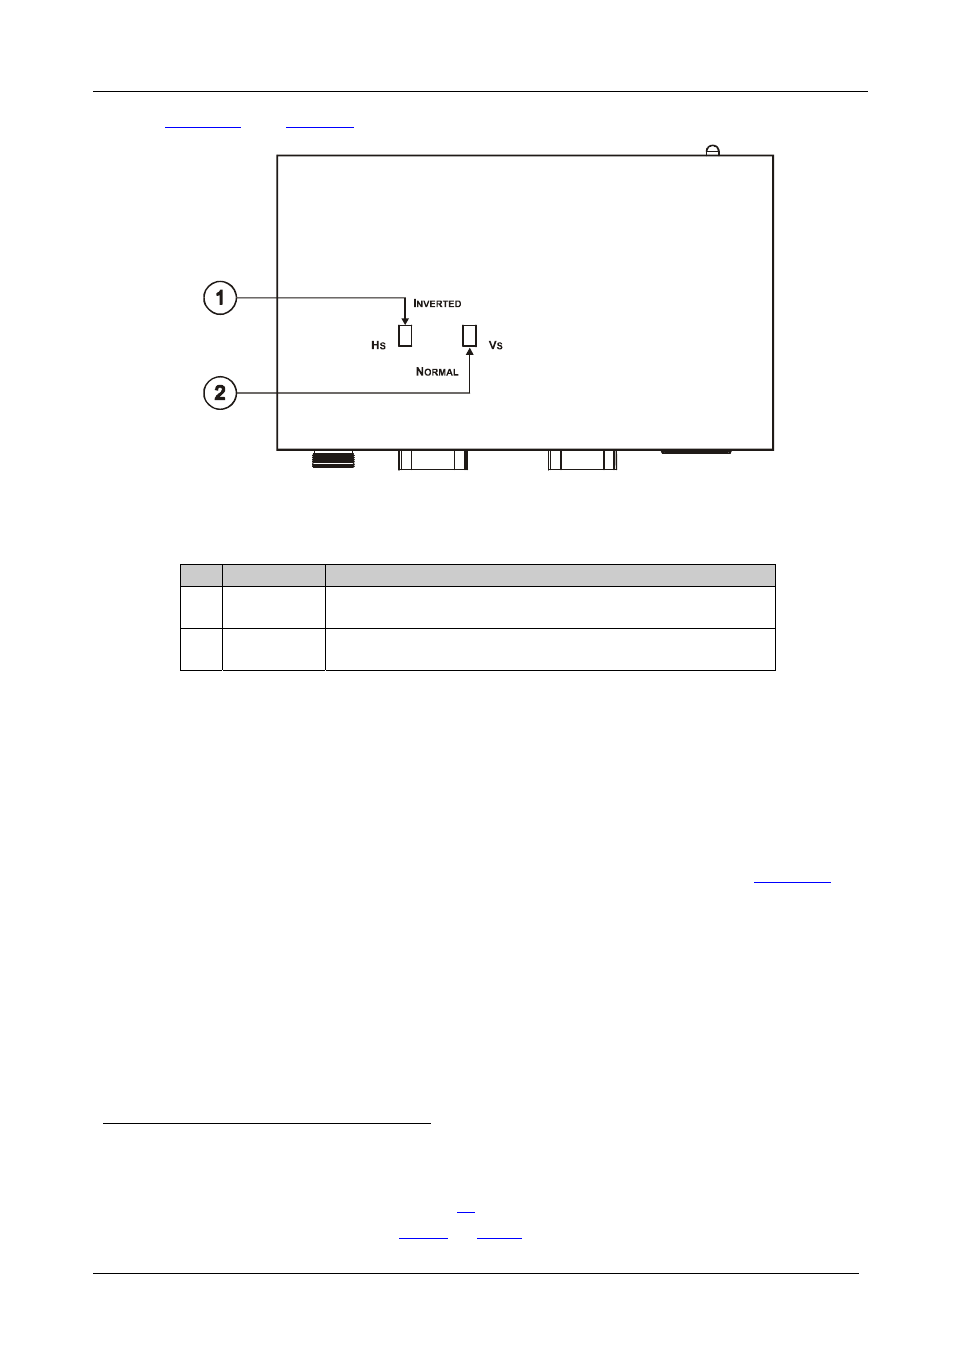
Figure 4: TP-220HD (Underside Panel)
Table 4: TP-220HD (Underside Panel) Features
#
Feature
Function
1
HS Switch
Slide the switch up
(to INVERTED) to invert the HS polarity
Slide the switch down (to NORMAL) to retain the polarity
2
VS Switch
Slide the switch up
(to INVERTED) to invert the VS polarity
Slide the switch down (to NORMAL) to retain the polarity
5
Connecting the TP-219HD and TP-220HD
You can use the TP-219HD XGA/HD – Line Transmitter/Switcher with the
TP-220HD XGA/HD – Line Receiver/DA to configure an XGA/HD DA
system. This will let you transmit one selected computer graphics/HD signal
to two displays via long line CAT 5 UTP cabling.
To connect the TP-219HD to the TP-220HD, as the example in
illustrates, do the following:
1. On
the
TP-219HD, connect
:
An XGA
source (for example, Computer Graphics Source 1) to
the INPUT 1 15-pin HD connector
An XGA
source (for example, Computer Graphics Source 2) to
the INPUT 2 15-pin HD connector
2. If necessary, set the HS and VS switches on the TP-219HD underside
.
1 By default, both switches are set to NORMAL
2 You do not have to connect both inputs
3 Alternatively, you can connect an HD source, see section
5.1
4 By default, both switches are set to normal (see
Figure 2
and
Table 2
)