Condensate drain connection – Comfort-Aire VFH 24 CA User Manual
Page 9
Heat Controller
VFH InverterFlex
®
- Ceiling Cassette
7
Notes:
1.
Do not over tighten or torque the connections.
2.
Lubricating the connection with oil is recommended.
Once the connections have been made, locate the (2) pieces of pipe insulation provided with your unit to
insulate the union between the line set and unit connections:
1.
Remove the adhesive backing and wrap the smaller diameter pipe insulation over the liquid connection.
2.
Next remove the adhesive backing from the larger diameter pipe insulation over the gas connection.
3.
Using the roll of tape provided with the unit, wrap each connection’s insulation.
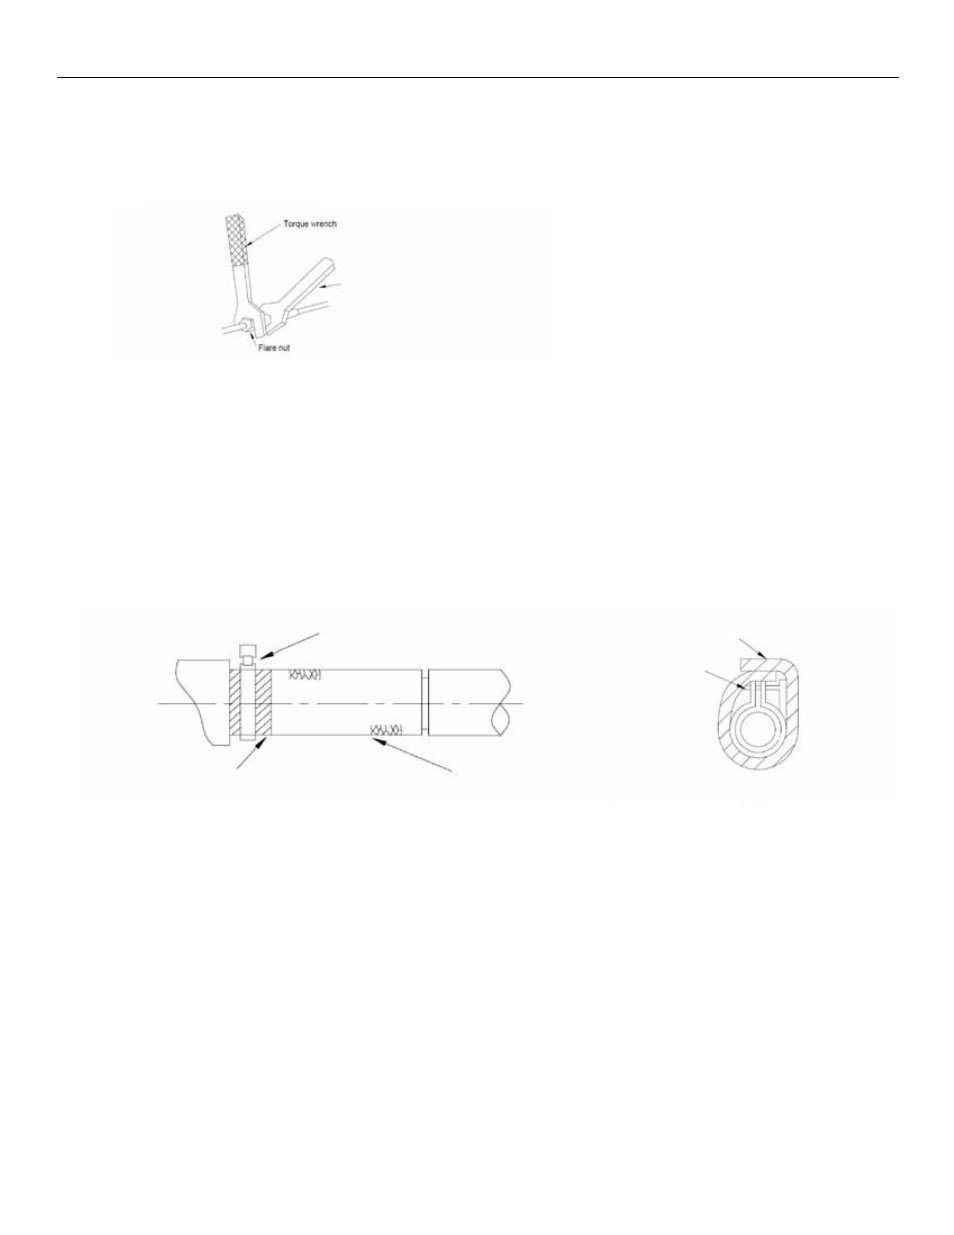
Condensate Drain Connection
To create a flexible connection between the rigid drain outlet of the unit and the rigid drain pipe, a flexible drain
hose adapter with hose clamp is provided (see figure below, left).
1.
Slide the clamped end of the drain adapter onto the drain outlet on the unit.
Note: Loosening the hose clamp may be required to slide over the drain outlet.
2.
Next tighten the hose clamp to ensure that no condensate will leak at the connection point.
3.
After the connection has been made, locate the piece of foam with an adhesive backing provided with
the unit.
4.
Remove the adhesive backing and wrap the sticky side around the hose clamp at the connection point.
(See figure above, right)
5.
Additional drain pipe or hose can be provided in the field, purchased locally to route condensate to a
suitable drainage location.
6.
The condensate hose connection is a flexible 25mm O.D. that can slide over a rigid connecting drain pipe
and/or be inserted into a rigid connecting drain pipe.
Notes:
•
Appropriate adhesives and/or hose clamps should be used to prevent condensate leakage.
•
The drain connection from the adapter to the drain pipe should be insulated.
•
Follow all local and national building codes related to plumbing and drainage.
Foam
Hose Clamp
Hose Clamp
Insulation
Flexible Drain Hose Adapter
(provided)
Wrench