Rugged Ridge 3-Inch Lift Kit without Shocks, 84-01 Jeep Cherokee (XJ) User Manual
Page 3
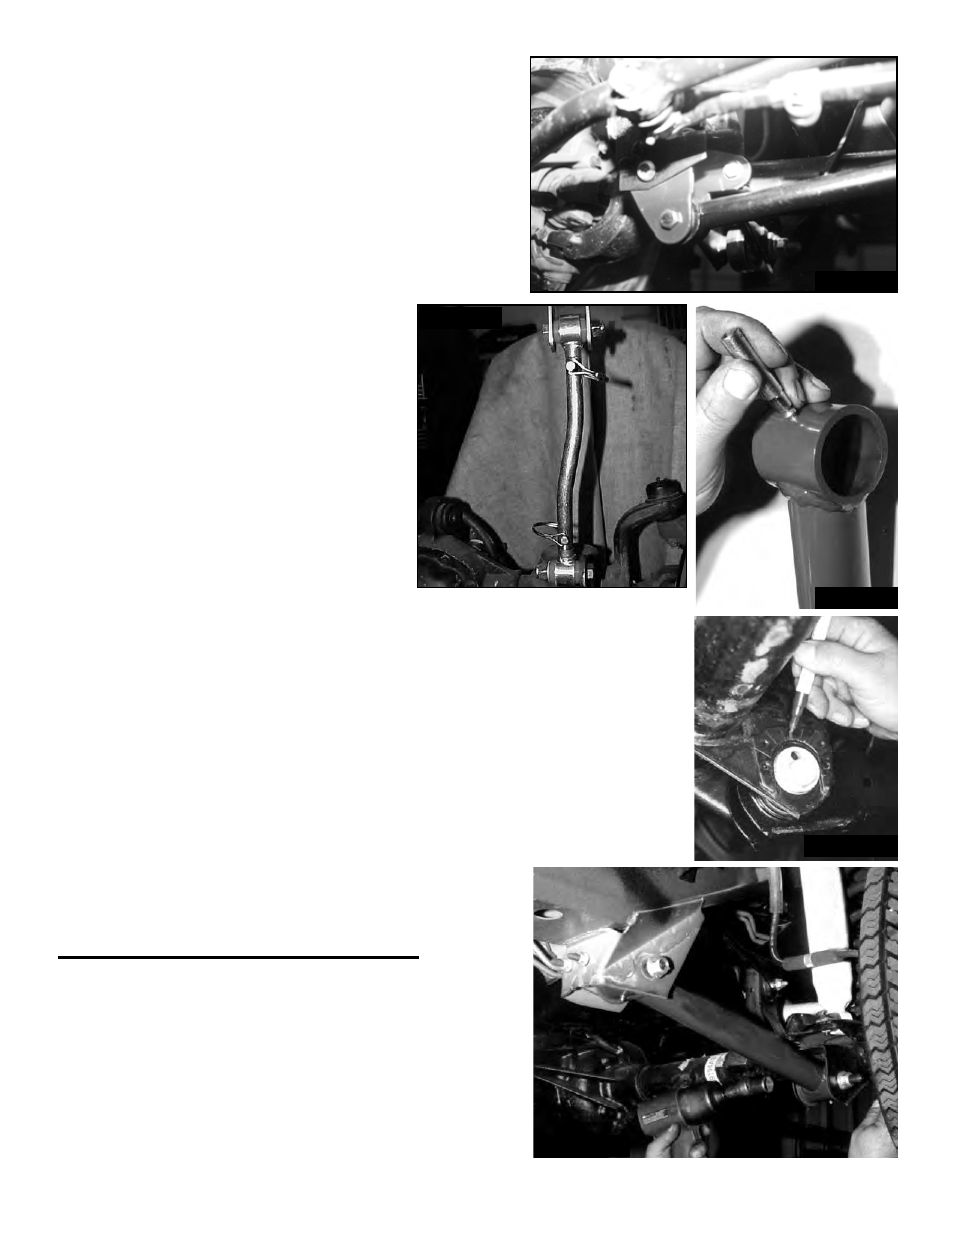
7. Locate the front track bar mount on the axle, insert
new bracket (see photo #7). Insert original bolt and
keeper nut through original hole. Drill a 3/8” hole and
install the 3/8 x 1” bolt with self lock nut. Tighten these
two bolts. Attach track bar using new 7/16 x 2-1/2” bolt
(it may be necessary to rotate steering wheel left or
right to align hole). Be sure all track bar bolts are tight.
NOTE: For best handling and steering, it is
recommended to install the replacement
adjustable track bar shown on page 6.
8. Reinstall sway bar end link bolts on
both sides and tighten (unless new
extended double quick-disconnect sway
bar links were purchased (see photo #8).
If so, follow their installation instructions at
this time.
9. Install drive-in zerk fittings in each
end of links by using a 1/4” socket over
the fitting, tap with a hammer until fitting
is completely tapped in. (see photo #9)
Install poly bushings and steel sleeves
(2.645” long) in each end of links. Be sure
to slightly grease them prior to the installation.
10. Remove and replace the lower links with new Rugged Ridge extended
links (one side at a time). On Grand Cherokee models, mark original
position of eccentric cams (see photo #10). Do not tighten bolts until both
sides are installed (see photo #11). On Grand Cherokee models, set the
eccentric cams back in original position.
NOTE: So that the links can be greased while on the vehicle, install them
with the zerk fittings positioned as follows: front eye of link has fitting
pointing out the end, rear eye of link should have the fitting pointing down.
11. Install tires and lower vehicle to ground.
CHEROKEE / COMANCHE - REAR:
12. Place a floor jack under rear axle and raise vehicle.
Place jack stands under the frame to support vehicle
and remove the rear tires and shock absorbers.
13. Remove the axle U-bolts and lower axle down a few
inches. Care should be taken because when U-bolts are
removed, axle can move freely.
Pg 3
Photo #7
Photo #8
Photo #9
Photo #10
Photo #11