Rugged Ridge 7-Inch Fender Flare Kit, 97-06 Jeep Wrangler User Manual
Page 2
1997-06 TJ
Fender Flare Installation
Page 2
Step 5.
If so desired, now
is a good time to
clean the fender
area which is
covered by the
fender flare.
Step 6.
Place the new fender flare on a flat surface with
the outside edge facing down. Transfer the turn
signal assembly to the new fender flare,
remembering to install the retainer nut to retain
the turn signal housing.
Step 7.
Take the new fender
flare and align it to the
fender using the
existing flare and fender
screw holes. Starting
at the front of the
vehicle, begin loosely
installing the screws
into the fender.
Step 8.
once the screws have all been installed, you
may adjust the flare position for proper fender
alignment. Once you are satisfied with the flare
location, begin tightening the screws in order
from the front to the rear of the vehicle. Tighten
the screw snugly, taking care to not over-tighten.
NOTE: Due to variances in fenders and
manufacturing processes, your new fender
flares may or may not have locator pins, this is
to allow for maximum adjustability for alignment.
Step 9. Repeat for opposite side front fender. Installation is now complete for the front flares.
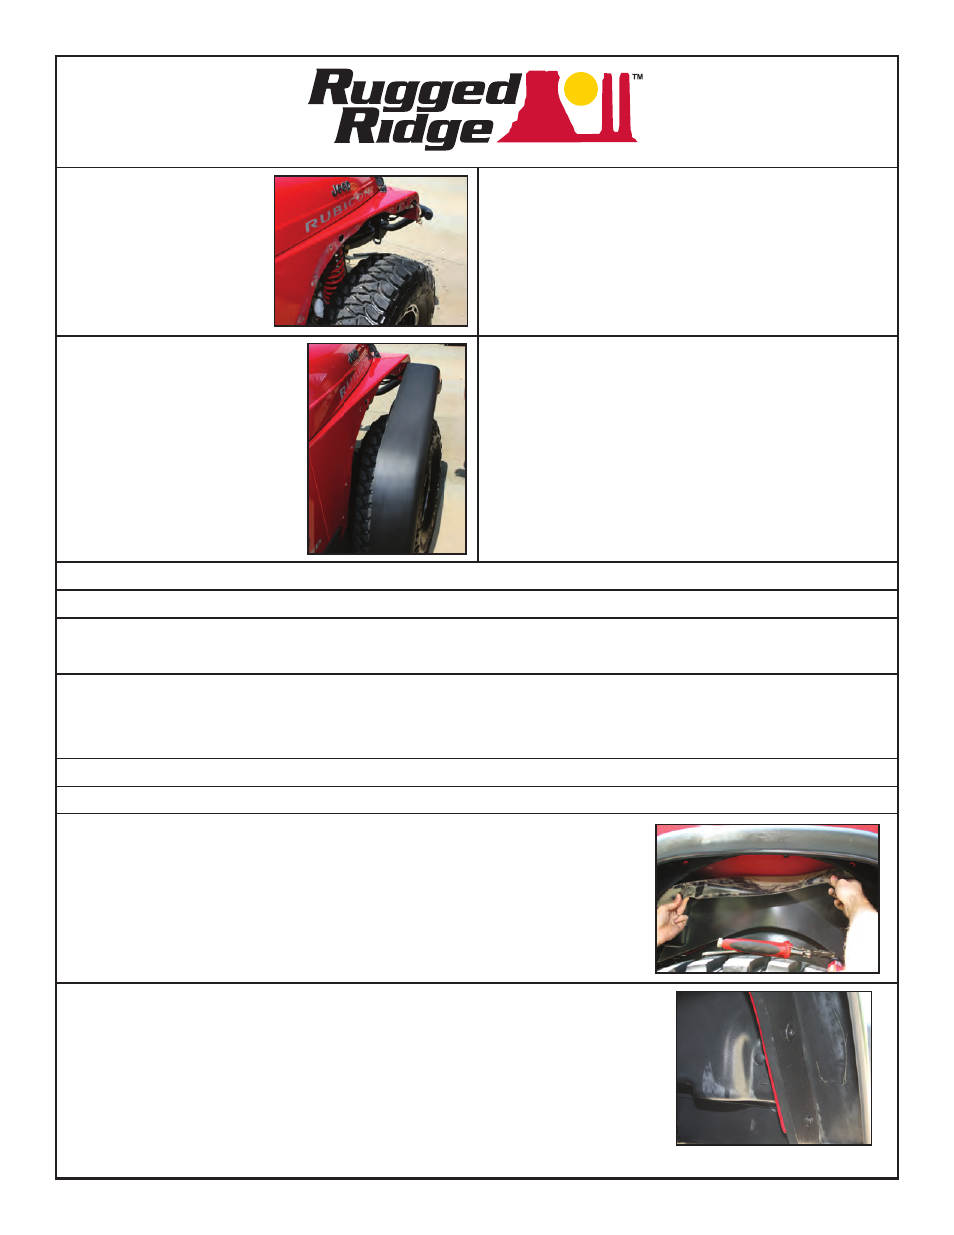
Rear Fender Flare Installation:
NOTE:
For ease of installation, we recommend removing the rear wheel well liner
for easy access to the fender flare hardware. The wheel well liner is held
in place by four (4) push-in black plastic fasteners located in the areas in
front and rear of the wheel well (facing downward). once these fasteners
have been removed using the appropriate tool, it is now possible to
remove the wheel well liner, starting at either the front or rear of the liner
and working the liner out from the wheel well area.
Step 1.
Remove the inner fender-to-flare hex-headed washer screws located along
the inner lip of the stock fender flare. Work from the front of the vehicle
towards the back. The numbers 1, 2, and 8 screws are retained by body
mounted riv-nuts and require no special tools for removal. The numbers
3, 4, 5, 6, and 7 screws are held by rectangular black plastic retainers. To
prevent the retainers from spinning in place, use a pair of pliers to grip the
retainer while simultaneously turning the screw. Place the screws on a flat
surface (in order), replace hardware as necessary.*
Front Fender Flare Extension Installation:
Step 1.
Remove the three (3) body-to-flare extension hex-headed washer screws located along inside of the
extension. Place the screws on a flat surface (in order), replace hardware as necessary.*
Step 2.
Take the new flare extension and align it to the body using the existing flare and body mount screw holes.
Starting at the front of the vehicle, begin loosely installing the screws into the body. Adjust the front-to-rear-
location until it is just touching the fender flair (some gap may occur across the width of the extension, this is
normal). Starting at the front of the vehicle tighten the screw snugly, taking care to not over-tighten.
Step 3.
Repeat for opposite side flare extension. Installation is now complete for the front fender flare extensions.