Rugged Ridge 7-Inch Fender Flare Kit, 97-06 Jeep Wrangler User Manual
Rugged Ridge For the car
1997-06 TJ
Fender Flare Installation
Page 1
*HARDWARE NOTE: This kit includes
complete brand new hardware (enough
for installation on a completely new
fender if necessary). We recommend
replacing your old hardware with
the supplied new hardware. When
removing the old hardware, arrange
the hardware in order of removal, from
front to rear of the vehicle. Compare
each old hardware item with the
new hardware items, replacing them
one at a time until all hardware has
been replaced. Depending on the
condition of your fasteners, you may
have unused new hardware, which is
acceptable. Discard the old hardware
and store the unused new hardware
for future use.
Front Fender Flare Installation:
Step 1.
Reach inside the front edge of the front fender flare and locate the
turn signal wiring harness. Follow the harness to the turn signal
assembly. Using a twising motion, remove the bulb assembly from
the turn signal housing.
Step 2.
Remove the inner fender-to-flare hex-headed washer
screws located along the inner lip of the stock fender
flare. The numbers 1 through 7 screws are held by
rectangular black plastic retainers. To prevent the
retainers from spinning in place, use a pair of pliers
to grip the retainer while simultaneously turning the
screw. The numbers 8, 9 and 10 screws are retained
by body mounted riv-nuts and require no special tools
for removal. Remove the screws from front to back of
the vehicle in order. Place the screws on a flat surface
(in order), replace hardware as necessary.*
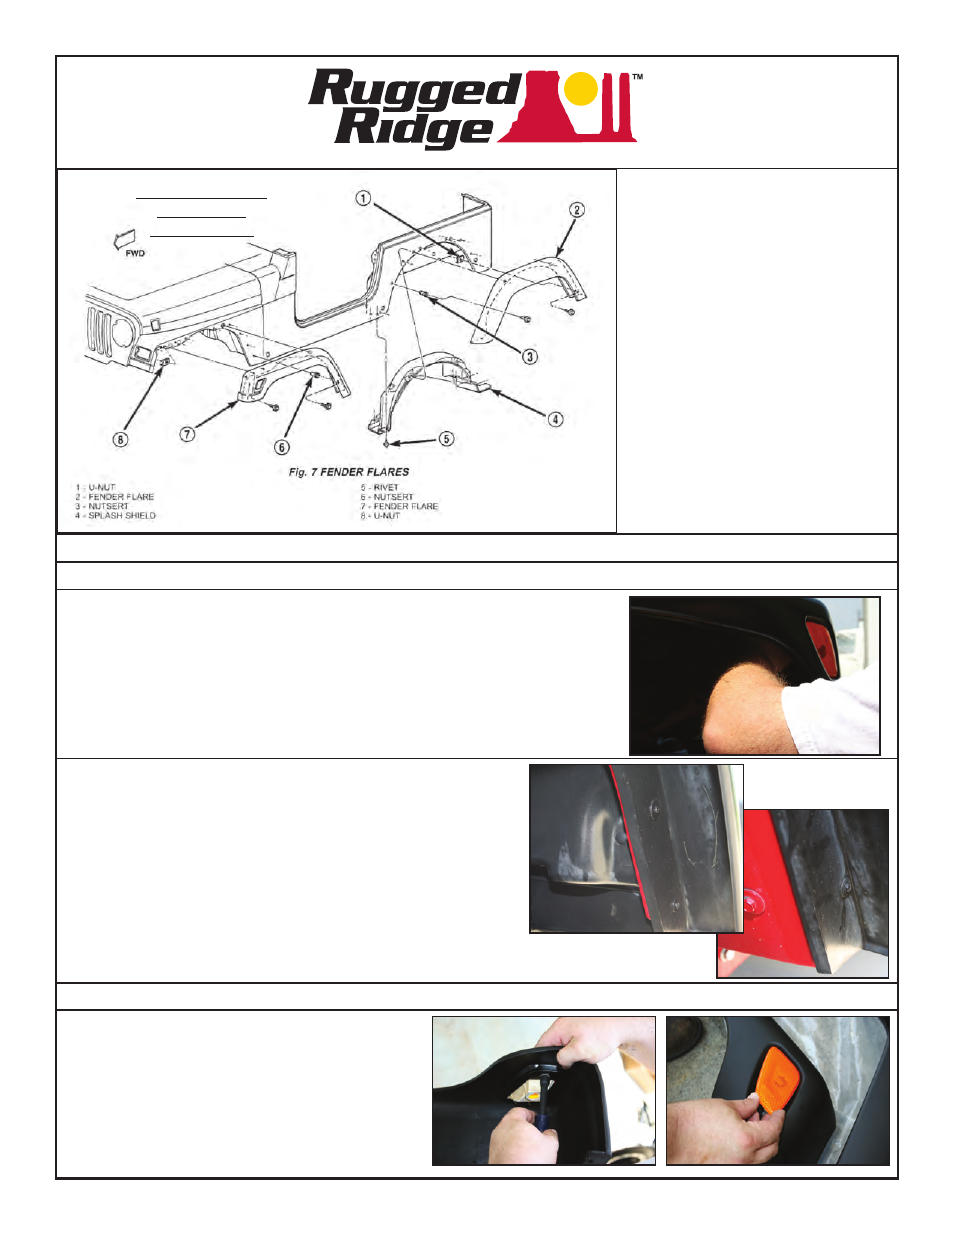
Assembly Diagram
Provided For
Reference Use
Step 3.
Supporting the flare with two hands, pull the flare directly away from the body.
ImPoRTAnT
! Replace only ONE fender flare at a time.
Step 4.
Place the stock fender flare on a flat
surface with the outside edge facing
down. Remove the stock turn signal
assembly by removing the single
retainer nut. The turn signal assembly
will then be easily removed from the
outside of the fender flare.