06 cj, yj, tj, lj hood lift – Rugged Ridge Hood Lift Kit, 72-06 Jeep CJ & Wrangler User Manual
Page 2
11252.50
72-06 CJ, YJ, TJ, LJ HOOD LIFT
Page 2 of 3
2.
Locate the cross brace on the rear underside of the hood. Place
lower rod on rear hood cross brace no less than 1 inch outbound of the
radiator brace rod as shown. Mark holes in the bracket for mounting. It is
not necessary to use all of the holes provided. Some holes may fall on
cutouts and be unusable. You should be able to use at least 6 holes for
each bracket including the holes on the top flange. Drill holes using a
5/64” bit being sure not to drill too deep. Secure with supplied sheet metal
screws. NOTICE: SHEET METAL SCREWS ARE EASILY STRIPPED. BE NOT TO
OVERTIGHTEN.
3.
Slide lower rod installed in step 2 into upper sleeve. Bolt upper
sleeve to L bracket mounted to hood in step 1. Use 1/4”-20 bolt with flat
washers and Nylock nut as shown.
4.
Bolt the lower ball stud mounting plate to the radiator brace rod
about 6” from the fire wall using the supplied U-bolt. Orient the plate
such that the unused hole is located above the rod. Insert a ball stud
into the unused hole and tighten using a Nylock nut and washer. The
ball should face outward as shown. Do this for both radiator brace rods.
CJ
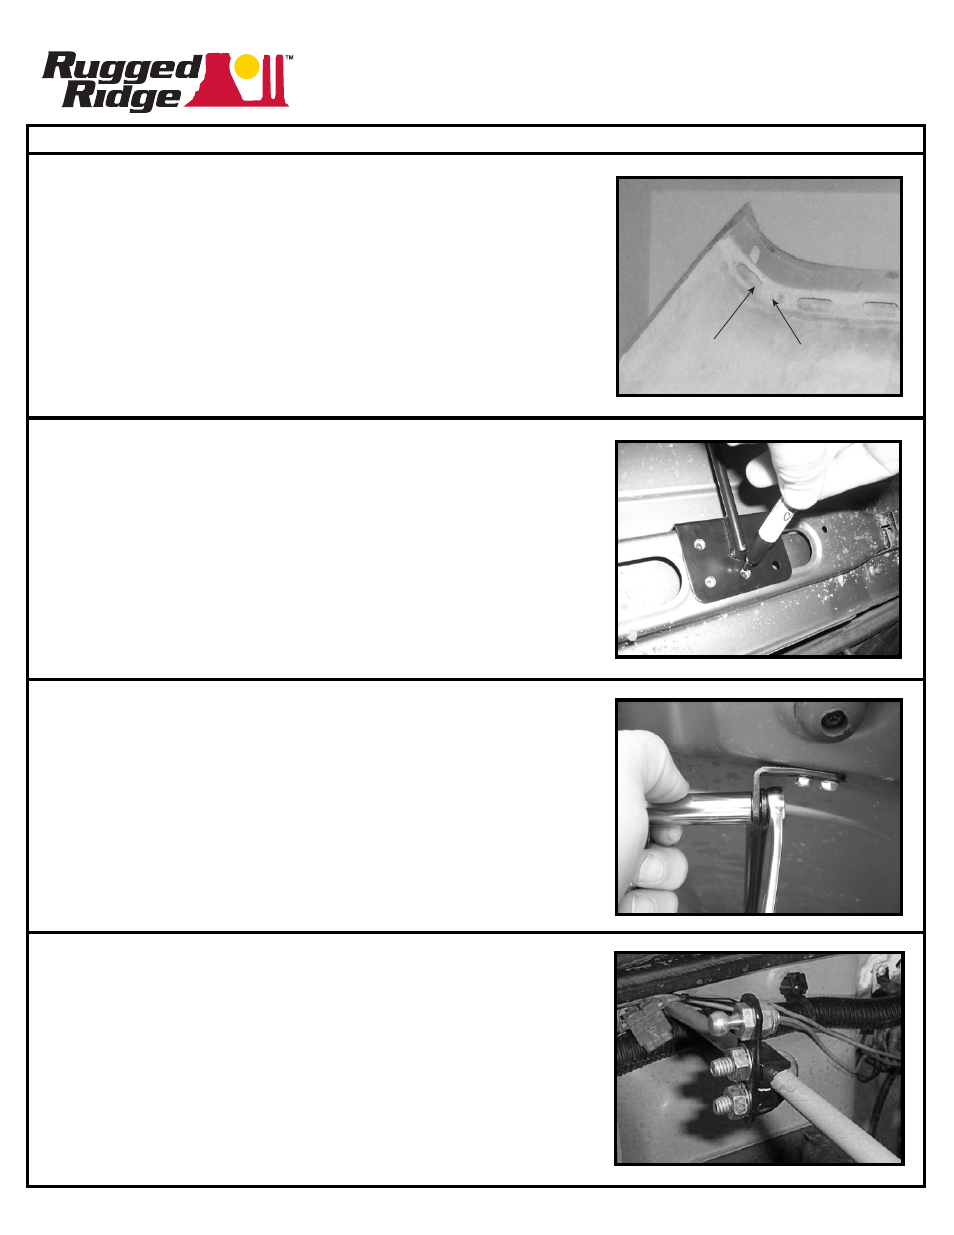
Remove factory prop rod on passenger side under hood. Use the outermost
hole to mount the L bracket. Mark and drill the second mounting hole to
5/64” using the L bracket as a guide. This hole should be to the left of the first
hole. Insert a nut and washer in the obround cutout to retain the bolt.
Measure the location of the installed L bracket and use the dimensions to
mark and drill for the driver side L bracket. Do not overtighten sheet metal
screws.
USE OUTERMOST
MOUNTING HOLE
INSERT NUT
AND WASHER THROUGH
THIS CUTOUT