Step.6, Step.7 – Rugged Ridge Hood Guard, Body Armor, 97-06 Jeep Wrangler User Manual
Page 2
After installation, inspect to make sure all tape areas are adhered securely to the v ehicle before driving.
NOTE: it is important that the Hood Armor be positioned as far back onto the hood as possible.
There should be NO GAP between the front of the hood and the inside of the Hood Armor
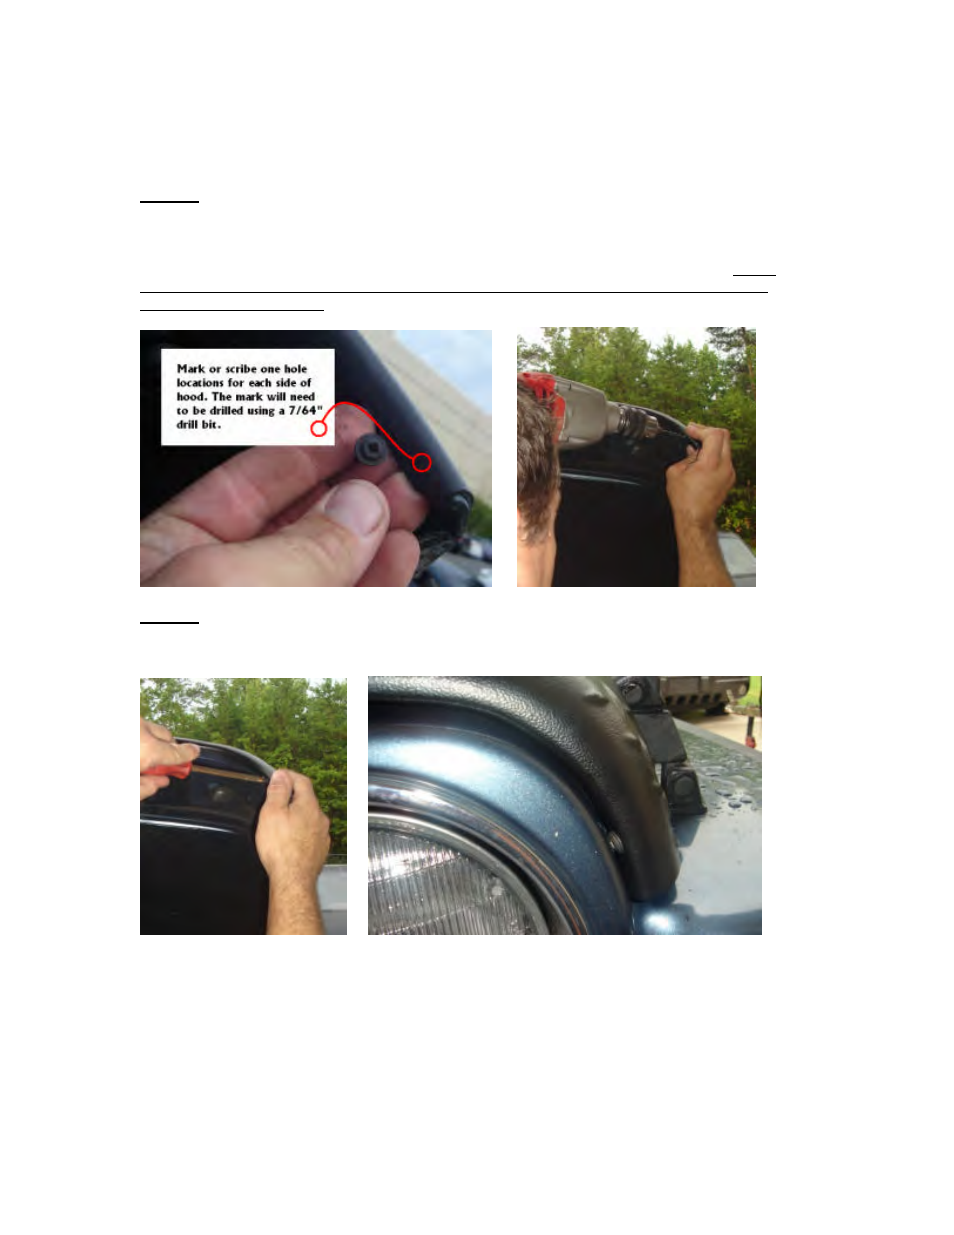
Step.6
With Hood Armor in the correct position and firmly attached to the vehicle mark or scribe two hole
locations on each side of the inner hood. These marks are to be drilled using a 7/64” drill bit. Make sure
mark locations are positioned as far inward as possible. This will allow the screws to be lo cated flush with
the hood and grille line when lowered. With marks in place carefully drill the two 7/64” holes. TAKE
CARE NOT TO DRILL TO FAR PAST THE INNER LIP OR DAMAGE TO OUTER HOOD
SURFACE MAY RESULT.
Step.7
After holes have been drilled using the 7/64” bit insert screws to secure Hood Armor to vehicle using a
Phillips head screw driver.
When properly installed the retaining screws should just be visible inside of the vehicle hood line and not
interfere with the closing or locking of the hood.
OMIX – ADA or Rugged Ridge is not responsible for damage to vehicle or injuries acquired during
the installation or use of this accessory.
Pg.2