Brocks Performance ShortMeg Full System 14" Muffler CBR-1000RR (12-14) User Manual
Page 5
Document ID 996512
Page 5 of 6
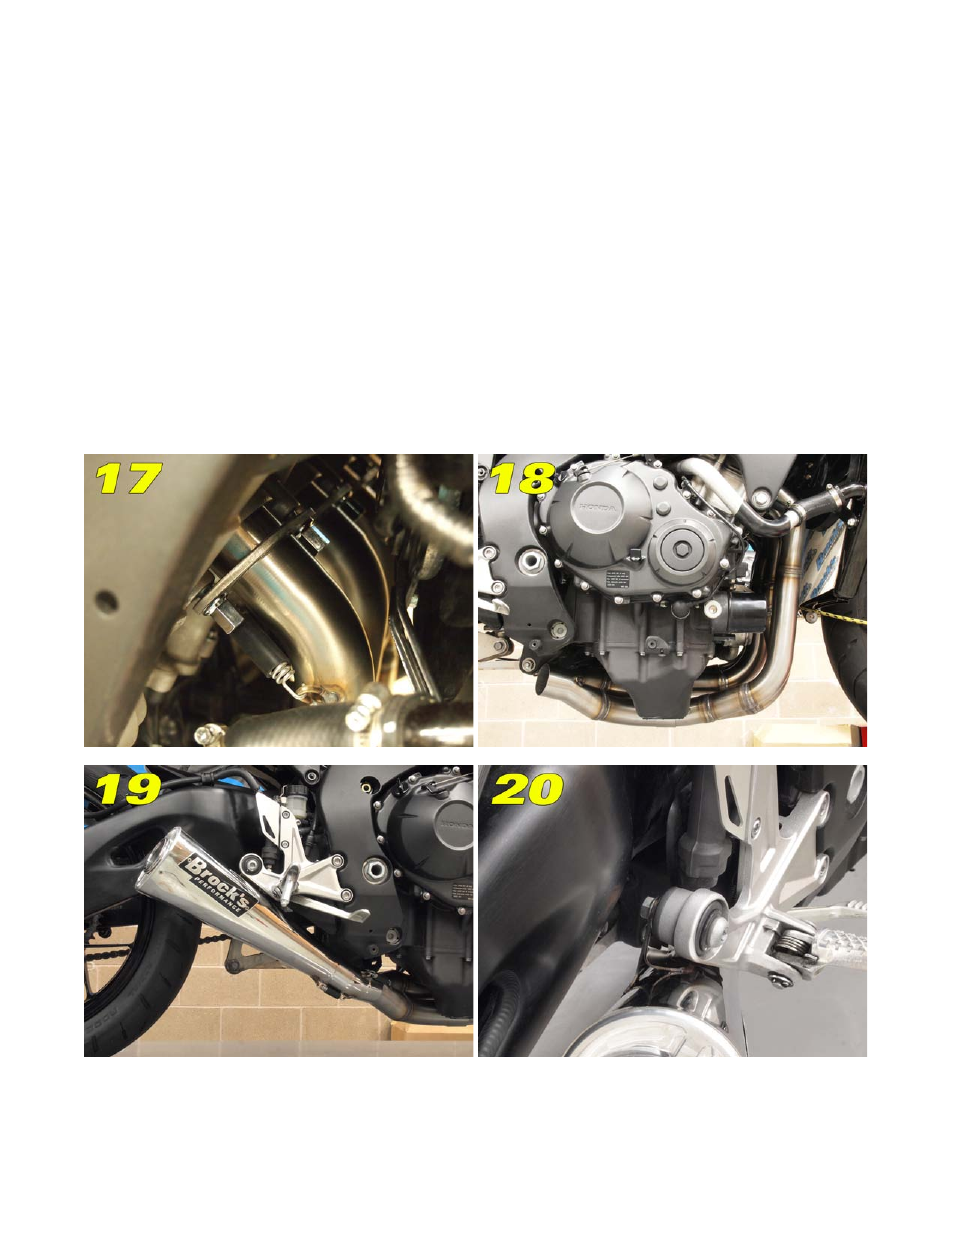
Step 7: Install Primaries (see figure 17):
Install the left side primary (cylinders 1 & 2) onto the
flanges, making sure not to hit the radiator. Attach one (1) spring to the tabs on each of the primaries. Repeat
for the right side primary (cylinders 3 & 4.) Tighten the flanges to 10-15 ft-lb. to promote a proper seal. Make
sure the radiator hose, as well as other hoses have clearance from the head pipes.
Step 8: Install Collector (see figure 18):
Install the collector onto the primaries, aligning the spring
tabs. Install the two (2) springs. Once the springs are on, move the collector a bit from side to side and up and
down to fully seat the collector and primaries.
Step 9: Install Elbow and Muffler (see figures 19 & 20):
Slip the large diameter end of the
elbow onto the collector. Adjust as necessary to ensure that the spring tabs align and install both springs. Install
the muffler onto the elbow. Adjust as necessary to ensure that the mounting bracket lines up with the OEM
mounting location. Insert the OEM muffler-mounting bolt through the OEM location and through the bracket on
the muffler. Place the OEM washer then nut on the bolt and tighten enough to hold the system in place. Do not
fully tighten until final adjustments have been made. Install the springs on the spring tabs and adjust the
assembly by hand as required to ensure proper clearance between the belly pan and muffler.