Assembly instructions continued – Martin Universal Design U-7100 Avanti Designer Table User Manual
Page 3
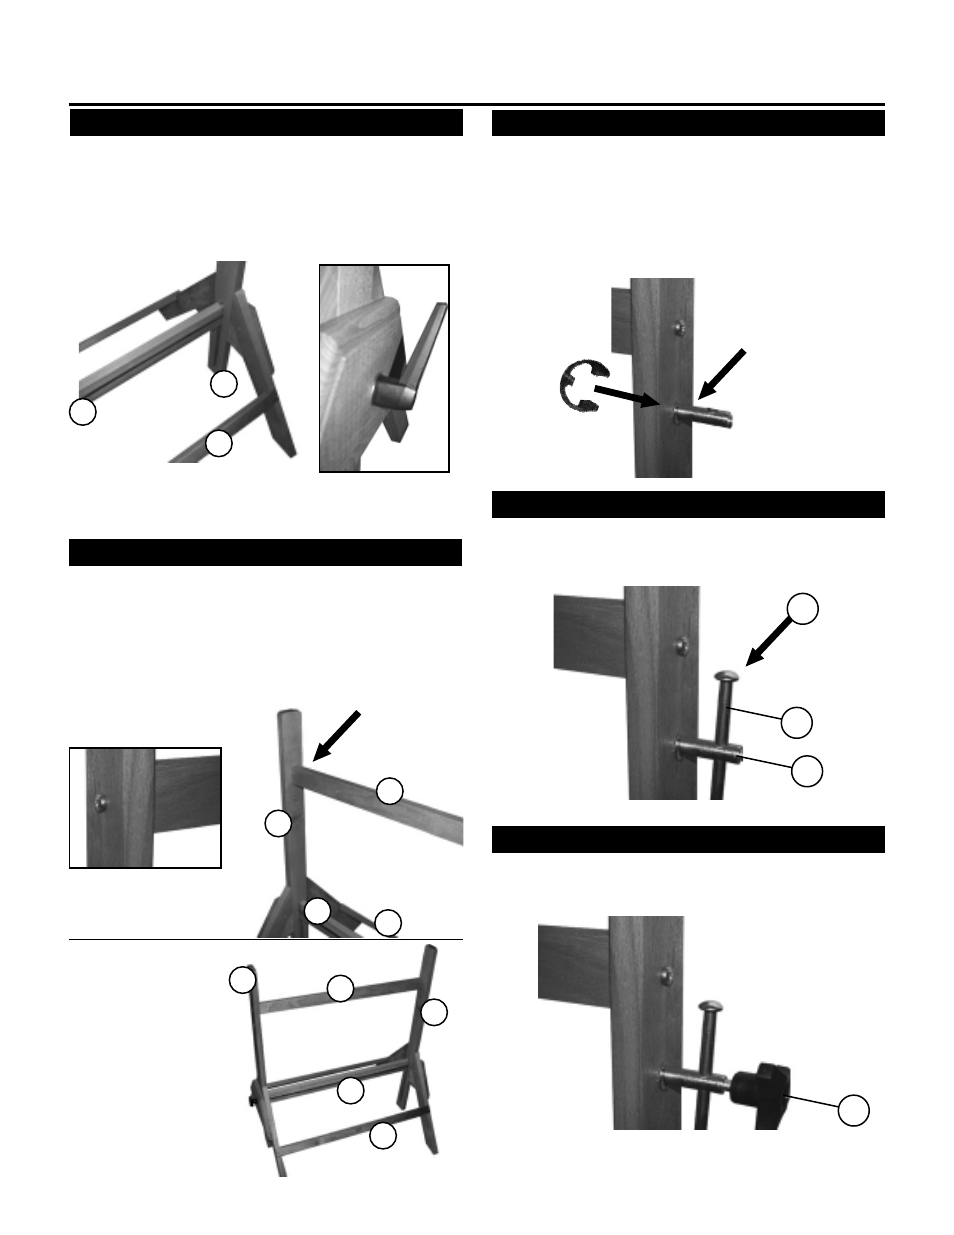
STEP 5] Securing Lower Support & Rod
Repeat with other A-Base assembly on other side.
First by sliding Channelled Side Support [D] down into A-Base
assembly, then continue by inserting Lower Support & Rod
[F] into Channel in Side Support [D] making sure threaded
rod goes all the way through A-Base assembly, this time
securing with large washer [BB] and Lever [AA]. See photos
below.
Assembly Instructions continued:
C
F
D
Close-up photo of
Lever and large
Washer.
STEP 6] Attaching Upper Cross Support
Take Upper Cross Support [E] and insert one end into small
slot in upper portion of the Channelled Side Support [D].
Secure with 1-3/4” Bolt [HH]. Tighten with Phillips Screwdriver.
Insert other end into other side of Channelled Side Support
[D]. Secure with other 1-3/4” Bolt [HH]. PLEASE NOTE: You
may have to loosen Lever to allow Side Support to pull away
enough to allow end of Upper Cross Support [E] to be in-
serted into slot. Retighten Lever once completing Step 6.
D
F
C
E
E
D
D
F
C
After Steps 1 - 6.
Base should look like
photo to right.
STEP 7] Inserting Pin into Side Support
Take the [2] Large Pins with Hole [EE] and insert each one
into the hole which is below cross support bolt. Insert pin
through inside of base and through other side as shown be-
low. Secure pin [EE] with “C” Washer by sliding “C” washer
over and onto Pin slot which is located right where Pin and
Side Support meet. PLEASE NOTE: This is difficult to
accomplish. You must use a flat screwdriver to push “C” washer
into slot.
Close-up photo of
1-3/4” Bolt attachment.
STEP 8] Attaching Tilt Adjustment Rods
Take [1] of the Metal Tilt Adjustment Rods [JJ] and insert it
into the hole in the Pin [EE]. Secure with Metal Pin End Cap
[KK]. Repeat with other side.
KK
JJ
STEP 9] Securing Tilt Adjustment Rods
Take [1] Male Knob [DD] and attach to Pin end. Screw in to
tighten. Repeat with other Adjustment Rod.
EE
DD