U-uds5000wd drawing table assembly instructions, Step 3] tilt bracket assembly, Step 4] assembling top to base – Martin Universal Design U-UDS5000WD Drawing Table User Manual
Page 3
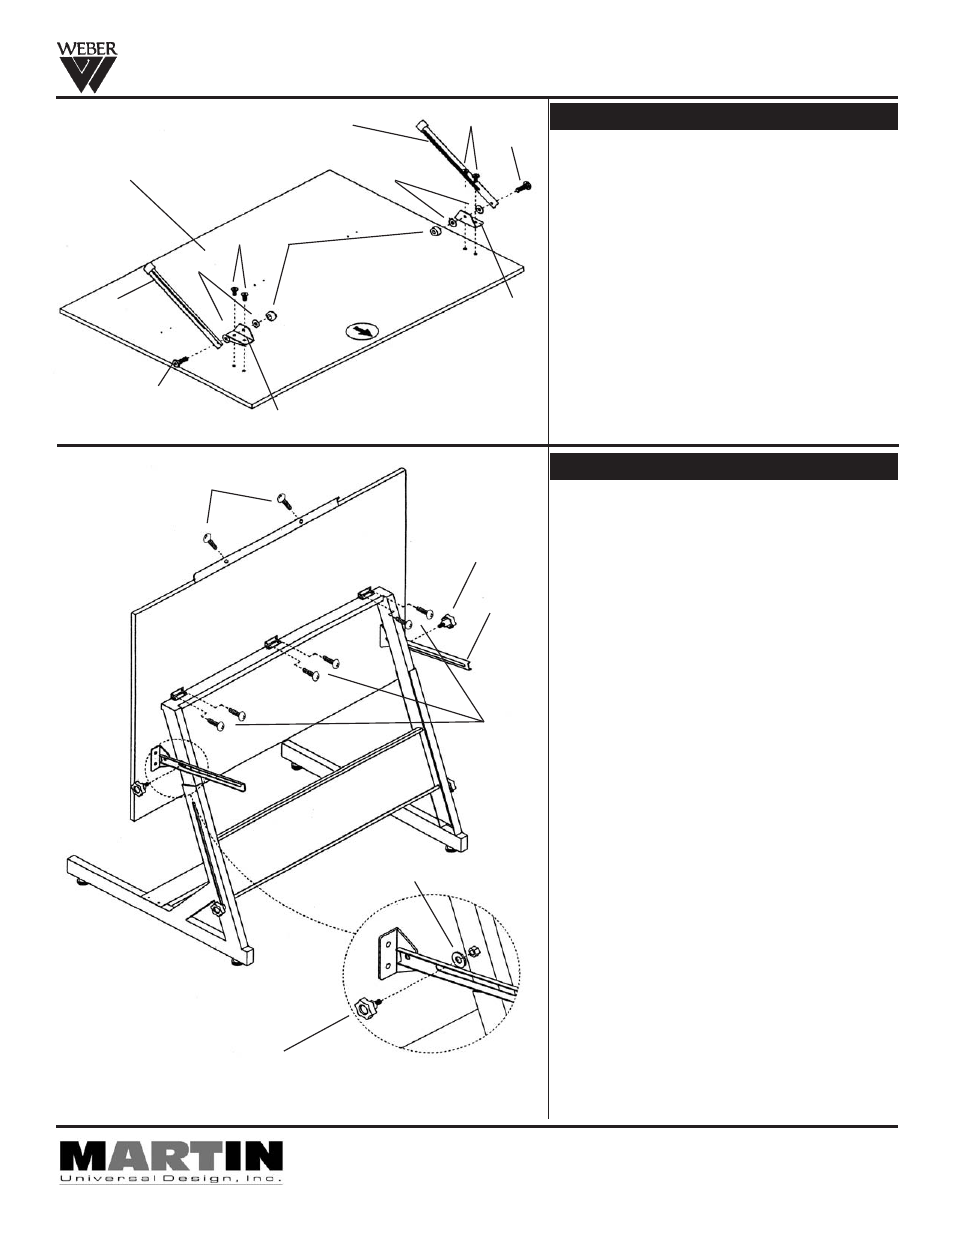
FIG 3
FIG 4
E
1
A
H
Pg. 3
G
3
5
Aug. 08 Revised- RPI
STEP 3] Tilt Bracket Assembly
Lay table top onto flat carpeted or cardboard sur-
face with holes facing up (to protect from scratching
table top). Attach the Tilt Bracket End (part E) to the
table top in the position as shown in FIG 3 using [2]
each M6 x 8mm Allen Screws (part 3) per bracket.
Line up holes in bracket end with T-nuts in table
top. Secure with Allen-Wrench. See FIG 3.
Continue by adding Tilt Bracket (part F) to tilt
bracket end (part E) securing with [1] M6 x 12mm
Allen-Screw (part 4), [2] washers (part 6) and [1]
Nut (part 2). Tighten with Allen-Wrench to secure.
See FIG 3.
4444 Lawton Avenue, Detroit, MI 48208 USA • Tel:(313)895-0700/Fax:(313)895-0709
Email: [email protected] • visit us at www.MartinUniversalDesign.com
Pg. 3
4
4
6
6
F
2
E
3
IMPORTANT:
THIS NEXT STEP NEEDS TWO PEOPLE TO
ATTACH TOP TO BASE.
Attach Top to base by having one person hold the
top while the other person attaches the hinges
that are on the table base to the top using [2] M4
x 12mm screws (part 1) in each hinge. Tighten
with Phillips screw-driver to secure.
Attach pencil ledge to the front edge of table top
using [2] each M4 x 12mm Screws (part 1). Secure
with Phillips screw-driver.
Attach Tilt brackets to table base using [1] Knob
(part 5) and [1] washer (part 7). Tighten knob to
secure. Repeat with other side.
See Fig 4B.
STEP 4] Assembling Top to Base
5
1
F
7
FIG 4B
U-UDS5000WD Drawing Table Assembly Instructions
IMPORTANT: ASSEMBLY IS EASIER AND SAFER WITH TWO PEOPLE