Ariel table assembly instructions, Un n f d, Ft o – Martin Universal Design U-HL6080W ARIEL TABLE User Manual
Page 4
Martin Universal Design, Inc. • Detroit, MI 48208 USA
Tel: 1-313-895-0700 • E-mail: [email protected] • www.MartinUniversalDesign.com
4
2/28/11- RPI
Ariel Table Assembly Instructions:
FIG 5
FIG 4
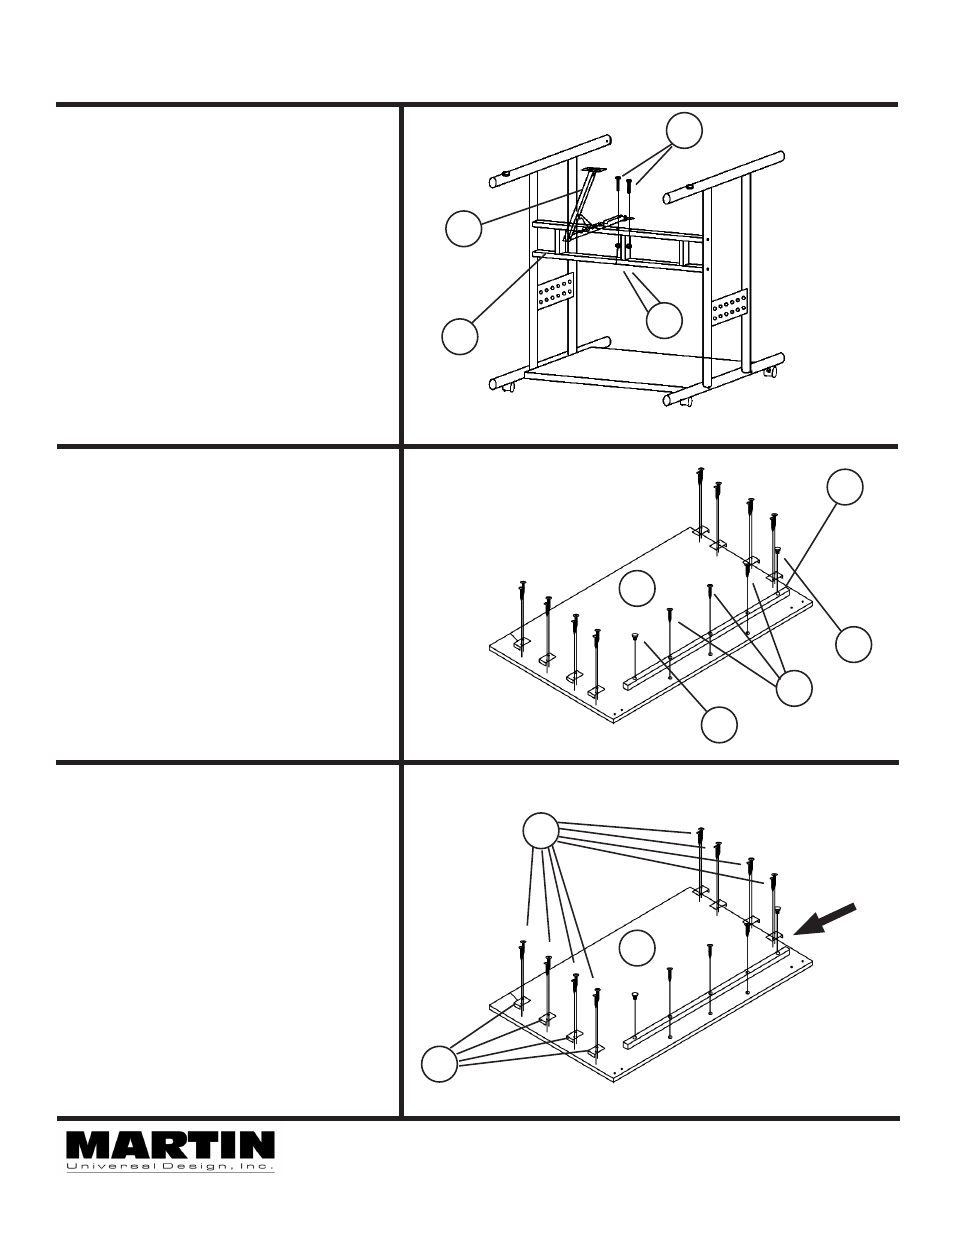
Step 4. Attach Table Top Tilt Mechanism
R
H
Attach Tilt Mechanism (part H) to Cross
member (part C) in position as seen in
FIG 4.
Secure by using 2 ea. Hex Bolts
(part R) and 2 ea. Nylon Nuts (part S).
Tighten to secure with supplied wrench
(part W)
See FIG 4
C
S
FRONT
END OF
TABLE
REAR
END OF TABLE
Step 5. Attach Ruler Support Bar
Begin by laying Table Top (part F) face
down on protected hard floor (like a
carpeted floor).
Attach Ruler Support Bar (part D) to
bottom of table top by lining up
Support Bar to the pre-drilled holes
in the table top. Secure using 3 wood
screws (part U). Insert 2 each plastic
caps into the holes on either end of the
ruler support bar.
See FIG 5.
U
N
N
F
D
Line up all 8 Metal Side Tray Clips (part
O) to each hole in the top and secure
each one to the table top using 2 ea.
wood screws (part T) per metal support.
PLEASE NOTE: The lip on the Metal
Side Tray Supports should wrap around
the side edge of the table top.
See FIG 5B.
F
T
O
FIG 5B
Step 5B. Attach Side Tray Metal Clips
Lip of Metal
Tray Clips
positioned
around
edge of top