頁面 12, Receiver lock & unlock, Squelch setting sq – MIPRO ACT-717 Single-Channel True Diversity Receiver User Manual
Page 12
ACT-717 / ACT-717B Receiver
1. Receiver Lock: Press and hold the Rotary Controller until the “ ” icon appears.
Release the Rotary Controller immediately when the “ ” icon appears. When
locked, the receiver parameters can no longer be changed. However, you can still
navigate the Rotary Control Knob to view existing settings and parameters.
2. Unlock Receiver: Press and hold the Rotary Controller until the “ ” icon
disappears. Release the Rotary Controller immediately when the “ ” icon
disappears.
ACT-727 / ACT-727B & ACT-747 / ACT-747B Receivers
1. To Lock or Unlock All Receiver Channels:
Same instructions as ACT-717/ACT-717B receiver. (See “1” above)
2. To Lock 1 Receiver Channel only: For example, locking Channel 1. Press & hold
Rotary Controller until all “ ” icons start flashing. Press & hold the button
on Channel 1 when the “ ” icon appears , then release the “ Rotary Controller ”
and button of Channel 1 simultaneously when the rest of the “ ” icons in the
other channels disappear. Press & release the button again while the
cursor is flashing to confirm and save.
3. To Unlock 1 Receiver Channel only:
For example, unlocking Channel 1. Press & hold Rotary Controller until all “ ”
icons start flashing. Press & hold the button on Channel 1 until the “ ” icon
disappears, then release the “Rotary Controller” and button of Channel 1
simultaneously when the rest of the “ ” icons in the other channels appear. Press
& release the button again while the cursor is flashing to confirm
and save.
4. To Lock or Unlock 2~3 Channels (ACT-747 / ACT-747B):
Follow the same procedure as above, using the button on each channel to set
the lock status as desired. (Note: This is easier if you keep an eye on the unset
channels' icons as they flash on and off.)
SET
SELECT
SQ Cursor
SET
SELECT
Lock cursor
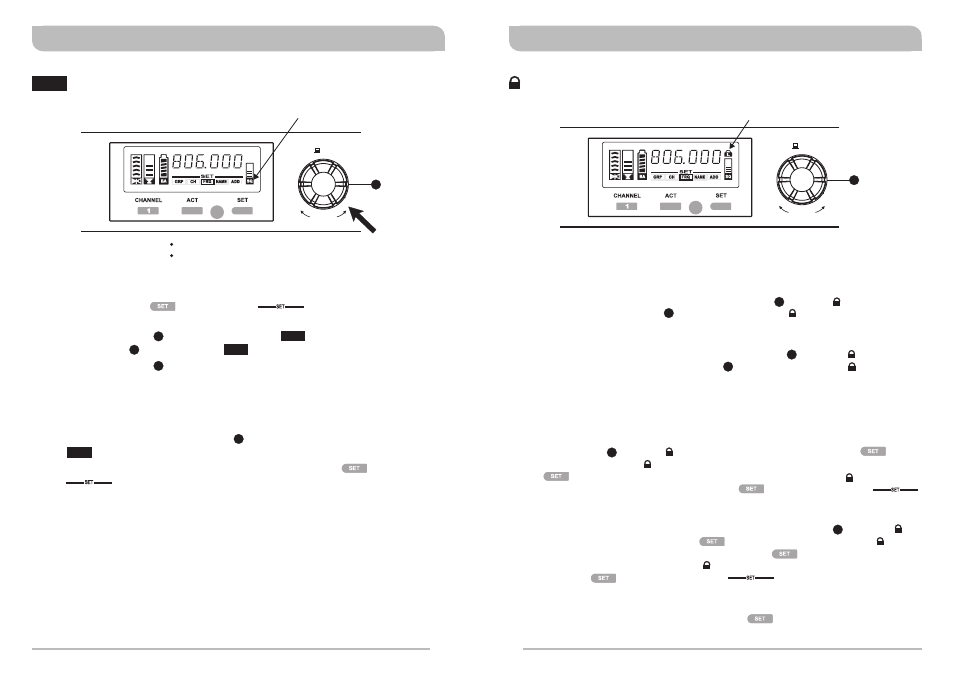
Receiver Lock & Unlock
L
Turn knob clockwise to increase one segment at a time
Turn knob counterclockwise to decrease one segment at a time
Instructions:
L
L
L
L
L
L
4
4
Instructions:
Press and hold knob to lock and unlock the display panel
4
4
4
4
L
L
L
L
4
4
SQUELCH setting
SQ
1. Press and release the button once. The cursor starts flashing to
denote it is ready to accept parameter changes.
2. Turn Rotary Controller left or right and stop at . Press and release the
Rotary Controller once and current setting starts flashing.
3. Turn Rotary Controller left to decrease sensitivity level by 1 indicator or turn right
to increase sensitivity level by 1 indicator.
4. The higher the level indicators, the lower the sensitivity which shortens the
transmission ranges. The lower the level indicators, the higher the sensitivity which
increases the transmission ranges.
5. Press and release the Rotary Controller once to confirm the change.
The number stops flashing.
6. To confirm and save the new parameter, press and release the button once.
The cursor stops flashing and the new SQ level is now stored into memory.
4
4
4
4
SQ
SQ
SQ
True Diversity Receivers
True Diversity Receivers
18
19