Removing the front panel – Sony PCV-E314DS User Manual
Page 34
VAIO Digital Studio Reference Manual
26
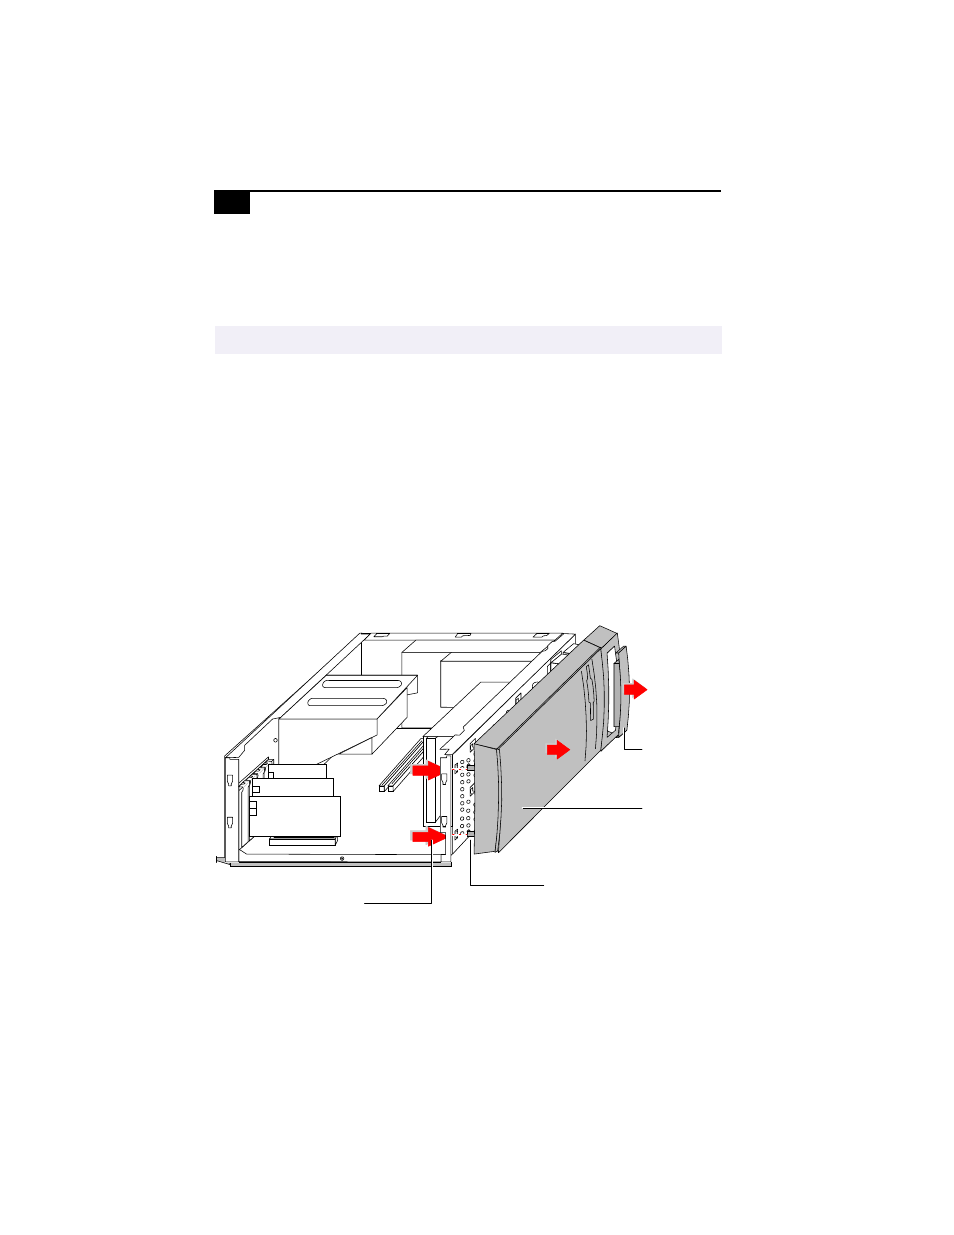
Removing the Front Panel
You must remove the front panel to install system memory, which
requires pulling the diskette drive out about two inches.
1
Insert a straightened paper clip into the emergency eject hole to open
the tray.
2
Pull the tray out to its normal opened position.
3
Lift up on the front tray cover to remove it.
4
Push the tray back in.
5
Remove the bottom panel (see
page 25) to access the two plastic tabs on the bottom of the front
panel.
6
Push down and out on the two plastic tabs from inside the bottom of
the chassis to release the bottom end of the front panel.
7
Pull out the top end of the front panel to remove it.
✍
Follow steps 1 to 3 in the sequence shown to prevent damage to the front tray cover.
KY0055.VSD
Tab
Front panel
Front tray cover
Push tabs out from
inside chassis
- USER GUIDE V G N - C S 2 0 0 (184 pages)
- PCG-V505DX (40 pages)
- PCG-V505DH (152 pages)
- VGN-TX00 (177 pages)
- NAS-SV20DI (2 pages)
- VAIO VGN-SZ600 (216 pages)
- VPCYB (28 pages)
- VAIO VGN-CR (197 pages)
- VGN-FE500 (20 pages)
- VGN-FS800 (175 pages)
- VAIO VPCZ12 SERIES (209 pages)
- VAIO VPCCW1 Series (168 pages)
- VGC-LT20E (197 pages)
- VGN-AR300 (20 pages)
- PCV-RX465DS (134 pages)
- PCV-RX480DS (101 pages)
- PCV-RX450 (32 pages)
- PCV-RS710G (44 pages)
- PCV-RX670 (88 pages)
- VGN-FS Series (150 pages)
- PCV-R553DS (62 pages)
- PCV-R558DS (118 pages)
- VGN-TZ100 (226 pages)
- PCV-RS511P (1 page)
- PCV-RS511P (143 pages)
- PCV-RS530G (44 pages)
- VAIO VGN-P500 (165 pages)
- VGC-RC320P (177 pages)
- VAIO VPCF2 (174 pages)
- PCV-L600 (48 pages)
- PCV-L600 (106 pages)
- PCV-RX260DS (114 pages)
- CRX1600L (40 pages)
- VAIO VPCS13 (192 pages)
- PCG-V505DC2 (44 pages)
- PCG-V505DC2 (152 pages)
- VGC-JS270J (136 pages)
- VAIO PCV-RX490TV (142 pages)
- PCV-RX490TV (12 pages)
- PCV-RS724GX (2 pages)
- PCV-MXS10 (56 pages)
- PCV-MXS10 (1 page)
- MX (112 pages)
- PCV-MXS10 (32 pages)
- PCV-MXS10 (105 pages)