Step 3: secure bracket a to the wall – Sony SU-W200 User Manual
Page 5
5
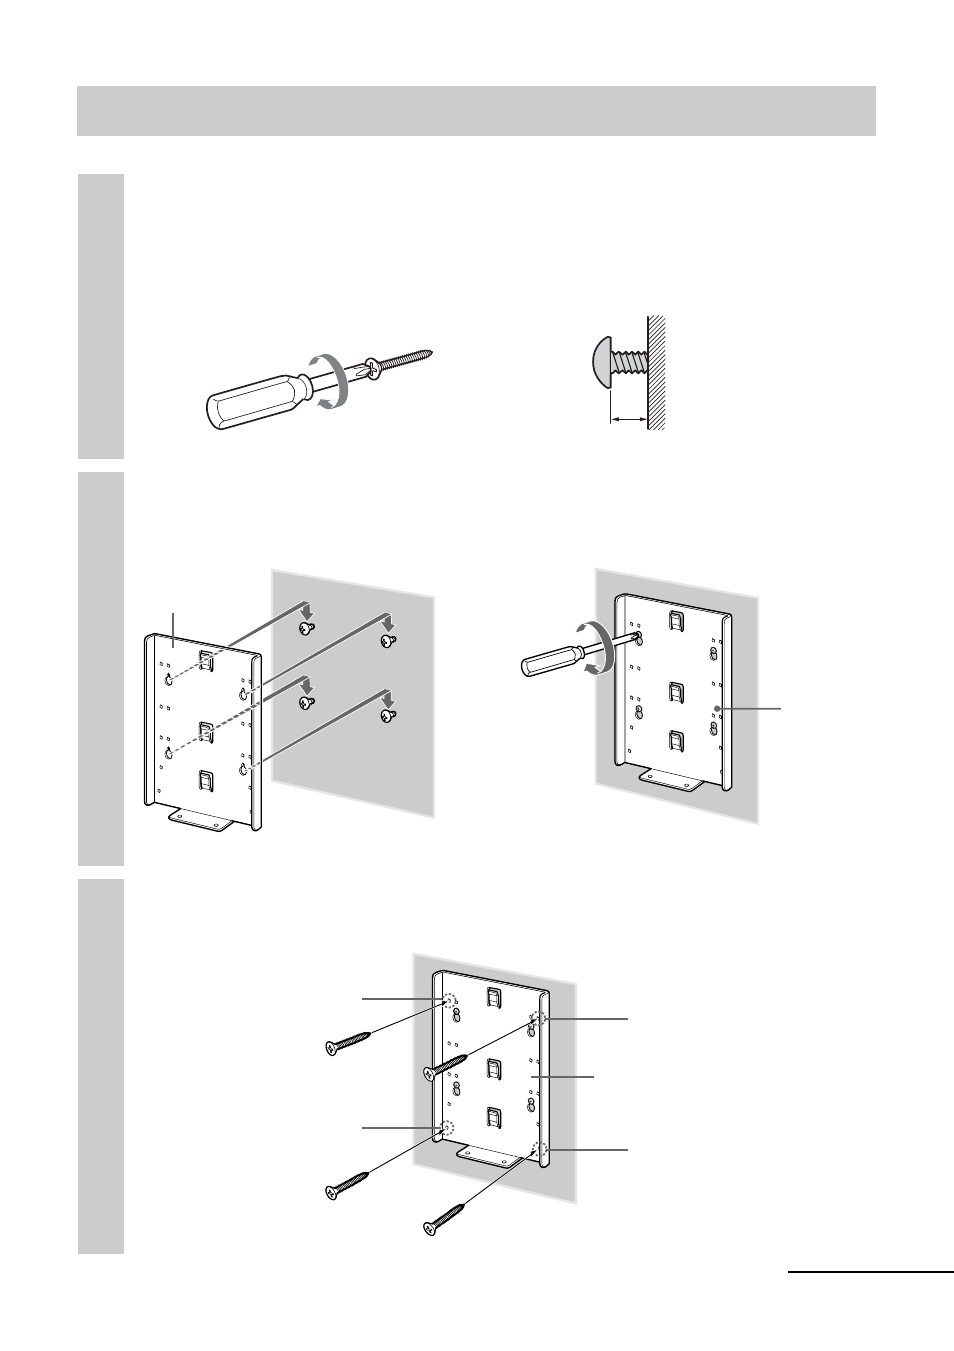
Step 3: Secure bracket A to the wall
1
Insert four of the screws you prepared at the positions
marked in Step 2 (page 4).
Do not tighten the screws completely for the moment. Keep a space of 2
to 3 mm (
3
/
32
to
1
/
8
inches) from the wall.
2
Press bracket A to the wall and slide it down. Then fully
tighten the four screws on the wall.
3
Fully tighten four of the screws you prepared in screw
holes 1 to 4 firmly.
Screws you
prepared
Wall
2 - 3 mm (
3
/
32
-
1
/
8
inches)
,
Wall
Bracket A
Screws you
prepared
Bracket A
Wall
Bracket A
3
2
4
1
continued
See also other documents in the category Sony Audio:
- AWS-G500E (12 pages)
- XDCAM (28 pages)
- OXF-R3 (396 pages)
- MDM-X4 (194 pages)
- DMX-P01 (49 pages)
- SRP-X500P (43 pages)
- SRP-X500P (37 pages)
- RS-232C (62 pages)
- XBA-H1 (2 pages)
- CPF-NW001 (100 pages)
- MDS-JE500 (37 pages)
- MDR-SA1000 (2 pages)
- MDR-SA1000 (2 pages)
- MDR-EX15AP (2 pages)
- ICD-TX50 (2 pages)
- MDR-KX70LW (2 pages)
- HAR-D1000 (52 pages)
- HAR-D1000 (108 pages)
- HAR-D1000 (20 pages)
- SA-NS300 (2 pages)
- SA-NS300 (40 pages)
- SA-NS400 (2 pages)
- NAS-SV20i (11 pages)
- SRS-A201 (2 pages)
- ICD-SX1000 (2 pages)
- ICD-SX1000 (2 pages)
- NWZ-B173 (2 pages)
- ICF-C763 (2 pages)
- ICF-C763 (2 pages)
- SRS-M30 (2 pages)
- TDM-NC1 (467 pages)
- TDM-NC1 (483 pages)
- TDM-NC1 (2 pages)
- ICF-CD855L (2 pages)
- CFD-E10 (2 pages)
- ICD-B600 (2 pages)
- MHC-ZX10 (60 pages)
- NWZ-Z1040 (2 pages)
- NWZ-Z1040 (2 pages)
- DR-EX12iP (2 pages)
- HAP-S1 (213 pages)
- HAP-Z1ES (59 pages)
- MDR-XB400 (1 page)
- XBA-4 (2 pages)
- RDP-X200IPN (2 pages)