3 turning the camera on/setting the clock – Sony DSC-T300 User Manual
Page 13
13
GB
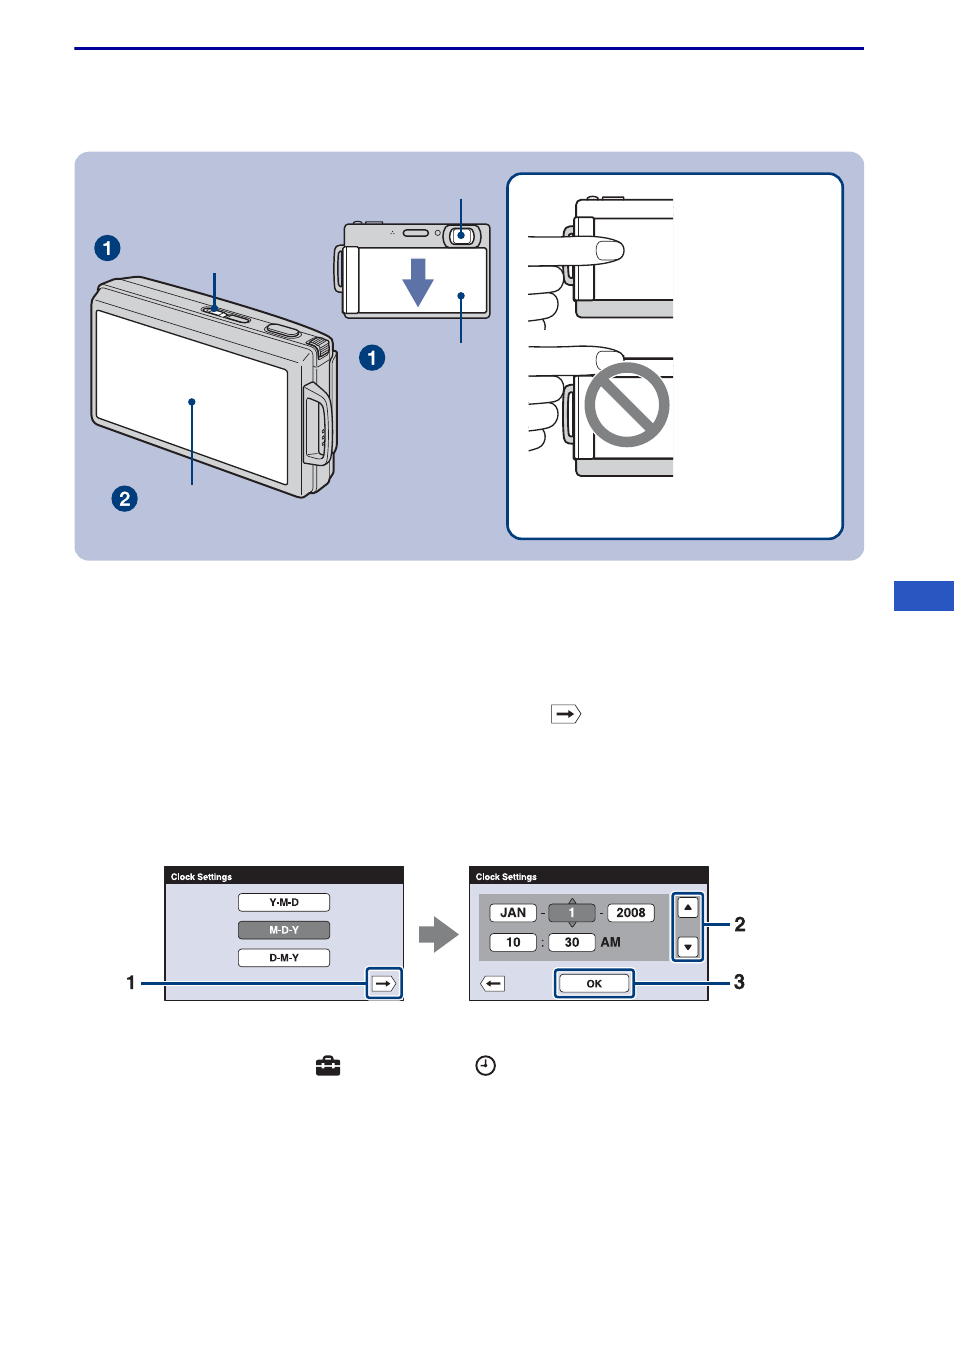
3 Turning the camera on/setting the clock
1
Press the POWER button or slide the lens cover downward.
• Be careful not to apply force to the lens cover when lowering it.
2
Set the clock by touching the button on the touch panel.
1
Touch the desired date display format, then touch
.
2
Touch each item, then set its numeric value by touching v/V.
3
Touch [
OK
].
• The camera does not have a feature for superimposing dates on images. By using “Picture Motion
Browser” in the CD-ROM (supplied), you can print or save images with the date.
• Midnight is indicated as 12:00 AM, and noon as 12:00 PM.
[
To set the date and time again
Touch [HOME], then touch
(Settings)
t [
Clock Settings] (pages 23, 24).
POWER button
Lens
Touch panel
Lens cover
Support the part
shown in the
illustration and
lower the lens
cover.
The lens cover
has a two-layer
construction.
Do not press on
the inside cover.
- DSC-H20 (149 pages)
- DSC-H20 (120 pages)
- DSC-U30 (84 pages)
- DSC-T200 (40 pages)
- DSC-T200 (131 pages)
- DSC-H2 (123 pages)
- DSC-M2 (19 pages)
- DSC-H2 (2 pages)
- DSC-T9 (111 pages)
- DSC-T9 (2 pages)
- DSC-P93 (132 pages)
- DSC-T1 (120 pages)
- DSC-T1 (10 pages)
- DSC-T1 (2 pages)
- DSC-V1 (132 pages)
- DSLR-A300X (167 pages)
- DSLR-A300X (1 page)
- DSC-P71 (108 pages)
- DSC-P31 (108 pages)
- DSC-M1 (19 pages)
- DSC-T5 (2 pages)
- DSC-T5 (107 pages)
- DSC-W230 (80 pages)
- DSC-W220 (129 pages)
- DSC-W220 (40 pages)
- DSC-W290 (60 pages)
- DSC-W290 (145 pages)
- DSC-S90 (103 pages)
- DSC-S60 (2 pages)
- DSC-S90 (2 pages)
- DSC-P8 (120 pages)
- DSC-HX1 (151 pages)
- DSC-HX1 (176 pages)
- DSC-H1 (107 pages)
- DSC-H1 (2 pages)
- DSC-U20 (108 pages)
- DSC-U20 (1 page)
- DSC-P41 (124 pages)
- DSC-F88 (132 pages)
- DSC-S40 (2 pages)
- DSC-S40 (91 pages)
- DSC-N1 (132 pages)
- DSC-N1 (2 pages)
- DSLR-A700P (179 pages)
- DSLR-A700P (19 pages)