Step 3: selecting the dubbing mode, Step 4: performing easy dubbing, Du b b in g /e d itin g – Sony CCD-TRV338 User Manual
Page 65: The title lights up, Hello
Du
b
b
in
g
/E
d
itin
g
Dubbing/Editing
65
4
Turn the SEL/PUSH EXEC dial to
select [OK], then press the dial.
The title lights up.
b
Notes
• You can put a title only into the tape of the VCR.
• If you set the background color to [FADE], the
picture may not appear properly, depending on the
connected VCR.
z
Tips
• The title color changes as follows:
[WHITE]
y [YELLOW] y [VIOLET] y
[RED]
y [CYAN] y [GREEN] y [BLUE]
• The title size changes as follows:
[SMALL]
y [LARGE]
• The background color changes as follows:
[FADE]
y [WHITE] y [YELLOW] y
[VIOLET]
y [RED] y [CYAN] y [GREEN]
y [BLUE] y [BLACK]
Step 3: Selecting the dubbing
mode
You can choose either normal recording
([NORMAL]) or interval recording
([PREVIEW]).
1
Turn the SEL/PUSH EXEC dial to
select [MODE SEL], then press the
dial.
2
Turn the SEL/PUSH EXEC dial to
select [NORMAL] or [PREVIEW],
then press the dial.
When you select [NORMAL]
You can record into the VCR normally.
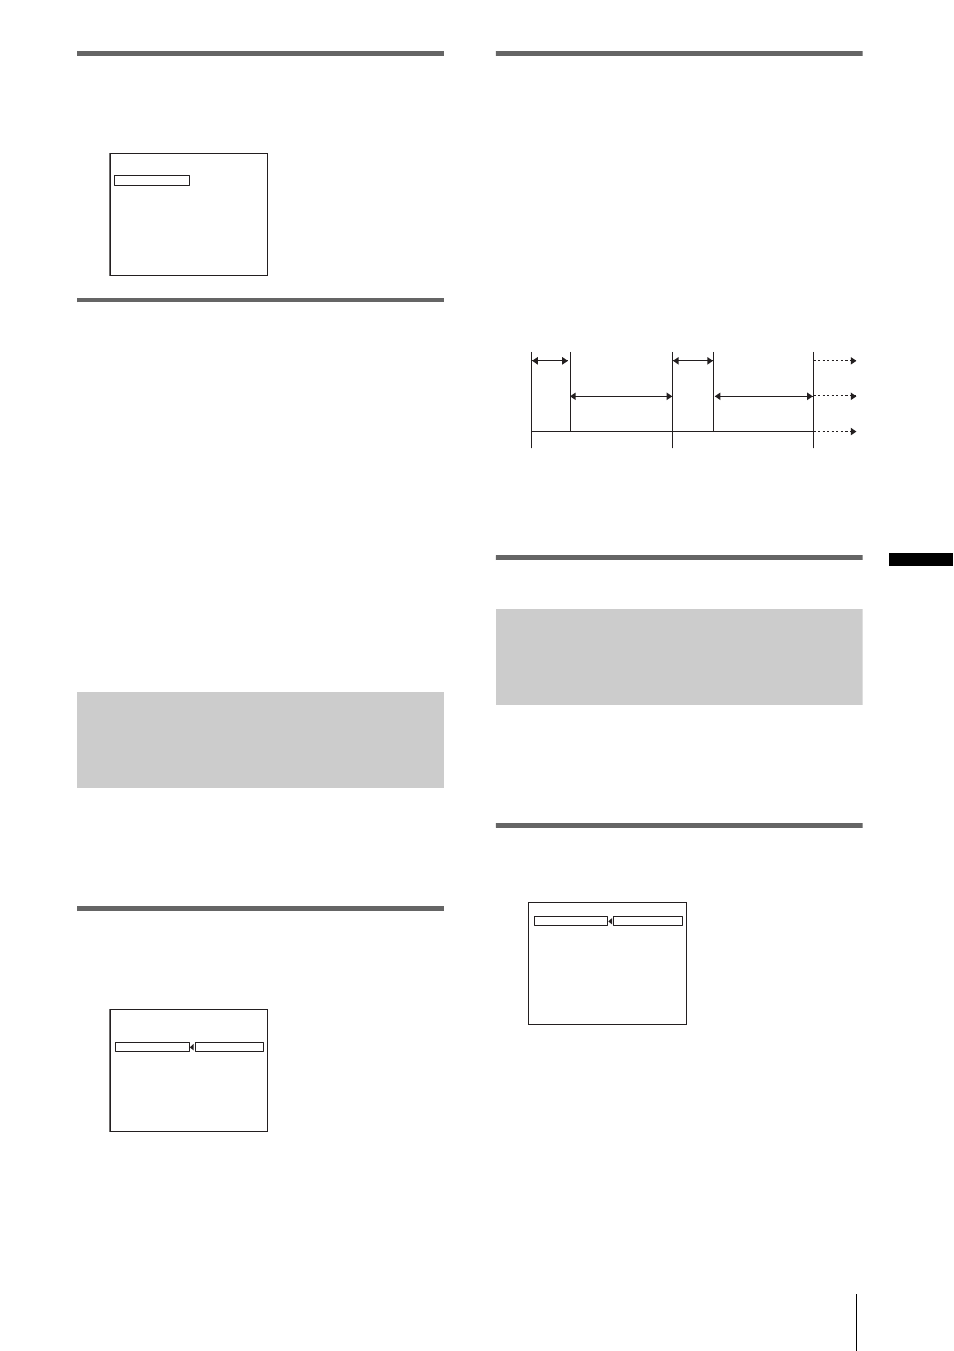
When you select [PREVIEW]
You can make a time-lapse dubbing by
setting the VCR to automatically repeat 5
seconds’ recording and 25 seconds’
standby.
a. Recording time (VCR)
b. Waiting time (VCR)
c. Playback time (camcorder)
Step 4: Performing Easy Dubbing
Make sure that your camcorder and VCR are
connected, and that the VCR is set to
recording pause.
1
Turn the SEL/PUSH EXEC dial to
select [START], then press the dial.
E A S Y D U B B I N G
S T A R T
T I T L E S E L
M O D E S E L
S E T U P
0
0
:
0
0
:
0
N O R M A L
O N
[ E A
S Y
] : E N D
B
U
D
HELLO!
E A S Y D U B B I N G
S T A R T
T I T L E S E L
M O D E S E L
S E T U P
0
0
:
0
0
:
0
N O R M A L
N O R M A L
P R E V I E W
[ E A S Y D U B ] : E N D
HELLO!
25 s
30 s
30 s
25 s
5 s
5 s
[a]
[b]
[c]
E A S Y D U B B I N G
S T A R T
T I T L E S E L
M O D E S E L
S E T U P
0
0
:
0
0
:
0
N O R M A L
R E T U R N
E X E C U T E
[ E A S Y D U B ] : E N D
E n g a g e r e c p a u s e .
,continued