Repair parts list, Warning – American Standard 2474 User Manual
Page 3
7 3 0 5 1 7 - 1 0 0
10
11
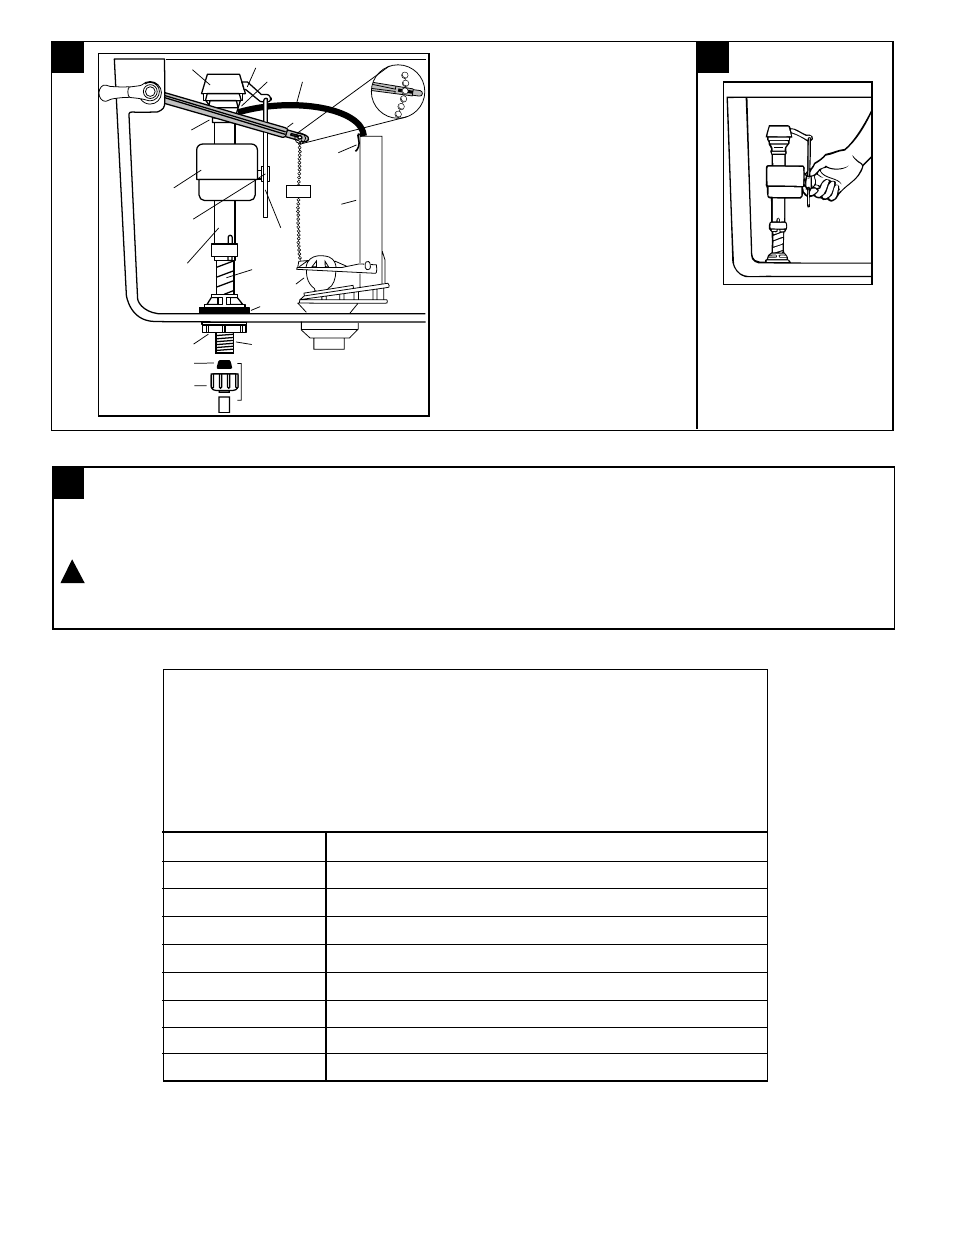
ADJUSTMENTS
a.
Adjust water level. Water level
should be adjusted to level
indicated on tank by adjusting float
cup.
See Step 11 for water level
adjustment method
b.
If bowl fails to siphon, an adjustment
may be required with the lift chain.
Simply remove the bead chain from
the retainment clip (see Fig. 10A)
and take up slack on the chain, and
reinsert on lift rod. Make sure the
chain is not too taught.
12
- 3 -
REPAIR PARTS LIST
NOTE: "XXX" represents color or trim finish options. Specify when ordering.
Repair parts are determined by toilet tank number which can be found
marked inside tank.
PART NO.
DESCRIPTION
738608-XXX0A
034783-XXX0A
730505-0070A
738565-400.0070A
738600-0070A
738605-0070A
4396.016
735099-400A
5725.064.XXX
TRIP LEVER
BOLT CAP KIT (INCL TWO COVERS & WASHERS)
COUPLING KIT, BOWL-TO-TANK
FLUIDMASTER 400A VALVE
FLAPPER ASSEMBLY
FLUSH VALVE ASSEMBLY
TANK
TANK COVER
SEAT - ELONGATED
CARE AND CLEANING
When cleaning your toilet, wash it with mild, soapy water, rinse thoroughly with clear water and dry with a soft cloth. Avoid detergents,
disinfectants, or cleaning products in aerosol cans. NEVER use abrasive scouring powders or abrasive pads on your toilet seat. Some
bathroom chemicals and cosmetics may damage the seat's finish.
WARNING:
Do not use in-tank cleaners. Products containing chlorine (calcium hypochlorite) can seriously damage fittings in the
tank. This damage can cause leakage and property damage.
American Standard shall not be responsible or liable for any tank fitting damage caused by the use of cleaners containing
chlorine (calcium hypochlorite).
!
TANK
LEVER
"S"
CLIP
LINK
TOP
ARM
NIPPLE
Diagram 1
PARTS FOR WATER
CONNECTION
(SEE STEP 9)
CONE WASHER
VALVE
BODY
WATER LEVEL
ADJUSTMENT
CLIP
FLAPPER
FLUSH
VALVE
THREADED
SHANK
SHANK
WASHER
COUPLING NUT
(HAND TIGHT ONLY)
FILL
VALVE
FLOAT
CUP
CRITICAL LEVEL
MARK ("C.L.")
MUST BE
1" ABOVE
OVERFLOW PIPE
REFILL
TUBE
ADJUSTABLE
HEIGHT
LOCK NUT
Fig. 10A
Turn on water supply.
Adjust water to desired
level by squeezing water
level adjustment clip and
moving FLOAT CUP up or
down along stainless steel
link.