2 installing the cpu heatsink and fan – Asus AP130-E1 User Manual
Page 23
2-7
ASUS AP130-E1 barebone server
2.3.2 Installing the CPU heatsink and fan
•
The system package came with a CPU heatsink and fan assembly.
Use ONLY the bundled CPU heatsink and fan to ensure optimum
thermal condition and performance.
•
Make sure that you have applied the thermal grease to the top of
the CPU before installing the heatsink and fan!
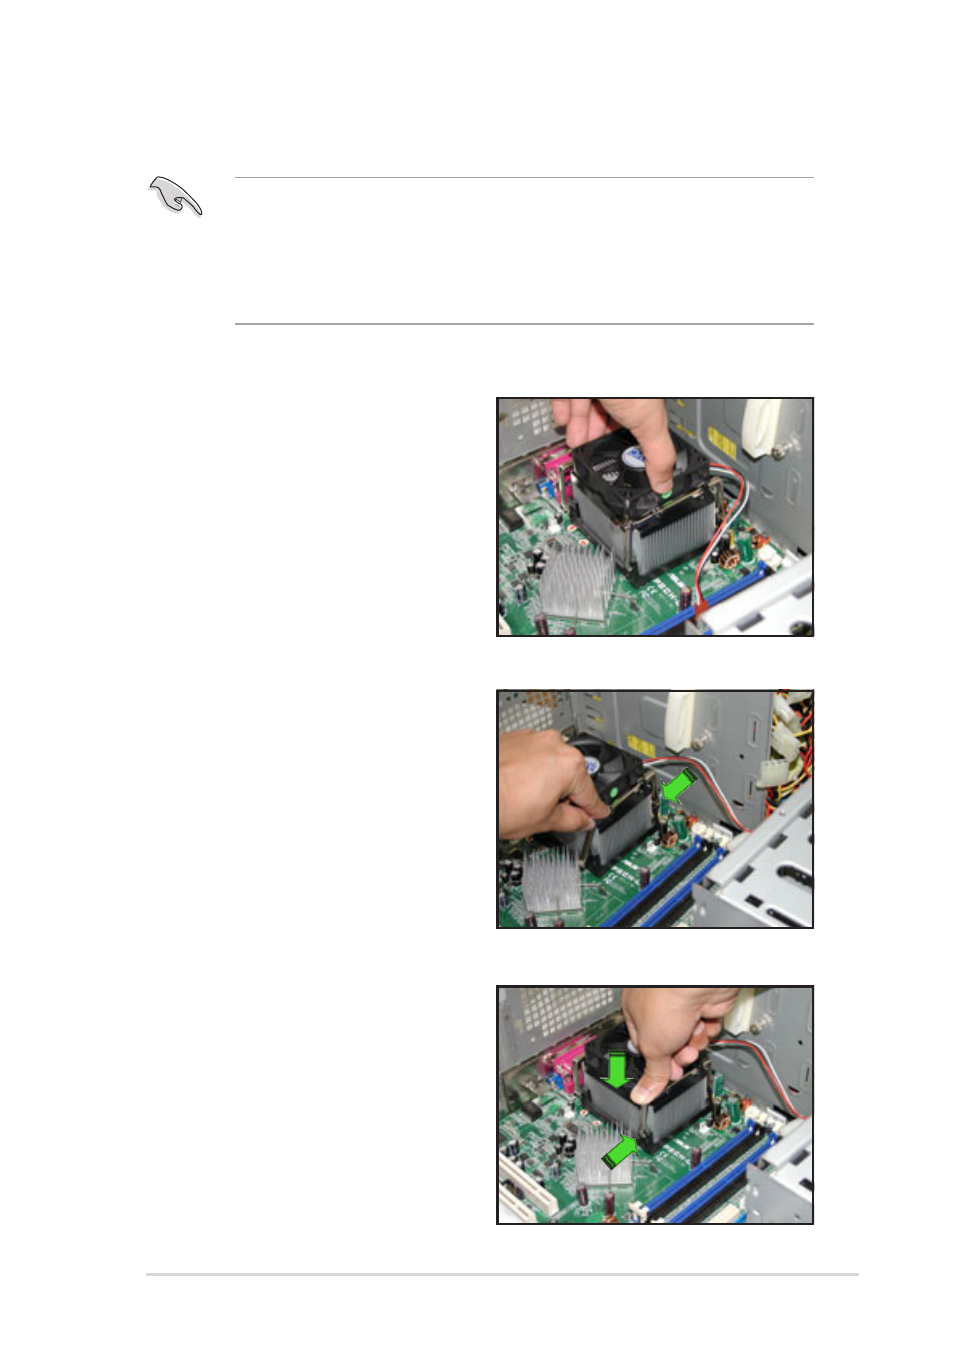
1. Place the heatsink with fan
assembly on top of the installed
CPU, then align the retention
bracket with the rails on the side
of the CPU fan.
2. Attach the retention bracket hook
into the retention module hole,
then carefully press down the
locking lever on the other side of
the retention bracket.
To install the CPU heatsink and fan:
3. Attach the locking lever hook into
the retention module hole to
secure the fan and heatsink
assembly in place.
Follow steps 1 to 3 to re-install
the second retention bracket.
- CG8565 (410 pages)
- CG8565 (246 pages)
- CS5111 (26 pages)
- CS5120 (1 page)
- ET1611PUK (38 pages)
- S2-P8H61E (80 pages)
- P2-PH1 (80 pages)
- P1-P5945G (80 pages)
- P2-P5945GCX (90 pages)
- CG8270 (218 pages)
- CG8270 (536 pages)
- CG8270 (72 pages)
- CG8270 (76 pages)
- CG8270 (534 pages)
- CG8270 (362 pages)
- P3-PH4 (80 pages)
- P3-P5G31 (100 pages)
- P2-M2A690G (80 pages)
- P2-M2A690G (8 pages)
- P4-P5N9300 (1 page)
- P4-P5N9300 (82 pages)
- P1-P5945GC (92 pages)
- P2-P5945GC (92 pages)
- P3-P5G33 (98 pages)
- T3-P5945GC (80 pages)
- T3-P5945GCX (80 pages)
- P2-M2A690G (94 pages)
- T3-PH1 (80 pages)
- T3-PH1 (82 pages)
- T5-P5G41E (82 pages)
- T5-P5G41E (76 pages)
- S1-AT5NM10E (68 pages)
- P6-P7H55E (67 pages)
- ES5000 (174 pages)
- T4-P5G43 (104 pages)
- T-P5G31 (92 pages)
- BT6130 (60 pages)
- BT6130 (54 pages)
- BT6130 (2 pages)
- CG8265 (350 pages)
- CG8265 (210 pages)
- CM1740 (330 pages)
- CM1740 (70 pages)
- CM1740 (198 pages)
- P6-M4A3000E (59 pages)