1 installing a cpu – Asus AP130-E1 User Manual
Page 22
Chapter 2: Hardware setup
2-6
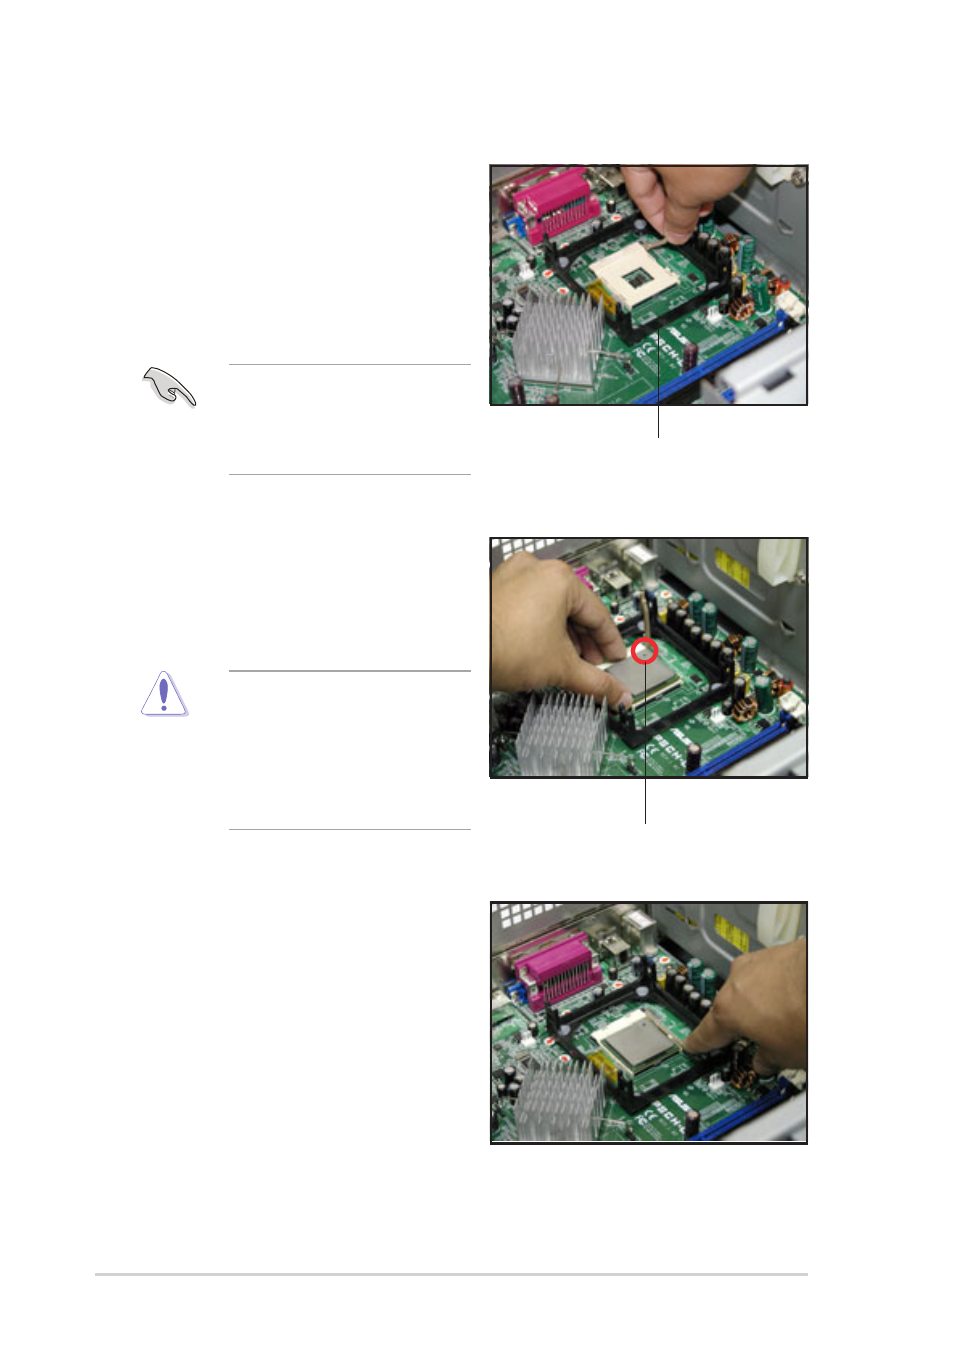
2. Position the CPU above the
socket as shown.
3. Carefully insert the CPU into the
socket until it fits in place.
The CPU fits only in one
correct orientation. DO NOT
force the CPU into the
socket to prevent bending
the pins and damaging the
CPU!
4. Carefully push down the socket
lever to secure the CPU. The
lever clicks on the side tab to
indicate that it is locked.
5. Apply the thermal interface
material (thermal grease) to the
top of the CPU. This thermal
grease should come with the
CPU package.
2.3.1 Installing a CPU
Follow these steps to install a CPU.
1. Locate the 478-pin CPU socket on
the motherboard. Unlock the
socket by pressing the lever
sideways, then lift it up to a 90°-
100° angle.
Make sure that the socket
lever is pushed back all the
way, otherwise the CPU
does not fit in completely.
CPU socket
Marked corner
- CG8565 (410 pages)
- CG8565 (246 pages)
- CS5111 (26 pages)
- CS5120 (1 page)
- ET1611PUK (38 pages)
- S2-P8H61E (80 pages)
- P2-PH1 (80 pages)
- P1-P5945G (80 pages)
- P2-P5945GCX (90 pages)
- CG8270 (536 pages)
- CG8270 (72 pages)
- CG8270 (76 pages)
- CG8270 (534 pages)
- CG8270 (362 pages)
- CG8270 (218 pages)
- P3-P5G31 (100 pages)
- P3-PH4 (80 pages)
- P2-M2A690G (80 pages)
- P2-M2A690G (8 pages)
- P4-P5N9300 (82 pages)
- P4-P5N9300 (1 page)
- P1-P5945GC (92 pages)
- P2-P5945GC (92 pages)
- P3-P5G33 (98 pages)
- T3-P5945GC (80 pages)
- T3-P5945GCX (80 pages)
- P2-M2A690G (94 pages)
- T3-PH1 (80 pages)
- T3-PH1 (82 pages)
- T5-P5G41E (76 pages)
- T5-P5G41E (82 pages)
- S1-AT5NM10E (68 pages)
- P6-P7H55E (67 pages)
- ES5000 (174 pages)
- T4-P5G43 (104 pages)
- T-P5G31 (92 pages)
- BT6130 (54 pages)
- BT6130 (2 pages)
- BT6130 (60 pages)
- CG8265 (350 pages)
- CG8265 (210 pages)
- CM1740 (70 pages)
- CM1740 (198 pages)
- CM1740 (330 pages)
- P6-M4A3000E (59 pages)