Install the display unit, Warning, Install the display unit on the tabletop stand – Sony SU-P50T2 User Manual
Page 7
7
(GB)
Install the Display Unit
WARNING
Be sure to complete the installation before connecting the mains lead to the wall socket. If you allow the mains
lead to be pinched under or between pieces of equipment, this may result in a short circuit or an electric shock.
If you stumble over the mains lead or the Display Unit, the stand may topple over and cause injury.
1
Install the Display Unit on the Tabletop Stand.
1
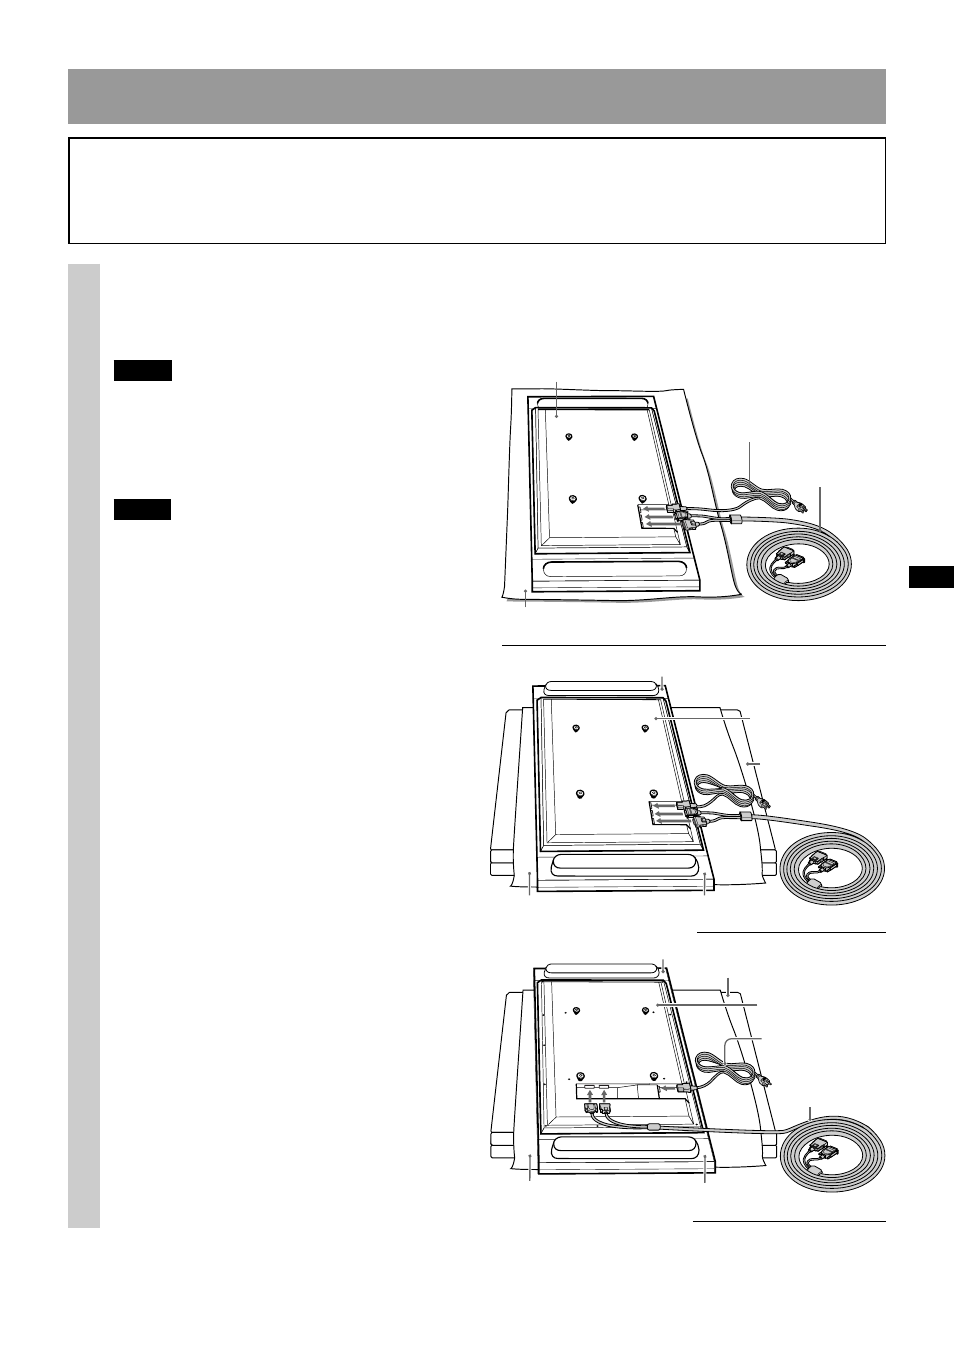
Connect the mains lead and the Display Interface Cable to the Display Unit.
z
Tip
See the instruction manual of the Sony
Flat Panel Colour Television or LCD Color
Television for more details on connecting the
mains lead and the Display Interface Cable.
Notes
• If the weight of the Display Unit is placed on
the speakers, deformation or a loose
connection of the speakers may result. To
avoid this, observe the following. (KDE-
P61MRX1, KE-P61MRX1, KDL-L42MRX1,
KLV-L42MRX1 only)
– Do not hold the speakers when carrying
the Display Unit.
– When connecting cables to the Display
Unit, place packing material, etc. on the
floor and lay the Display Unit face down
on it so that the speakers on either side of
the Display Unit are clear of the packing
material, etc.
• Be sure to place the Display Unit stably.
• Use soft cloth to protect the screen of the
Display Unit from damage or dirt.
Rear side of the Display Unit
Soft rag
Mains lead
Display
Interface Cable
Soft rag
Speaker (right)
Speaker (left)
Packing material,
etc.
Rear side of the
Display Unit
KDE-P42MRX1/KE-P42MRX1/KDE-P50MRX1/KE-P50MRX1
KDE-P61MRX1/KE-P61MRX1
KDL-L42MRX1/KLV-L42MRX1
Soft rag
Speaker (right)
Speaker (left)
Packing material, etc.
Rear side of the
Display Unit
Mains lead
Display Interface
Cable
Illustrations without model names that appear from now on are based on the Flat Panel colour television KDE-
P42MRX1, KE-P42MRX1.