Charging battery – Karcher BD 40-25 C Bp Pack User Manual
Page 21
– 5
Turn the running gear to the front with
your foot.
ATTENTION
Cables at the back of the device can get
damaged. Always tilt the chassis forward
before tilting the tank backward.
Turn out the screw and tilt the tank
backwards.
Lift battery cover.
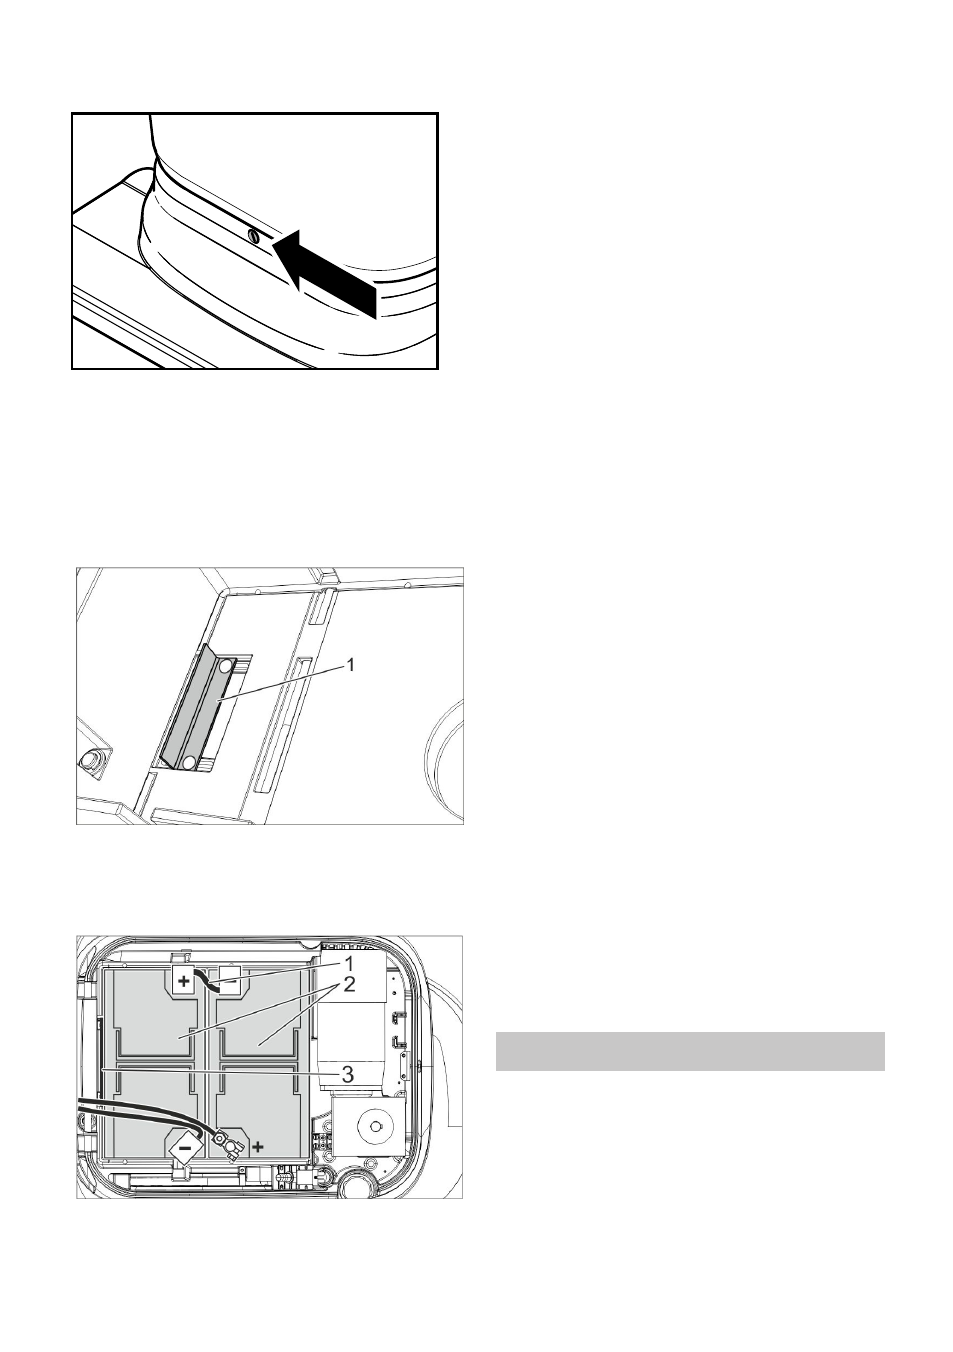
1 Mounting angle
Align the mounting bracket as shown
above.
1 Battery connector order no. 6.650-440.0
2 Battery, order no. 6.654-264.0
3 Mounting angle
Insert battery.
Firmly screw in the fastening bracket
behind the batteries.
ATTENTION
Risk of damage due to inadvertent transpo-
sition of the battery terminals.
Pay attention to correct poles.
Risk of damage due to crushing. Only use
the battery connector indicated above.
Note:
The programme selector switch must be
turned to "OFF" before connecting the bat-
tery set. If you do not observe this instruc-
tion, the following malfunctions can occur:
– The overload indicator of the brush mo-
tor shows a malfunction.
Rectification: Turn the programme se-
lector switch to "OFF" for approx. 10
seconds.
– The battery indicator shows full dis-
charge and the appliance cannot be
started.
Rectification: Completely charge the
battery.
Turn the program selection switch to
"OFF".
Connect the plus pole of one of the bat-
teries to the minus pole of the other bat-
tery.
Connect the connection cable to the
free battery poles (+) and (-).
Replace battery cover.
Tilt the tank downward and secure it
with screw.
ATTENTION
Risk of damage due to full discharge!
Charge the batteries before commissioning
the appliance.
Note:
The device is equipped with a safety mecha-
nism to prevent total discharge, i.e. when the
permissible minimum capacity is reached, the
device will shut off. In this case, the battery
monitoring symbol on the control panel is red.
Always charge discharged (even partially dis-
charged) batteries.
Charging battery
21
EN