Pitch adjustments, Ll continue to the maximum of, Pitch bend buttons (28 & 29) – American Audio Pro-Scratch 2 User Manual
Page 25: Ally return to, Adjusting the pitch slider's range (33), It’s previous set speed, Figure 44, Figure 46 figure 45, Off on, On/off
PITCH ADJUSTMENTS
©
American Audio
®
- www.americandj.com - Pro-Scratch 2™ Instruction Manual Page 25
2. PITCH BENDING:
Unlike the PITCH SLIDER (33) adjustment t
his function will momentarily increase or decrease a tracks
speed during playback. There are two ways to operate this function with the (-) & (+) PITCH BUTTONS (28 &
29)
or with the JOG WHEEL (16). The maximum pitch bend percentage allowed is +/- 100%. The pitch bend
function will work in conjunction with the PITCH SLIDER (33) pitch setting. For example, if the PITCH SLIDER
(33)
is set to a 2% pitch gain the pitch bending process will begin at 2% and wi
ll continue to the maximum
of +
/- 100%.
NOTE: A -100% pitch manipulation will stop playback entirely.
PARAMETER TIME
PARAMETER RATIO
EJECT
POWER
CUE
1 2 3 4 5 6 7 8 9 0
RELOOP
SINGLE
LOOP
REMAIN
NONSTOP
TOTAL
ELAPSED
M
T
S
PROGRAM
LOCK
KEY
SYNC.
BEAT
F
PITCH
BPM
CUE
AUTO
BPM
OFF
ON
FX
MIX
BOP
ENTER
PAN
FLANGER
SKID
PHASE
FX SELECT
SGL/CTN
TIME
REV.PLAY
TEMPO
LOCK
4%/8%/16%
TRANS
ECHO
SCRATCH
FILTER
HOLD
ON/OFF
SAMPLE PITCH
Holding down or tapping on the (+)
PITCH BEND BUTTON (28)
will pro-
vide a speed bump in the playback
pitch.
Holding down or tapping on the (-)
PITCH BEND BUTTON (29)
will provide
a slow down in the playback pitch.
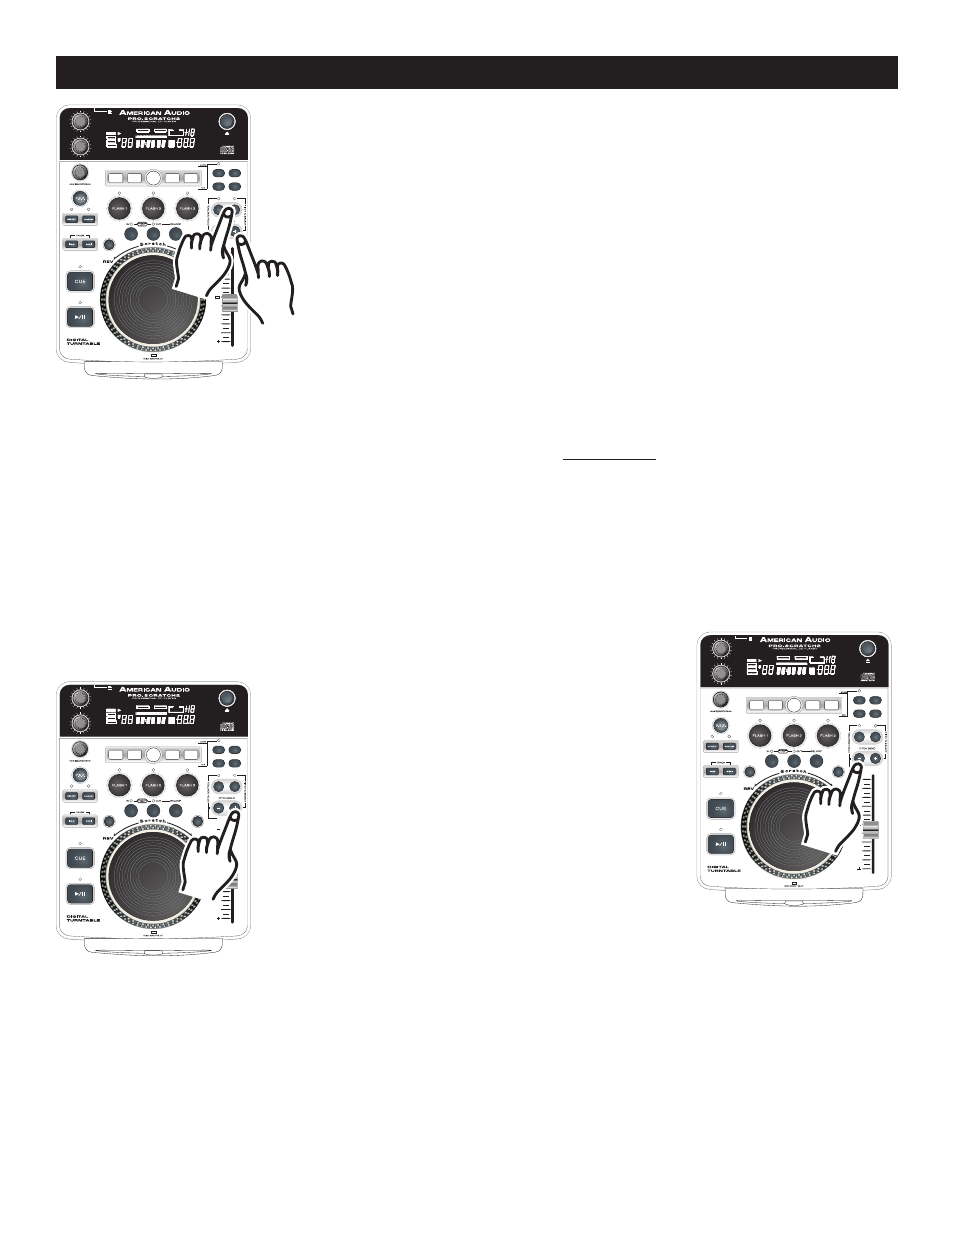
PITCH BEND BUTTONS (28 & 29):
The (+) PITCH BEND BUTTON (28) will increase track playback speed and the (-) PITCH BEND BUTTON (29)
will decrease track playback speed. The extent to which the speed changes is proportionate to the amount of
time the button is pressed. For example, if the (+) PITCH BEND BUTTON (28) is held down continuously as
in figure 43, the disc speed will increases and will continue to increase until it reaches a maximum of 100%
speed gain. When you release the (+) PITCH BEND BUTTON (28) the disc speed will automati
c
ally return to
it’s previous set speed.
Figure 44
Adjusting the PITCH SLIDER'S RANGE (33):
You may change the
PITCH SLIDER'S (33)
operating range at any time. To change the operat-
ing range be sure the pitch function is turned on, see figure 39. The pitch
percentage can be changed between +/-4%, +/-8%, +/-16%, and +/- 100%.
4% will allow the least amount of pitch manipulation and 100% will allow
the most amount of pitch manipulation. To adjust the different values, press
and hold down the PITCH ON/OFF BUTTON (26) and Tap on the + PITCH
BEND BUTTON (28)
until your desired value is reached. The LED above
the PITCH BUTTON (26); glowing red for 4%, glowing green for 8%, glow-
ing orange for 16% or flashing green for 100%. Note, the pitch percentage
must be activated to get a LED reading.
Figure 46
Figure 45
PARAMETER TIME
PARAMETER RATIO
EJECT
POWER
CUE
1 2 3 4 5 6 7 8 9 0
RELOOP
SINGLE
LOOP
REMAIN
NONSTOP
TOTAL
ELAPSED
M
T
S
PROGRAM
LOCK
KEY
SYNC.
BEAT
F
PITCH
BPM
CUE
AUTO
BPM
OFF
ON
FX
MIX
BOP
ENTER
PAN
FLANGER
SKID
PHASE
FX SELECT
SGL/CTN
TIME
REV.PLAY
TEMPO
LOCK
4%/8%/16%
TRANS
ECHO
SCRATCH
FILTER
HOLD
ON/OFF
SAMPLE PITCH