1 configuring your ethernet network card, 1 for windows, 98 second edition / windows – Allied Telesis AT-AR236E User Manual
Page 11
11
Easy Start
Easy Start
Easy Start
Easy Start
Easy Start
iii
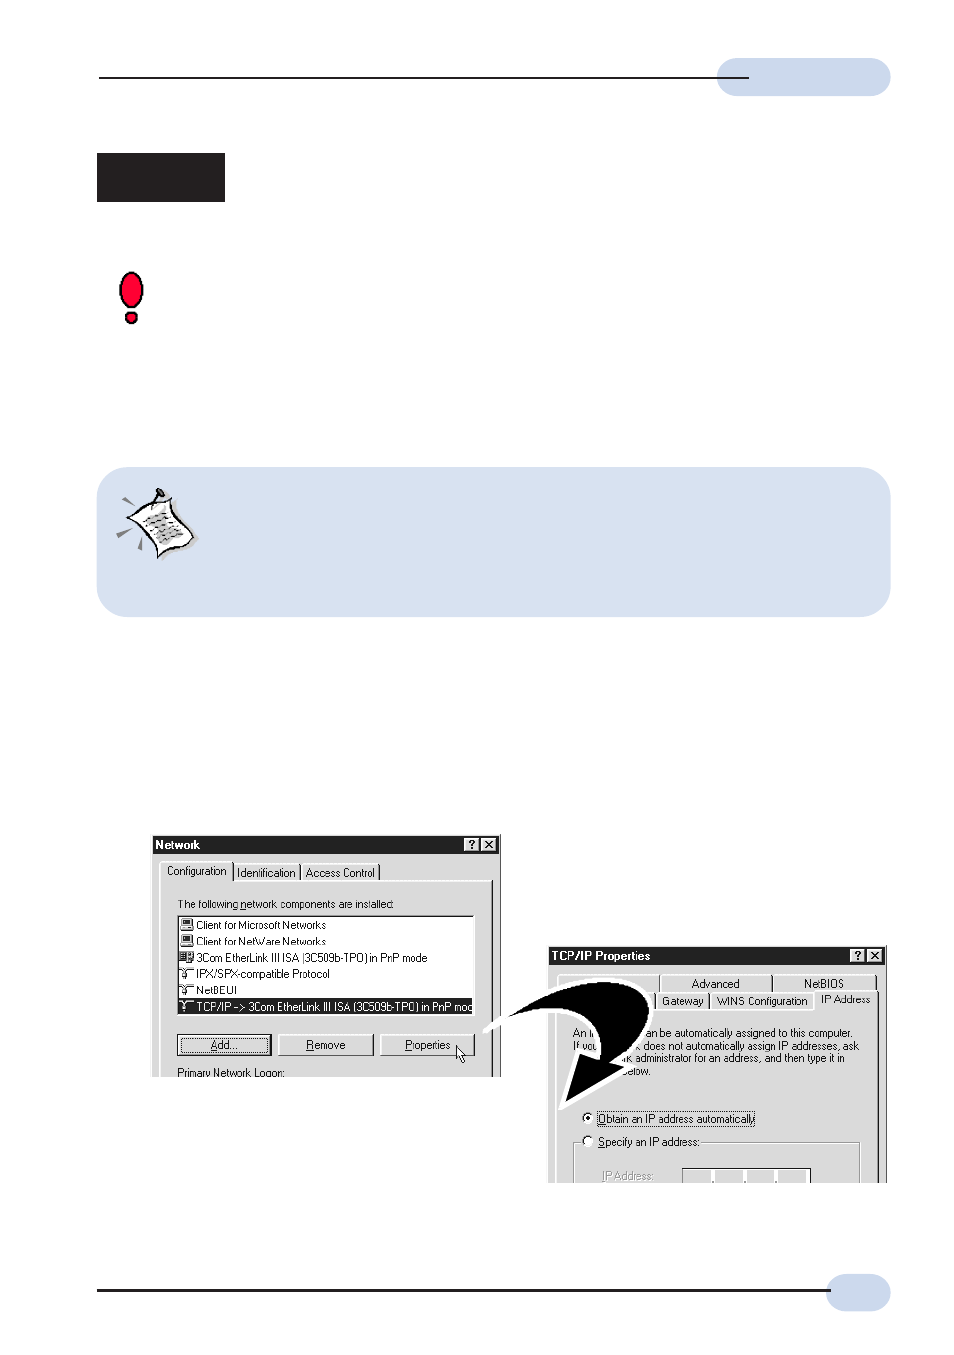
Click the
IP Address
tab.
Click the option
Obtain an IP address
automatically
and click
OK
to save the
settings.
i
From your Windows desktop, right-click on the
Network Neighborhood
icon. Select
Properties
.
ii
ii
From the
Configuration
tab, select
TCP/IP-> xxx
where
xxx
refers to the model of your
Ethernet Card that is connected to your ADSL Router.
Click
Properties
.
(This screen shot uses 3Com EtherLink
Ethernet card model as an example).
Step 2:
Configuring Your Ethernet Network Card
/ Installing Your USB Device
If your computer/notebook is connected to the Ethernet Port of the ADSL Router,
proceed with
section 2.1
. If your computer/notebook is connected to the USB Port
of the ADSL Router, proceed with
section 2.2
. If your computers/notebooks are
connected to both the Ethernet Port and USB Port of your ADSL Router, please
proceed with both
sections 2.1
and
2.2
!
2.1
Configuring Your Ethernet Network Card
1.
Proceed with this section ONLY if your computer/notebook is
connected to the Ethernet Port of your ADSL Router.
2.
The following illustrated screen shots serve only as examples. For
any dissimilarities, please follow closely the instructions prompted
on your Computer.
2.1.1
For Windows
®
98 Second Edition / Windows
®
Me
Ensure that your ADSL Router is powered on. Restart your system.
Proceed to
Step 3
.