3 mark, 1 mark, 2 delete mark – Allied Telesis AlliedView-EMS 3.10 AMIGO User Manual
Page 38: 3 jump to mark, 2 delete mark 4.3.3 jump to mark, Mark
4.3 Mark
From the Mark menu, you can mark particular MIB objects for later reference.
After marking, you can access the object by selecting it from the "Jump to
mark" menu.
Topics:
•
•
•
4.3.1 Mark
Adds a mark to the selected MIB object on the MIB tree. To add a mark, select
the object on the tree, then select Mark > Mark. Marked objects are listed in the
Mark > Jump to mark menu.
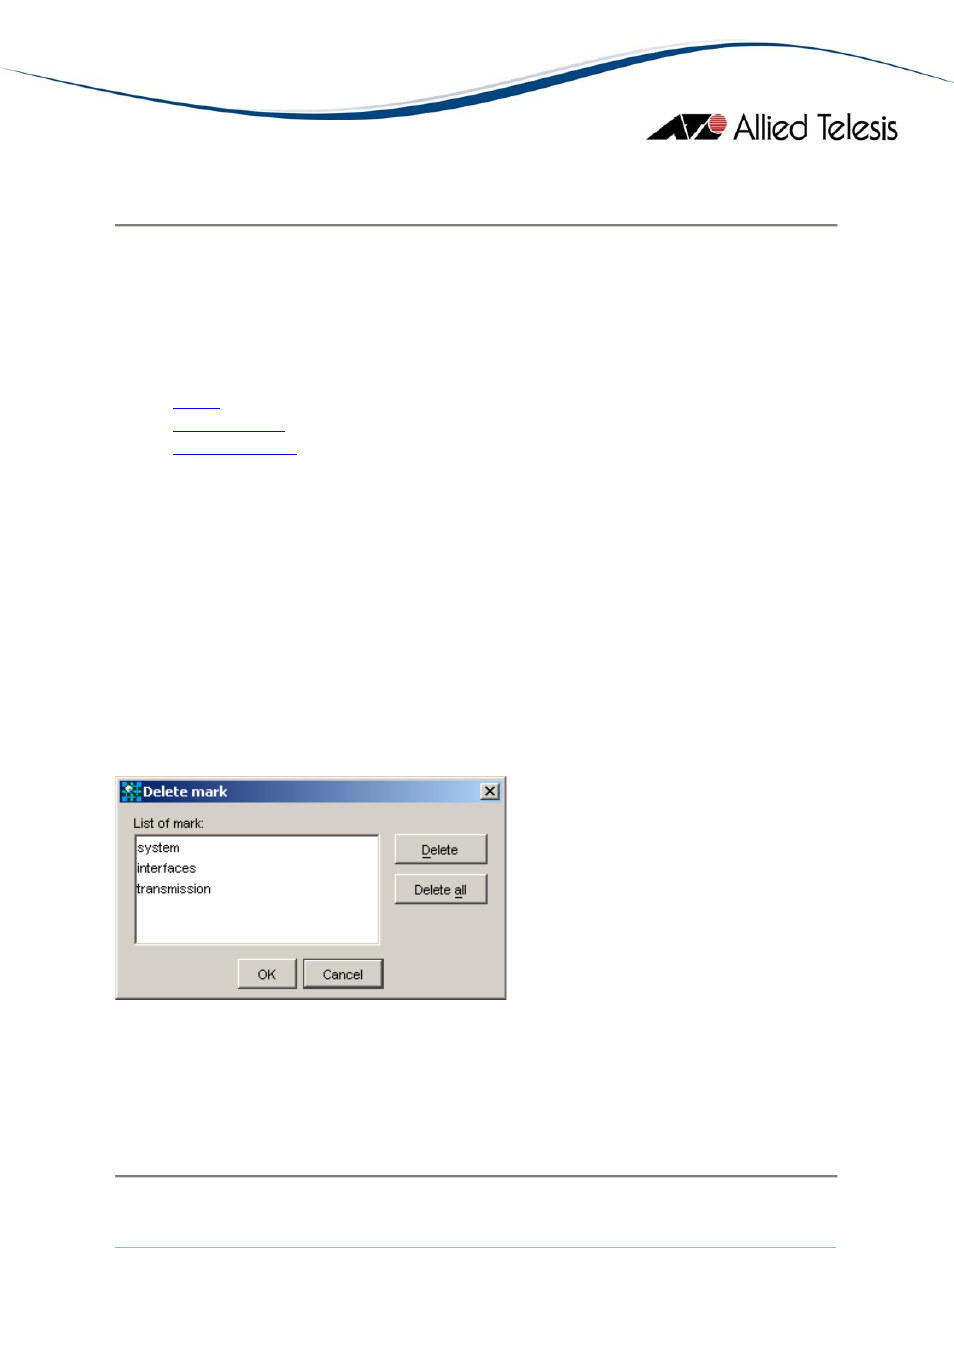
4.3.2 Delete Mark
To remove a mark, select Mark > Delete mark. The "Delete mark" dialog box
opens, containing a list of the currently configured marks. Select the mark to be
deleted, then click Delete. If you want to delete all marks, click the Delete all
button.
Delete mark dialog box
4.3.3 Jump to Mark
To jump to a marked object on the tree, select Mark > Jump to mark > [marked
object].
4 Menus
AlliedView™-EMS 3.10 AMIGO USERS GUIDE
Page 38 of 43
- AT-GS908M (54 pages)
- AT-x230-10GP (80 pages)
- AT-GS950/48PS (64 pages)
- AT-GS950/10PS (386 pages)
- AT-GS950/16PS (386 pages)
- AT-GS950/48PS (386 pages)
- AT-9000 Series (258 pages)
- AT-9000 Series (1480 pages)
- IE200 Series (70 pages)
- AT-GS950/48 (60 pages)
- AT-GS950/48 (410 pages)
- AT-GS950/8 (52 pages)
- AT-GS950/48 (378 pages)
- SwitchBlade x8106 (322 pages)
- SwitchBlade x8112 (322 pages)
- SwitchBlade x8106 (240 pages)
- SwitchBlade x8112 (240 pages)
- AT-TQ Series (172 pages)
- AlliedWare Plus Operating System Version 5.4.4C (x310-26FT,x310-26FP,x310-50FT,x310-50FP) (2220 pages)
- FS970M Series (106 pages)
- 8100L Series (116 pages)
- 8100S Series (140 pages)
- x310 Series (116 pages)
- x310 Series (120 pages)
- AT-GS950/24 (404 pages)
- AT-GS950/24 (366 pages)
- AT-GS950/16 (44 pages)
- AT-GS950/16 (404 pages)
- AT-GS950/16 (364 pages)
- AT-GS950/8 (52 pages)
- AT-GS950/8 (404 pages)
- AT-GS950/8 (364 pages)
- AT-8100 Series (330 pages)
- AT-8100 Series (1962 pages)
- AT-FS970M Series (330 pages)
- AT-FS970M Series (1938 pages)
- SwitchBlade x3112 (294 pages)
- SwitchBlade x3106 (288 pages)
- SwitchBlade x3106 (260 pages)
- SwitchBlade x3112 (222 pages)
- AT-S95 CLI (AT-8000GS Series) (397 pages)
- AT-S94 CLI (AT-8000S Series) (402 pages)
- AT-IMC1000T/SFP (23 pages)
- AT-IMC1000TP/SFP (24 pages)
- AT-SBx3106WMB (44 pages)