Segment control setting segment control manually, Figure 27 selecting a slot for segment change – Asante Technologies 2072 User Manual
Page 40
Page 39
Segment Control
Setting Segment Control
Manually
This section explains how to first select a module for a segment
change and then perform the actual segment change. Figure 27
summarizes the steps.
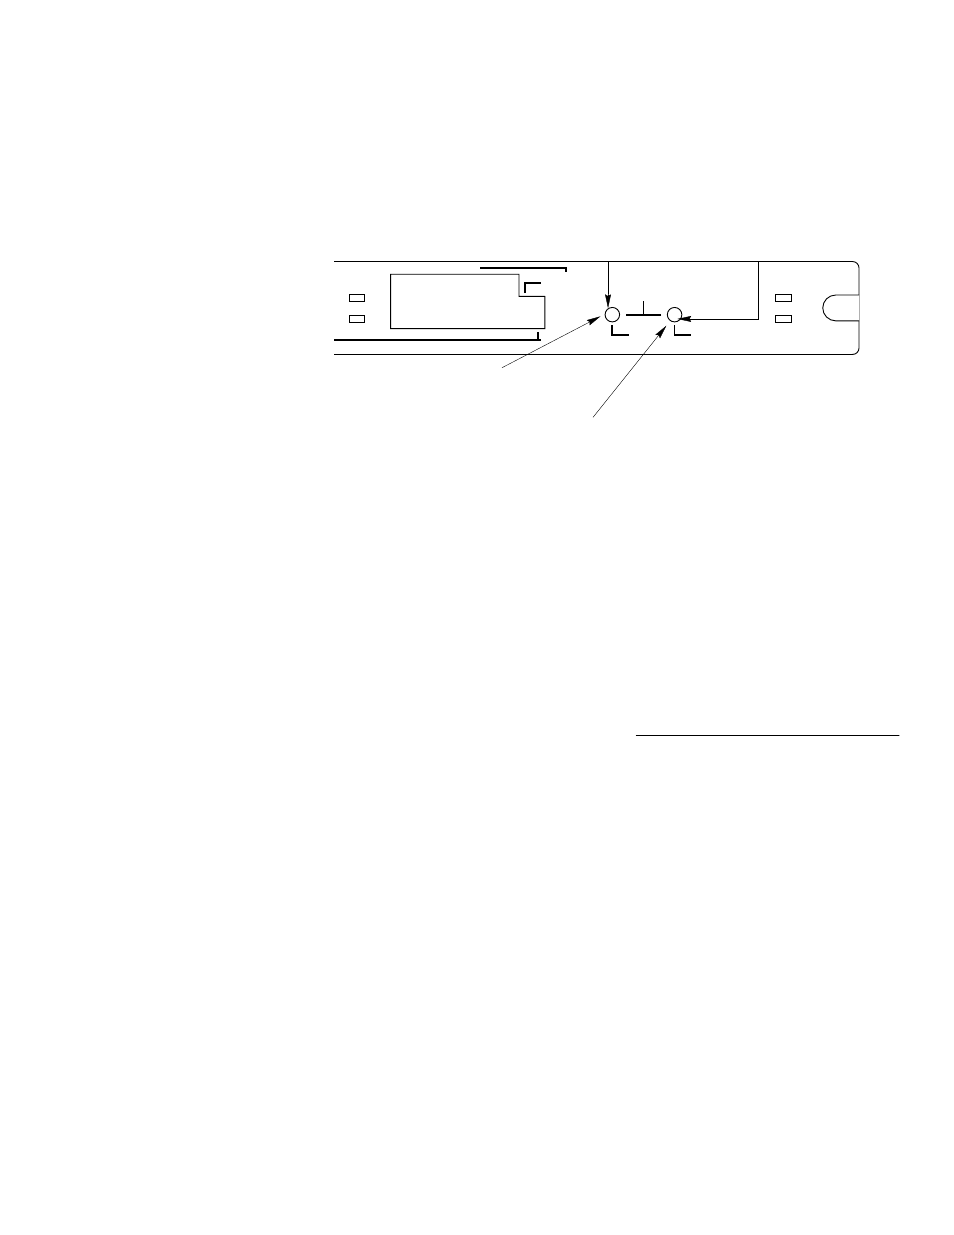
Figure 27
Selecting a Slot for Segment Change
∆
To ensure that you maintain network manage-
ment capabilities, you must make sure that your
AsantéView Management Station (AMS), which is
running AsantéView management software, is on
the same segment as the NMM. (Segment 1 is the
default setting.)
To manually select a module for segment change, complete the
following steps.
1
Press the Select Slot button.
If the NMM is set to Segment 1, pressing the Select
Slot Button causes the Segment 1 LED to flash. If the
NMM is set to Segment 2, pressing the Select Slot But-
ton causes the Segment 2 LED to flash. If the NMM is
isolated (set to neither segment), pressing the Select
Slot Button causes both segment LEDs of the NMM
module (Seg 1 and Seg 2) to flash.
2
Continue pressing the Select Slot button until you
have chosen your specified slot. The Segment LED for
the specified slot begins flashing.
OUT OF
BAND
SETUP
PRESS BOTH BUTTONS TO SET
AMS LINK
SELECT
SLOT
CHANGE
SEGMENT
SEGMENT CONTROL
SEG 2
SEG 1
%
ISION %
0
50 65+
5
10+
RS-232
ASANTEVIEW
OUT-OF-BAND
TERMINATION
RS232/AMS LINK
CONFIGURATION
Select Slot button
Change Segment button
Step 1. Press Select Slot button until
specified slot is chosen.
Step 2. Press Change Segment
button until specified segment is chosen.
Step 3. Press both the Select Slot and
Change Segment buttons at the same time
to set the new segment selection.