Sp50-l/sp85-l solar panel – Campbell Scientific SP50-L/SP85-L Solar Panel User Manual
Page 20
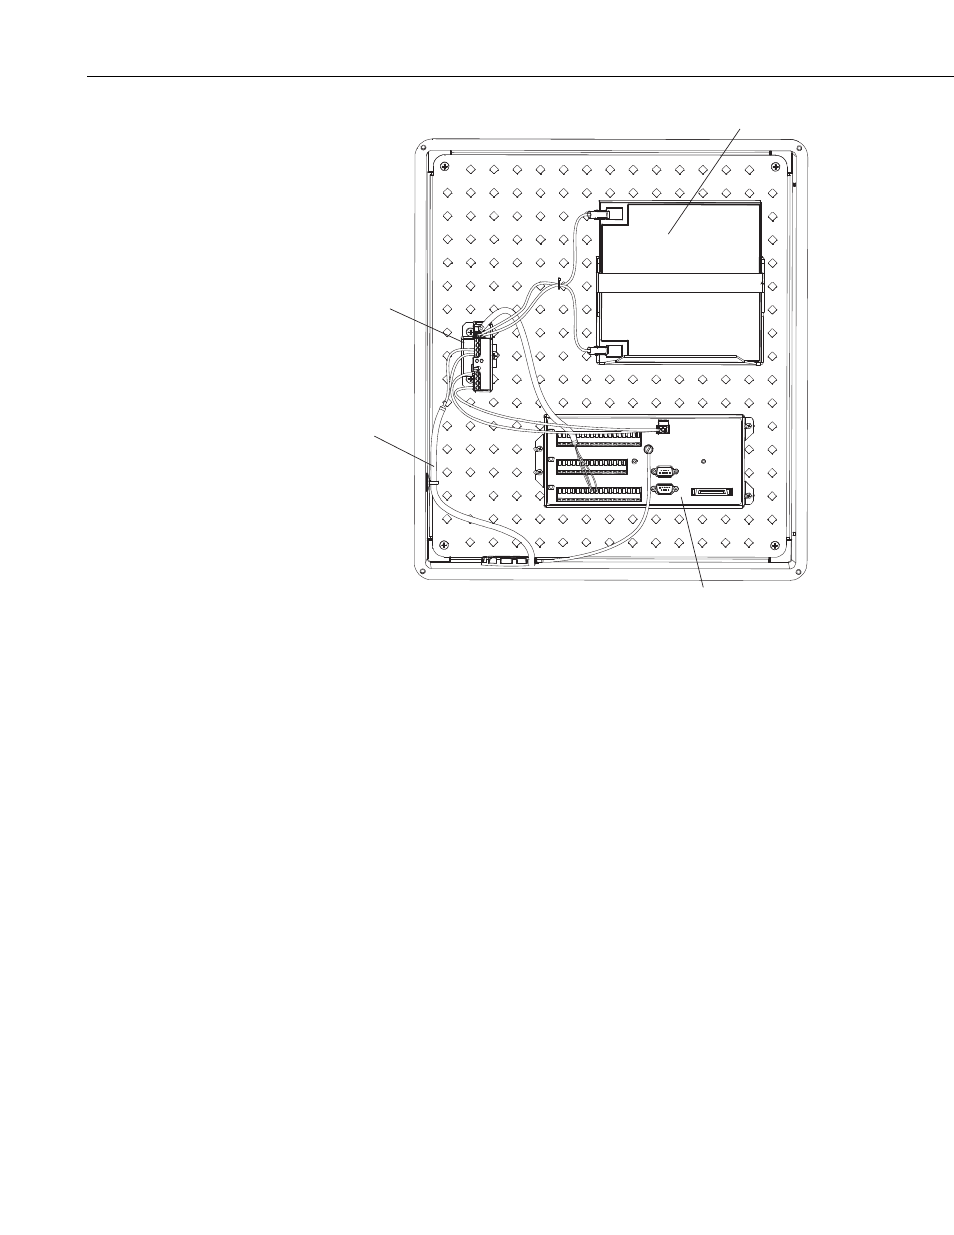
SP50-L/SP85-L Solar Panel
CHG
CHG
G
CHG
SOLAR
CK BATT
OFF
ON
O
I
G
G
12V
12V
To Solar Panel
CH200
Battery
CR1000 Datalogger
FIGURE 3-17. CH200 wired to solar panel, CR1000, and battery
3.5 Installation of Morningstar SunSaver SS-10-12V Regulator
1. Using the supplied mounting hardware, install the Morningstar SunSaver
SS-10-12V regulator (CSI p/n 18529) on the mounting plate of an
environmental enclosure (see FIGURE 3-18).
2. If using deep cycle marine battery along with the SP50 or SP85 solar
panels, install Battery Terminal Strip Adapters (CSI p/n 4386) to each
terminal of the user-supplied deep cycle battery as shown in FIGURE
3-19.
3. Using the spade terminated ends of the supplied red and black power
cables, secure the black wire to terminal lug #1 marked battery (–) on the
regulator. Connect the pigtailed end of the black cable to the “charge”
terminal on the Battery Terminal Strip Adapter installed on the battery’s
negative terminal. Secure the red wire to terminal lug #2 marked battery
(+) on the regulator. Connect the pigtailed end of the red cable to the
“charge” terminal on the Battery Terminal Strip Adapter installed on the
battery’s positive terminal. With the battery connected and no solar panel
input, the green LED on the regulator marked CHARGING SHOULD
NOT be on.
4. Connect the black (–) wire from the solar panel power cable to terminal
lug #3 marked solar (–) on the regulator. Connect the red (+) wire from
14