Install the lamps & shade, 2a 2b – LBL Lighting Eclipse W User Manual
Page 3
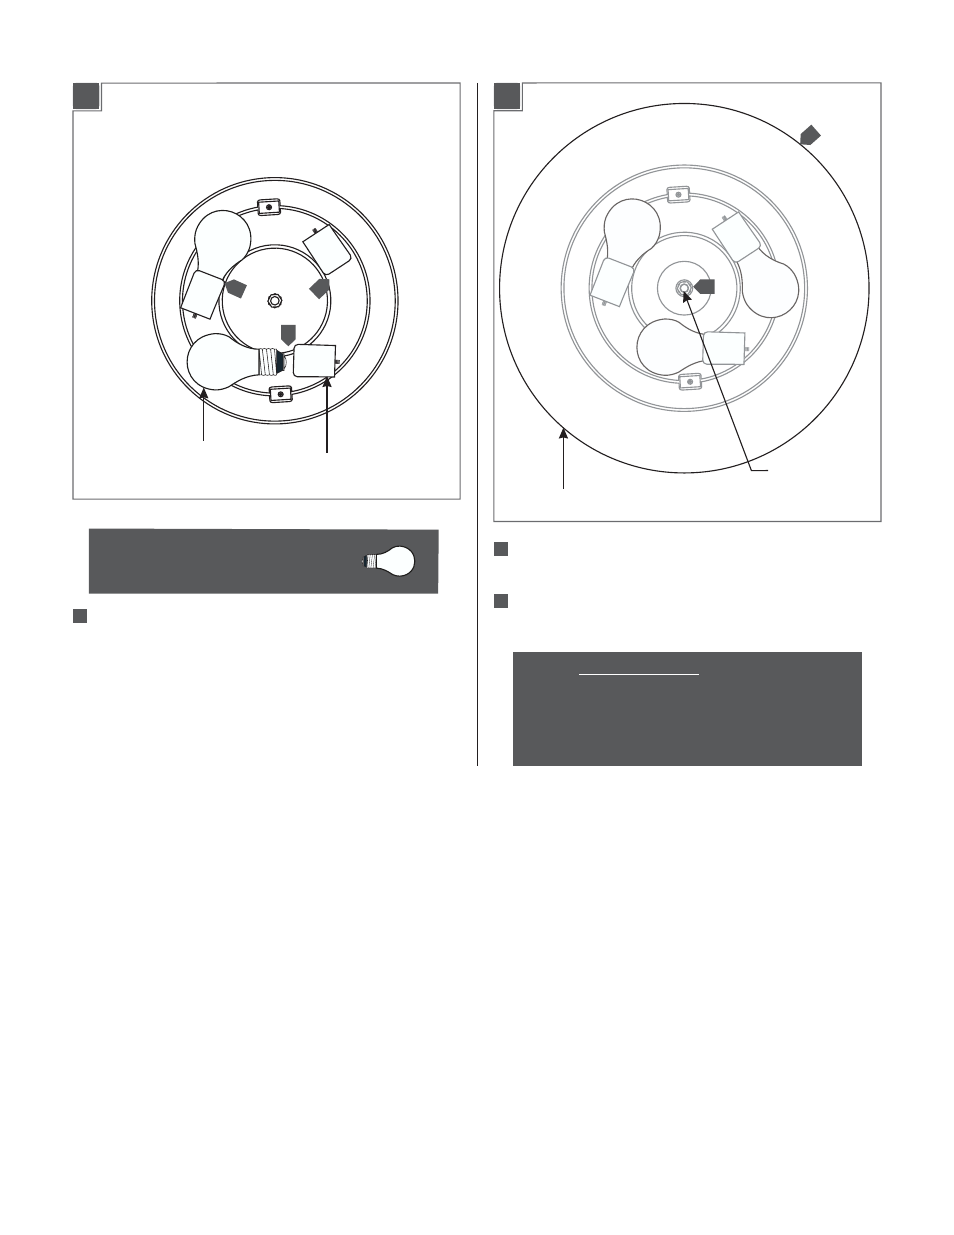
Install the Lamps & Shade
3
Align the metal shade center hole with the exposed threaded
nipple.
While holding the mounting plate in place, rotate to tighten
the metal shade to the mounting plate.
SOCKET
LAMP
METAL SHADE
EXPOSED
THREADED NIPPLE
NOTE:
To replace the lamp:
- Hold the mounting plate and rotate the metal shade
counter clockwise to remove it.
- Remove the old lamp.
- Follow steps 1 through 3 on this page.
Screw the lamps into the sockets.
Use
Watt Type A19
MAX 60
Medium Base Lamp With Each Socket
2A
2B
1
2
3
1
2
1
1
3
See also other documents in the category LBL Lighting Lighting:
- KENDALL (2 pages)
- LINNET PENDANT (1 page)
- MEZZO GP (4 pages)
- MEZZO GPCF (4 pages)
- MEZZO P (4 pages)
- MEZZO PCF (4 pages)
- MILO S (4 pages)
- MILO SCH (4 pages)
- RHUTHM S (2 pages)
- SOMEDAY GP (2 pages)
- SOMEDAY GPCF (2 pages)
- SOMEDAY P (2 pages)
- SOMEDAY CF (2 pages)
- Isla SP (1 page)
- Mason Classic (1 page)
- Mason SP (2 pages)
- Mason SPCF (2 pages)
- Aiko SP (1 page)
- Aiko SPCF (1 page)
- Olivia SP (1 page)
- Olivia SPCF (1 page)
- Zuri P (2 pages)
- Vera P (2 pages)
- Vera PCF (2 pages)
- Tindra P (4 pages)
- Akari P (1 page)
- Akari PCF (1 page)
- Isis GP (2 pages)
- Isis GPCF (2 pages)
- Rock Candy Cylinder SP (1 page)
- Rock Candy Cylinder SPCF (1 page)
- Miyu Classic SP (1 page)
- Miyu SP (2 pages)
- Miyu SPCF (2 pages)
- Sora SP (2 pages)
- Sora SPCF (2 pages)
- Julep S (2 pages)
- Julep SCF (2 pages)
- Pavia (2 pages)
- Rhythm PCF (2 pages)
- Rhythm P (2 pages)
- Juniper SF (4 pages)
- Juniper SFCF (4 pages)
- Alaya SP (4 pages)
- Icicle II SP (2 pages)