Install the lamp & shade, Save these instructions, 2a 1c – LBL Lighting Juniper WCF3 User Manual
Page 2
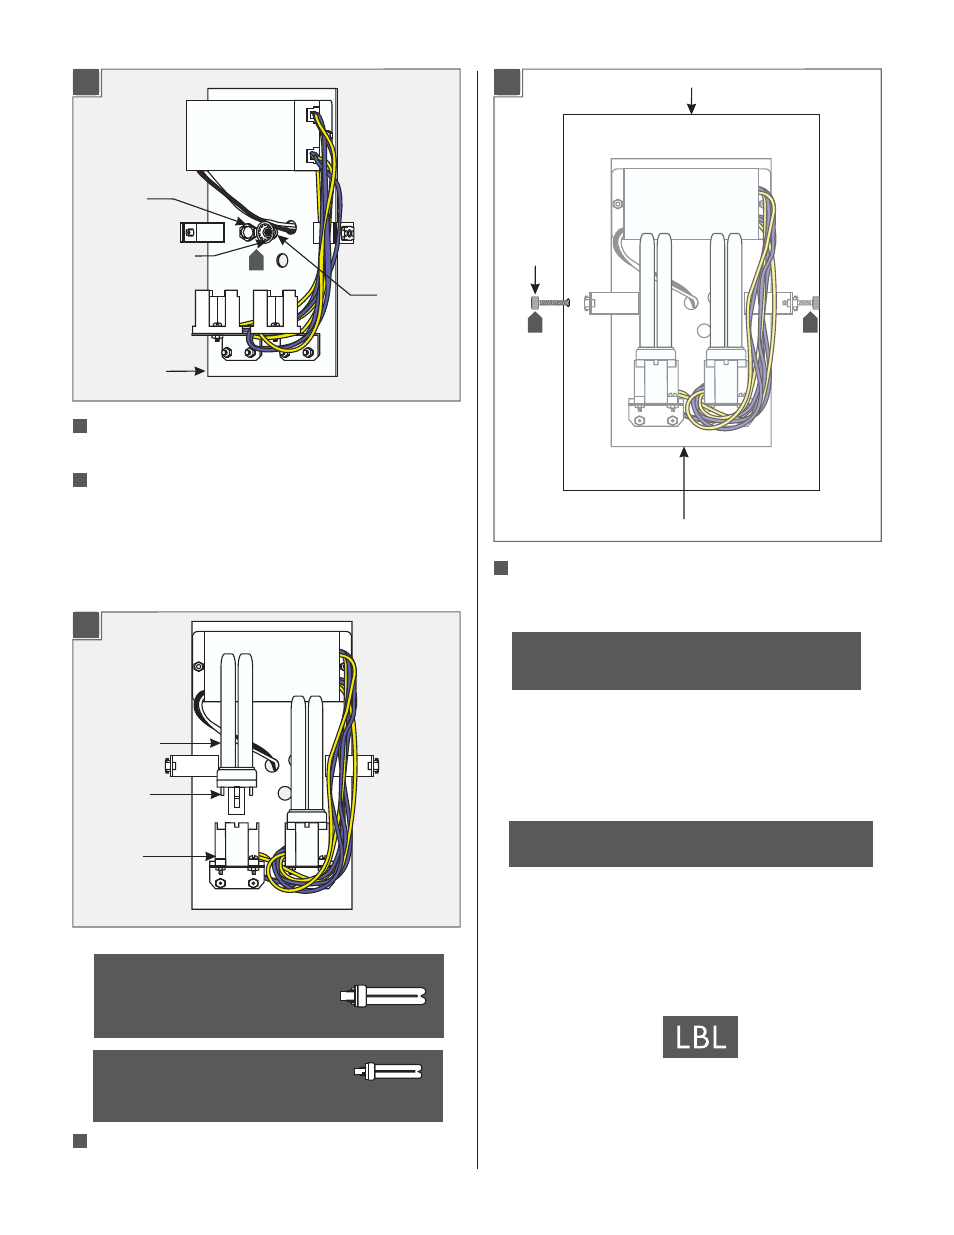
2A
1C
Place all wires and wire nut connections properly inside the
electrical box.
Slide the mounting plate center hole onto the exposed
threaded nipple. Secure the mounting plate in place by
tightening the provided nut and washer to threaded nipple.
2
MOUNTING
PLATE
NUT
WASHER
Install the Lamp & Shade
LAMP
LAMP PIN
SOCKET
Place the glass shade onto the mounting plate. Align the glass
shade holes with the mounting plate holes. Tighten the thumb
screws to secure the glass shade in place.
NOTE:
Do not over tighten the thumb screws which may
cause the glass shade to break.
GLASS SHADE
THUMB
SCREW
MOUNTING PLATE
THREADED
NIPPLE
6
Install each lamp by pushing the lamp pins completely into the
socket holes.
For The Fixtures With Electronic Ballast,
Use
Watt Type Quad Tube G24q-1
MAX 13
Base Compact Fluorescent Lamp With Each Socket.
For The Fixtures With Magnetic Ballast,
Use
Watt Type Quad Tube
MAX 13
GX23-2 Base Compact Fluorescent Lamp,
With Each Socket.
SAVE THESE INSTRUCTIONS!
7400 Linder Ave, Skokie, IL 60077
800.323.3226 - 847.626.6300
www.lbllighting.com
© 2014 LBL Lighting.All rights reserved.The "LBL Lighting" graphic is a
registered trademark of LBL Lighting. LBL Lighting reserves the right to
change specifications for product improvements without notification.
A Generation Brands Company
6
7
1
7
2B
2
2
2