LBL Lighting Electrical Box User Manual
Page 2
2
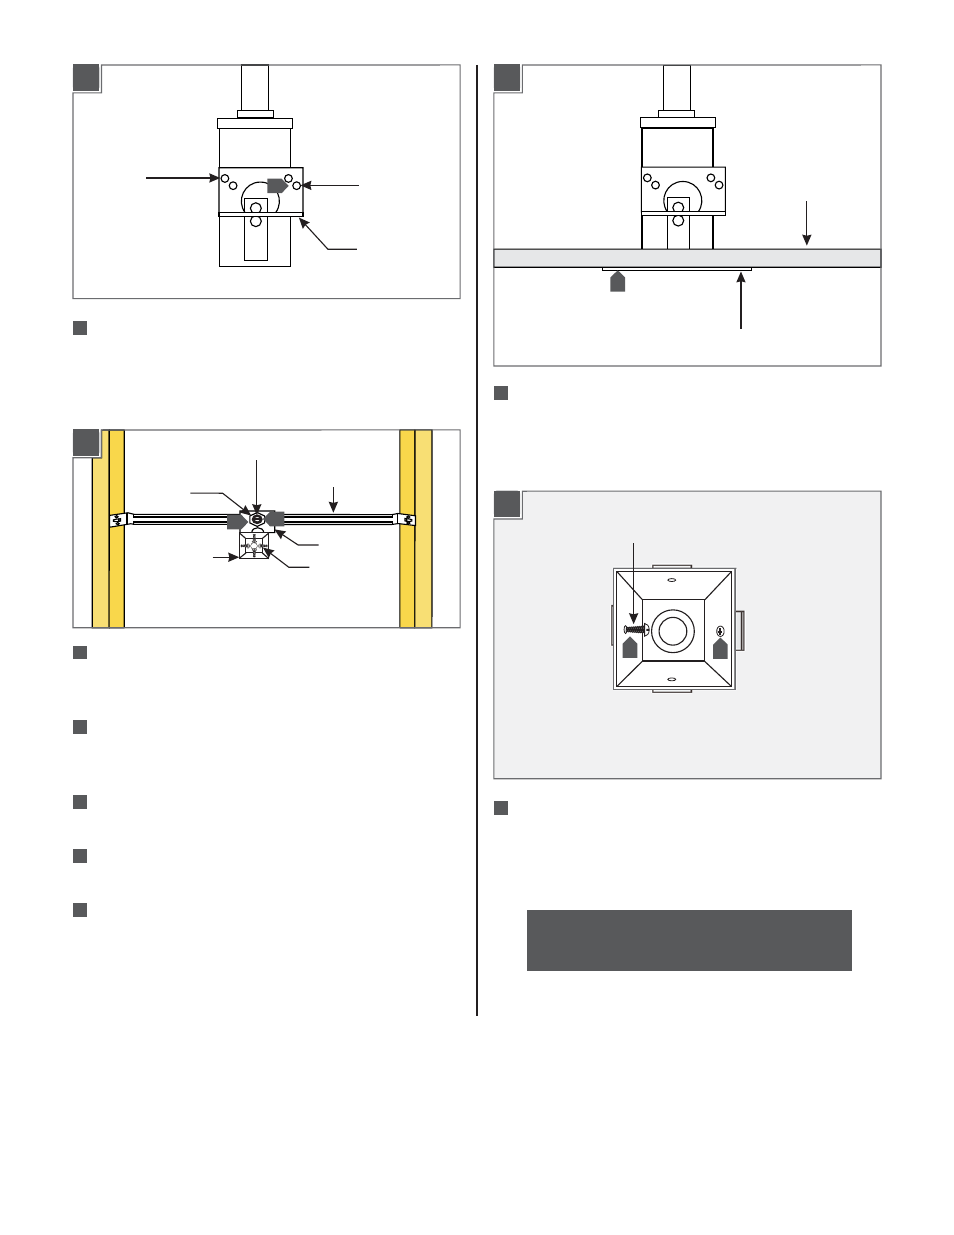
REAR HOLES
FOR 5/8"
DRYWALL
THICKNESS
For 1/2" drywall thickness mount the "L" bracket on the
2" electrical box by using the two front holes. For 5/8"
drywall thickness mount the "L" bracket to the 2"
electrical box by using the two rear holes.
FRONT HOLES
FOR 1/2"
DRYWALL
THICKNESS
"L" BRACKET
Remove the nut on the adjustable bar and place the "L"
bracket onto the nipple. Tighten the nut to secure the 2"
electrical box.
Loosen the flat head screw on the adjustable bar and
slide the 2" electrical box to the desired position. Tighten
the flat head screw to secure the 2" box in position.
Remove the four #6 screws on the front of the 2"
electrical box.
Mark a 1-13/16" square on the drywall where the 2"
electrical box is going to be located.
Cut out the marked square with a sharp knife and install
the drywall.
After installing the drywall, place the dressing plate on
the 2" electrical box. The dressing plate should cover the
plaster or open spaces around the 2" electrical box.
DRESSING PLATE
DRY WALL
Replace and tighten two #6 screws on opposing sides
of the 2” electrical box so that the spring tabs on the
side of the 2" electrical box push out against the drywall
and secure the box in place.
NUT
ADJUSTABLE BAR
"L" BRACKET
2" ELECTRICAL
BOX
FLAT HEAD SCREW
#6 SCREW
NOTE:
Refer to the canopy instructions for final
installation.
1C
10
11
12
13
14
1D
15
1E
16
17
1F
12
11
16
17
17
10
#6 SCREW