LBL Lighting Ambra SP User Manual
Page 2
2
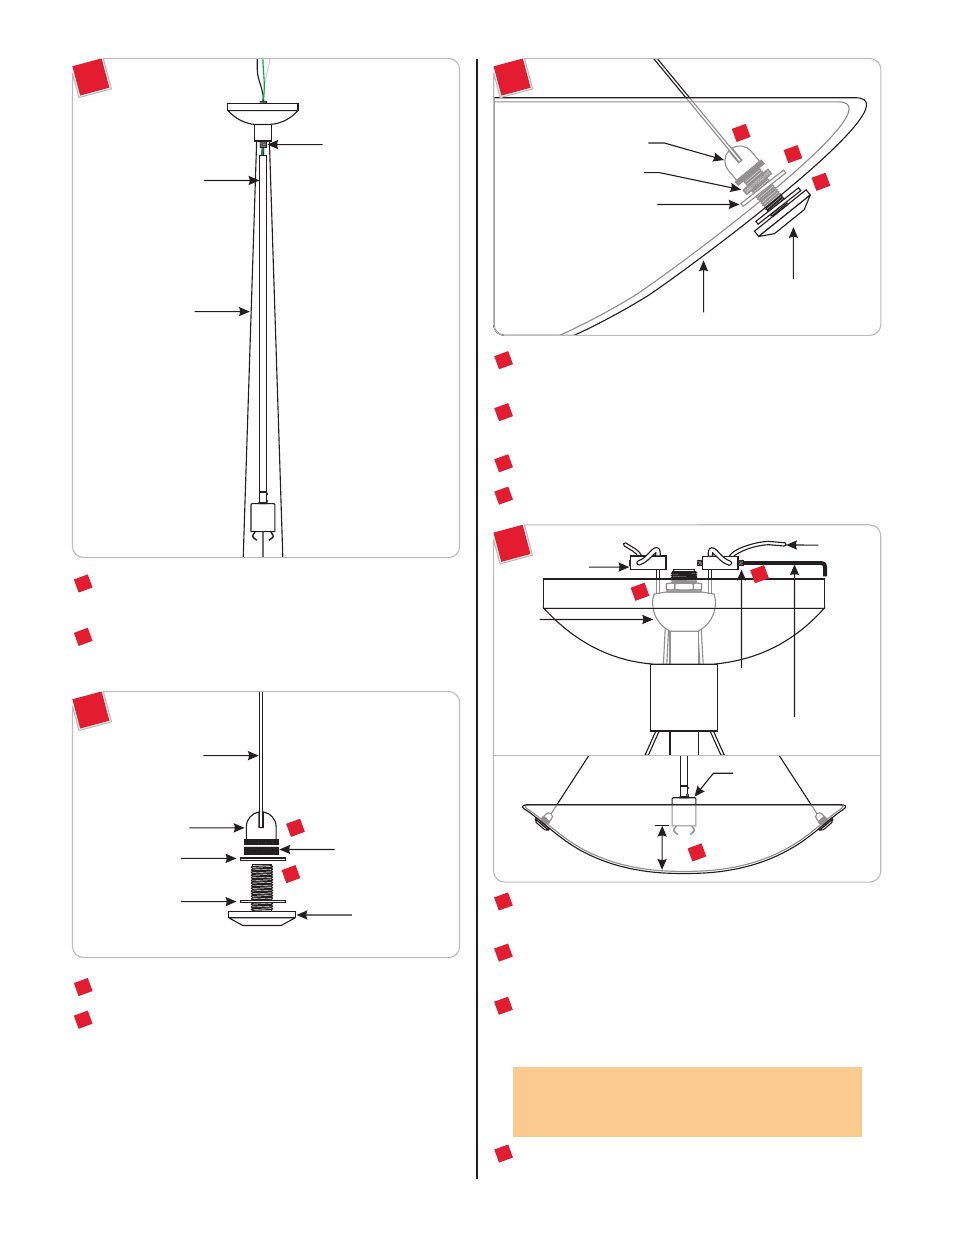
Feed the fixture wires coming out of the fixture stem through
the canopy threaded nipple.
Tighten the fixture stem completely to the canopy threaded
nipple. Make sure that the aircraft cables do not get tangled up.
1C
5
6
FIXTURE STEM
CANOPY
THREADED NIPPLE
AIRCRAFT CABLE
1D
Remove the cap screw from the cable bushing.
Remove the knurled nut and one of the plastic washers from
the cap screw.
7
8
AIRCRAFT CABLE
CABLE BUSHING
KNURLED NUT
PLASTIC WASHER
PLASTIC WASHER
CAP SCREW
7
8
1E
From outside of the glass shade, insert the cap screw through
one glass shade hole.
Place the second plastic washer onto the cap screw and finger
tighten the knurled nut to secure the cap screw in place.
Screw the cable bushing completely to the cap screw.
Repeat steps 7 through 11 for the remaining glass shade holes.
9
10
11
GLASS SHADE
CAP SCREW
9
12
CAUTION:
These set screws must be very tight to
secure the glass in place. Failure to do so may cause the
glass shade to fall.
For a nice and neat look, trim off excess aircraft cables coming
out of the strain reliefs.
KNURLED NUT
PLASTIC WASHER
CABLE BUSHING
11
10
16
For each strain relief, loosen (Do Not Remove) the M3 set
screws with the provided 1.5MM Allen wrench.
Mark the aircraft cables so that there is at least 3.5" space
between bottom of the socket cap and the inside glass shade.
Adjust the marked aircraft cables in the strain relief and make
sure that the strain relief sits against the hub; tighten the two
M3 set screws with the 1.5MM Allen wrench.
SOCKET
CAP
1.5MM ALLEN WRENCH
M3 SET
SCREW
AIRCRAFT
CABLE
3.5"
1F
13
14
15
14
STRAIN
RELIEF
13
15
HUB