Preparing the canopy, Install the fixture – LBL Lighting Duke Grande User Manual
Page 2
2
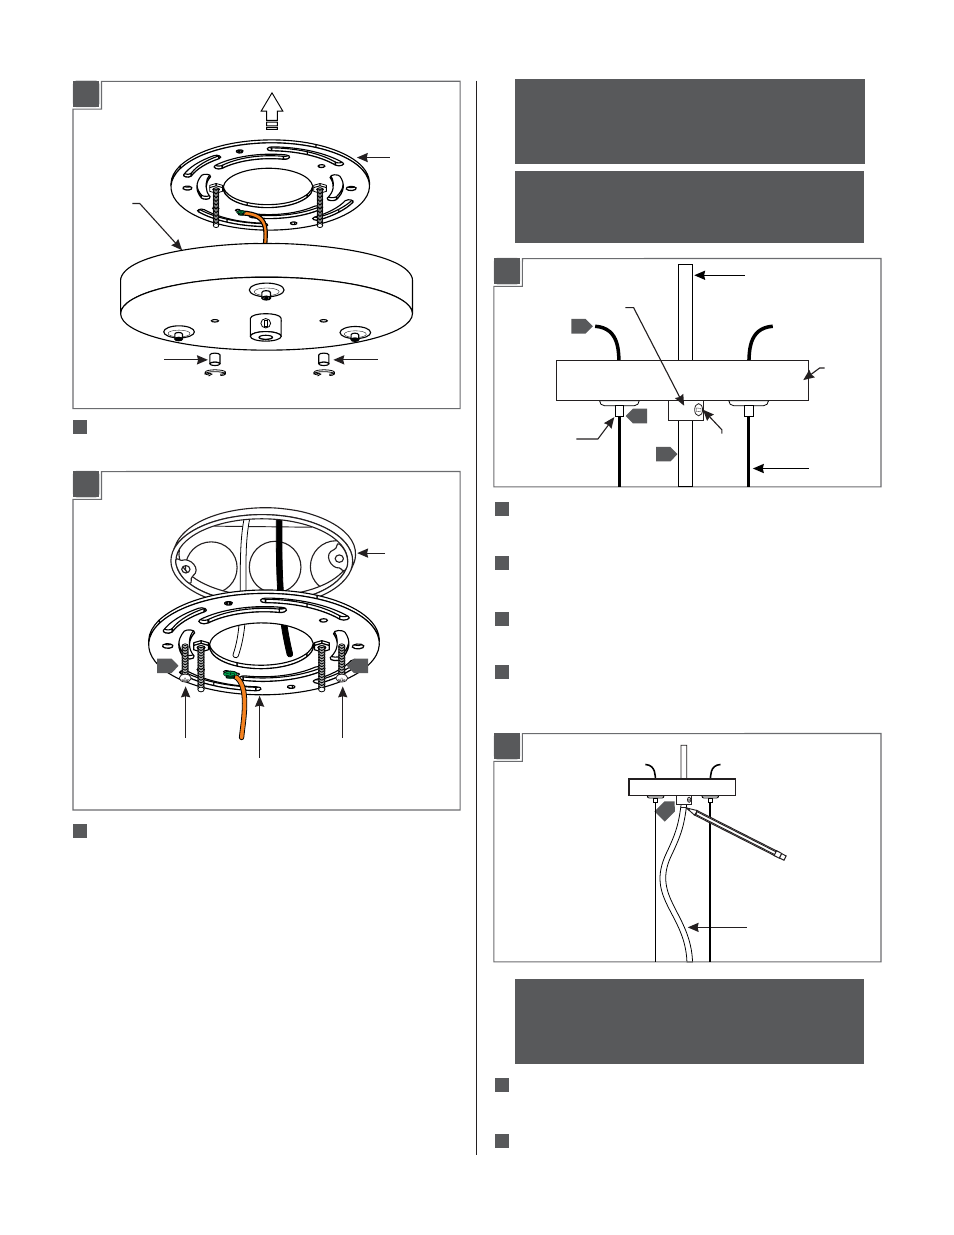
Preparing the Canopy
2A
1
CROSSBAR
Install the fixture
NOTE:
Make sure to support the fixture while
adjusting the aircraft cables. An assistant is
recommended to complete the remaining steps.
Feed the aircraft cables through the cable clutches in
the canopy.
Evenly pull the aircraft cables up through the canopy to
raise the fixture to the desired length.
Cut off the excess aircraft cable leaving enough for fine
leveling later.
If necessary loosen the set screw in the strain relief and
feed the power cord from the fixture into the canopy
port.
2
1
2
2
2
3
2
4
NOTE:
The power cord does not support the fixture.
For a casual “lazy cord” look, cut the power cord
several inches longer that the drop height of the
fixture.
Once the desired look is determined, tighten the set
screw on the strain relief.
Mark the cord underneath the strain relief.
2
5
3A
CABLE
CLUTCH
AIRCRAFT
CABLE
STRAIN RELIEF
CANOPY
POWER CORD
3
1
SET
SCREW
4
3B
CORD
5
2
6
Note: If shortening the power cord, take note of the
fixture’s wire connection configuration before
removing the wire nuts. The same connection to
driver is necessary for the fixture to work correctly.
CANOPY
THUMB NUT
THUMB NUT
Remove the cross bar from the assembly by
unscrewing the two thumb nuts.
Mount the crossbar to the electrical box with the two
#8-32 screws.
CROSSBAR
ELECTRICAL
BOX
#8-32 SCREW
#8-32 SCREW
2B
2
2
2