2e 2d – LBL Lighting Alaya SP User Manual
Page 3
3
Adjust the fixture height by moving the clear cord and aircraft
cables up or down.
When the desired height is achieved, from inside mark the
clear cord right behind the threaded nipple for the strain relief
location.
MARKED
POINT
THREADED
NIPPLE
Feed the clear cord into the canopy so that the marked point
is exposed behind the canopy.
Loosen the strain relief screw
. Slide the
(Do Not Remove)
strain relief down the clear cord right above the marked point
and tighten the screw.
Slide the clear cord down so that the strain relief seats against
the threaded nipple.
For power connection, leave at least 6" of the clear cord
exposed behind the canopy.
Cut off the excess clear cord with a sharp cutter.
STRAIN RELIEF
MARKED POINT
THREADED
NIPPLE
To adjust the aircraft cables following steps 3 through 5 on
page 1.
Slide the conical caps up and screw them completely to the
cable grips.
Leave 6" of the aircraft cable exposed behind the canopy.Trim
off excess aircraft cable.
Back out
the slotted head screws on the
(Do Not Remove)
metal strain relieves and remove the cut out aircraft cables.
For each aircraft cable exposed behind the canopy, feed the
aircraft cable from one strain relief hole, then loop it and feed
it through the other hole.
Tighten the slotted head screws.
CONICAL
CAP
SLOTTED
HEAD SCREW
METAL
STRAIN
RELIEF
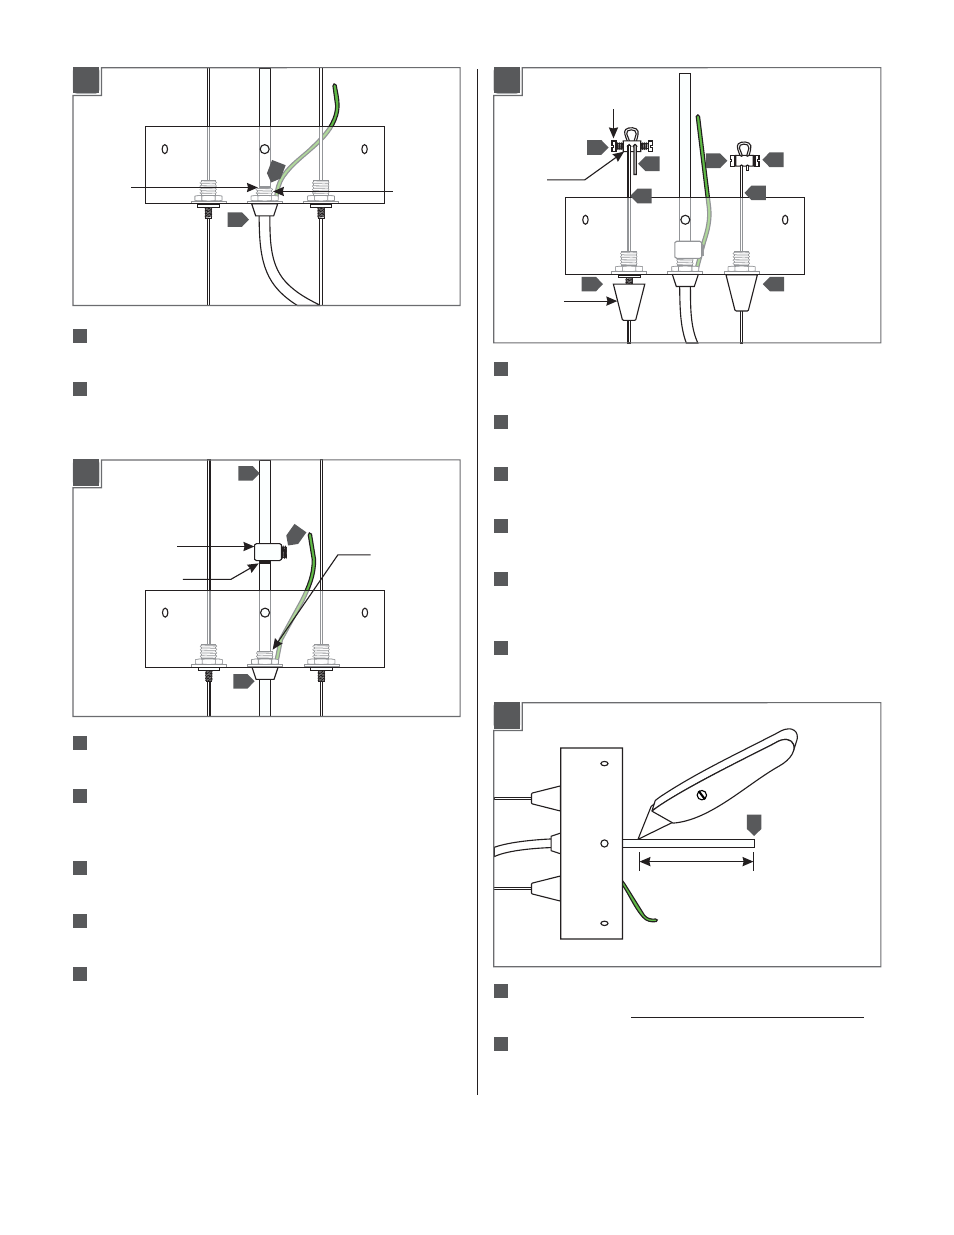
4"
From the end of the clear cord, strip the outer insulation 4"
using a sharp knife.
Make sure not to nick the inner wires.
Strip 1/4" of insulation from the inner insulated wires. The
bare inner wire is the ground wire.
2C
6
2E
2D
7
8
9
10
11
12
13
14
15
16
17
18
2F
19
20
19
9
11
8
18
18
15
14
14
15
17
16
6
7