6 trying out a keypad – Matrix Orbital GLK24064-25 Legacy User Manual
Page 6
GLK24064-25 rev. 06
6
1.5.1 Here's what to do:
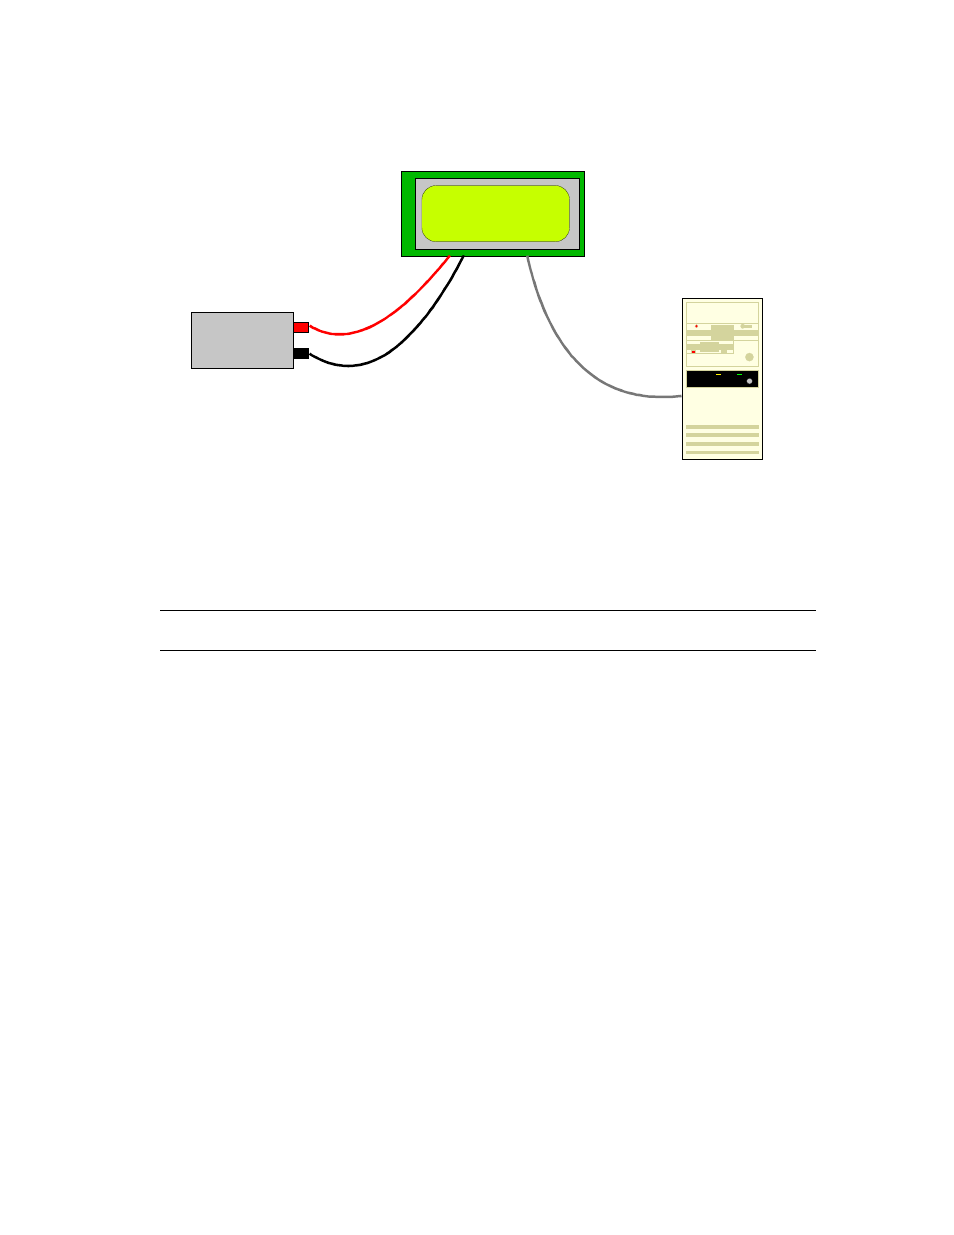
+5V power
GLK24064-25
PC
Figure 1-2 Connections for Testing
1. Refer to the diagram above for the following steps.
2. Wire the connector to the power supply. On most connectors the RED lead will go to +5V and the
BLACK lead to GND. Important: Do not connect the GLK24064-25 to a "spare" floppy drive
power lead in the PC. The wiring is not correct and the GLK24064-25 will be damaged.
Note: The manufacturer's warranty is void if the unit is subjected to over-voltage or reversed
polarity.
3. Connect the GLK24064-25 to the PC using the serial cable and adapter if required.
4. Connect the power connector, making sure that the +5V goes to V+ as shown in the diagram. Turn on
the power: the LCD backlight should come on.
5. Use the mogd.exe program to exercise some of the features of the GLK24064-25 to make sure
everything works properly.
6. To experiment with typing text, run a PC terminal program, such as Hyperterm. Make sure it's
configured to use the correct port. Set the baud rate to 19,200.
If you type characters on the keyboard, they should now appear on the GLK24064-25 screen. Note that CR,
backspace, etc., won't have any effect. Text will wrap around to the next line when you reach the end of a
line.
If you've reached this point and operation is normal, you can be confident that your GLK24064-25 works
properly.
1.6 Trying out a Keypad
Since a number of different keypad types can be connected to the GLK24064-25, the results you get may be
a little unpredictable. At this point all we need to do is make sure that your keypad and interface work, and
possibly generate an ASCII map for your programming needs.