Waterloo F1526A2 User Manual
Page 5
5
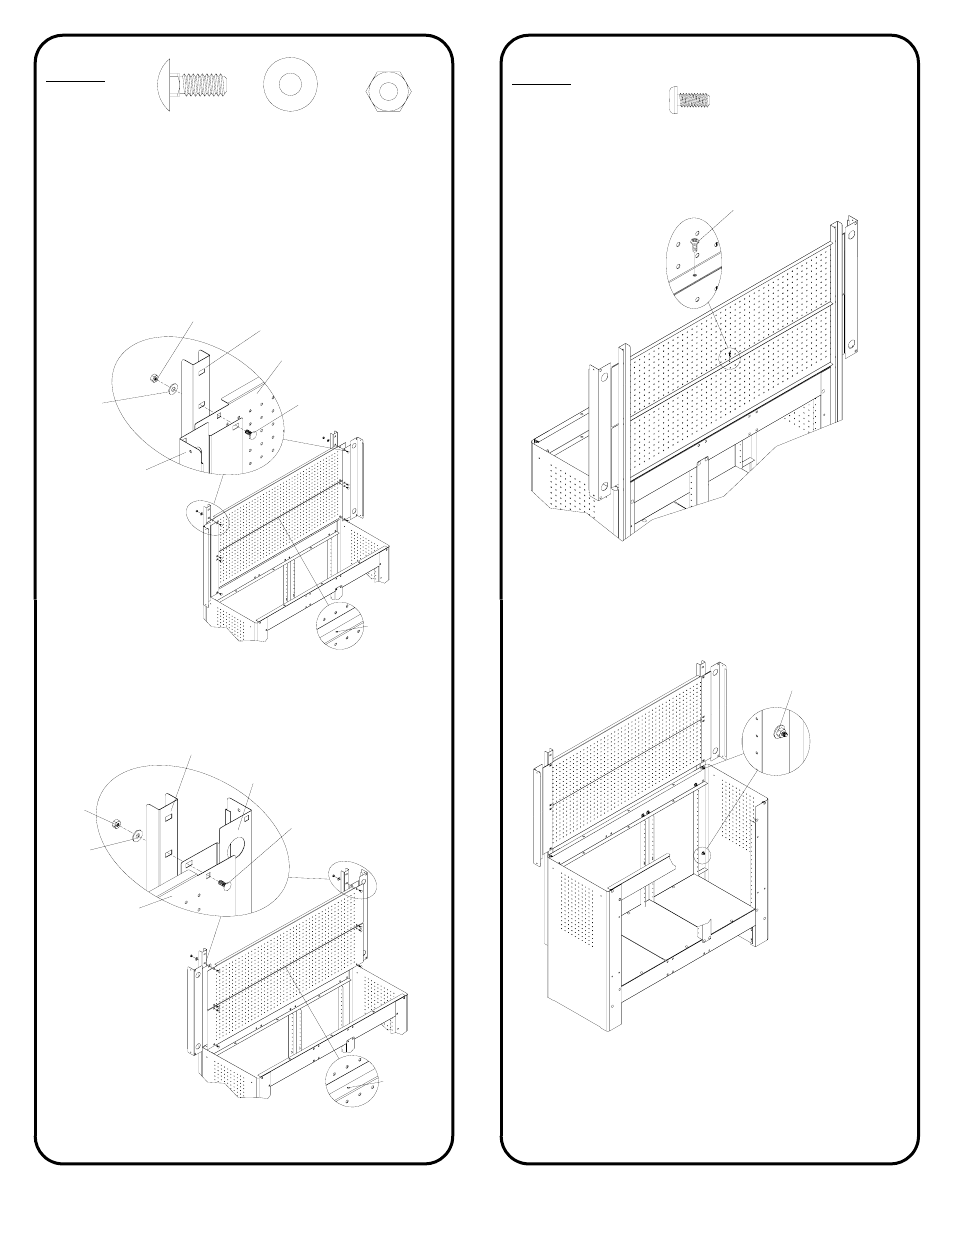
CC(1)
STEP 3:
• Install (1) CC in flanges of (2) B.
CC
Back of workbench
• Wrench tighten fasteners from step 1.
Fasteners from
step 1
AA(8)
EE(8)
FF(8)
Flanges
with holes
together
B
AA
EE
A
FF
C
Flanges pointed
forward
OPTION 1:
• Attach (2) C and (2) B to (2) A, as shown, using (8) AA, (8)
EE and (8) FF.
• Finger tighten.
Flanges
with holes
together
AA
EE
FF
A
C
Flanges pointed
back
B
OPTION 2:
• Attach (2) C and (2) B to (2) A, as shown, using (8) AA, (8)
EE and (8) FF.
• Finger tighten.
STEP 2:
Note: Option 1 shows mounting the backwall to a workbench
with a 54 inch top. To mount the backwall to a workbench with
a top that is larger than 54 inches wide, go to option 2.