2 how to install the camera, 3 how to install the heater, 4 how to install the blower – Videotec HEB User Manual
Page 7
EN - English - I
nstruc
tions manual
5
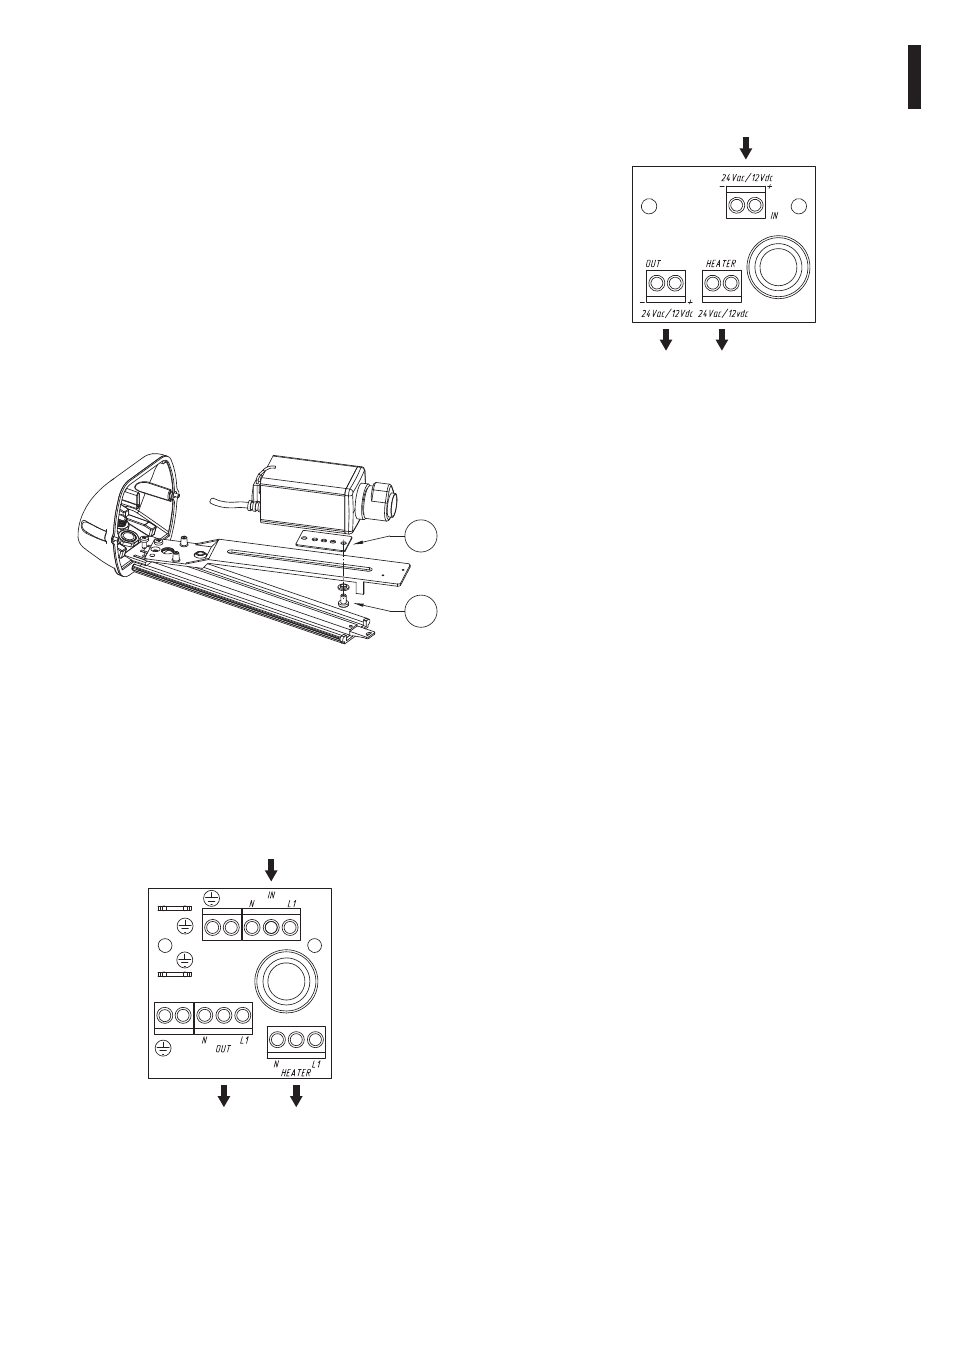
• Version 12Vdc/24Vac - When the power supply
voltage is 24Vac the circuit will be connected by
the terminals shown in the diagram.
IN 12Vdc/24Vac
Camera OUT
12Vdc/24Vac
Heater OUT
12Vdc/24Vac
Fig. 05
Re-set the slide in the working position and close the
housing.
6.1.3 How to install the heater
The power input of the heater kit can be 12Vdc/24Vac
or 115/230Vac. A blower can be installed only if
feeded with 12Vdc/24Vac.
6.1.4 How to install the blower
The power input of the blower kit can be 12Vdc,
24Vac or 230Vac. The blower kit cannot be mounted
with camera power supply.
6.1.2 How to install the camera
This chapter describes how to install the camera
into the housing. We wish to remind our customers
that power supply can be drawn from the circuit, if
available, after checking that the right supply voltage
is used.
Remove the body by unscrewing the 2 screws placed
on the rear cover plate.
Remove the screw of the internal slide opposite the
side with earth connection, in order to have access to
the lower part of the slide.
Fix the camera by interposing the insulating washer
between the 1/4” screw and the lower part of the
slide; set the insulating spacer (01) between the
camera and insulating spacer (02) in the upper part
of the slide, tighten the 1/4” screw and position the
camera wherever wished.
01
02
Fig. 03
If necessary use the spacers for a proper positioning
of the camera and of the zoom lenses.
Make the necessary electrical connections:
• Version 230Vac - When the power supply voltage
is 230Vac the circuit will be connected by the
terminals shown in the diagram.
IN 115/230Vac
Camera OUT
115/230Vac
Heater OUT
115/230Vac
Fig. 04