Installation – Martin Sprocket & Gear Bucket Elevator Safety User Manual
Page 9
Installation
5
JB. Move boot take-up to its uppermost position (head end take-up to lowest position.) Make these adjustments uniformly to
both sides at the same time. Many bearings will not accommodate much misalignment. Severe damage to internal bearing
parts and seals can occur if this procedure is not followed.
KB. It is recommended, especially in cool environments, that the belt be draped over the head pulley and allowed to hang for at
least 24 hours. This will relieve stresses resulting from being rolled up and tend to achieve initial stretch common to belting.
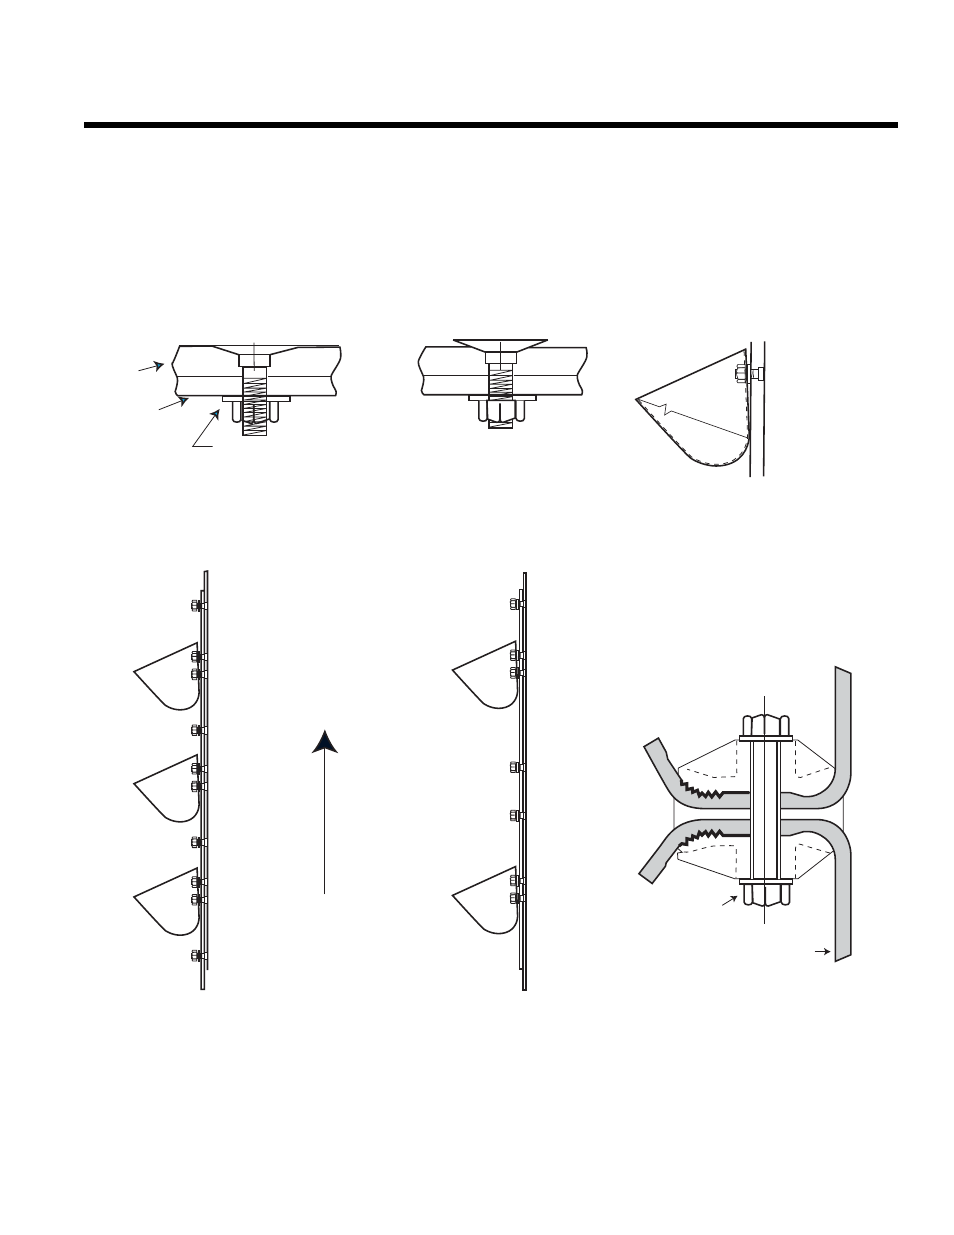
ATTACHING BUCKETS TO ELEVATOR BELTS
If rubber covered belt with unequal thickness covers is used, the thicker cover should be installed on the pulley side.
LAP JOINT
BUTT JOINT
CLAMP SPLICE
LB. Select the type of splice to be used from illustrations above.
MB. Clamp belt several feet from both ends using clamping angle irons and pull ends until a snug tension is achieved. Splice belt
by installing elevator bolts, nuts, and washers. Often it is desirable to add one or more rows of additional bolt holes between
buckets in the splice area. This is accomplished by drilling the holes while the belting is clamped in the pretensioned condi-
tion. If clamp splice is used follow instructions supplied with clamps.
PROPER
IMPROPER
SPACER WASHER
(OPTIONAL)
FLAT WASHER
WITH PLASTIC BUCKETS
BELT
BUCKET
F
L
O
W
End Piece #1
End Piece #2
Center Piece
PVC
or
Rubber Belt
1/2" Diameter
4" Long
Grade 5 Bolt
Anti Self-Locking
Nut
Center Piece