Slider bracket assembly instructions, Use these and other zoo med products – Zoo Med Deluxe Slider Hood User Manual
Page 2
LAMP INSTALLATION:
Check to make sure that the fixture is unplugged before installing lamps.
To install the lamps, first remove the mesh cover by removing the two
small screws near the bottom of the back side of the hood. For the linear
fluorescent lamp such as
Zoo Med’s Reptisun
®
5.0 or 10.0 UVB lamps;
fully insert the pins on the ends of the lamp into the slots on the lamp hold-
ers, and then rotate the lamp 90 degrees. For the incandescent lamps fully
insert the lamp into the fixture.
Note: Be sure to record the date of first use
on the linear fluorescent, and replace lamps annually. Replace the mesh
cover and attach the screws.
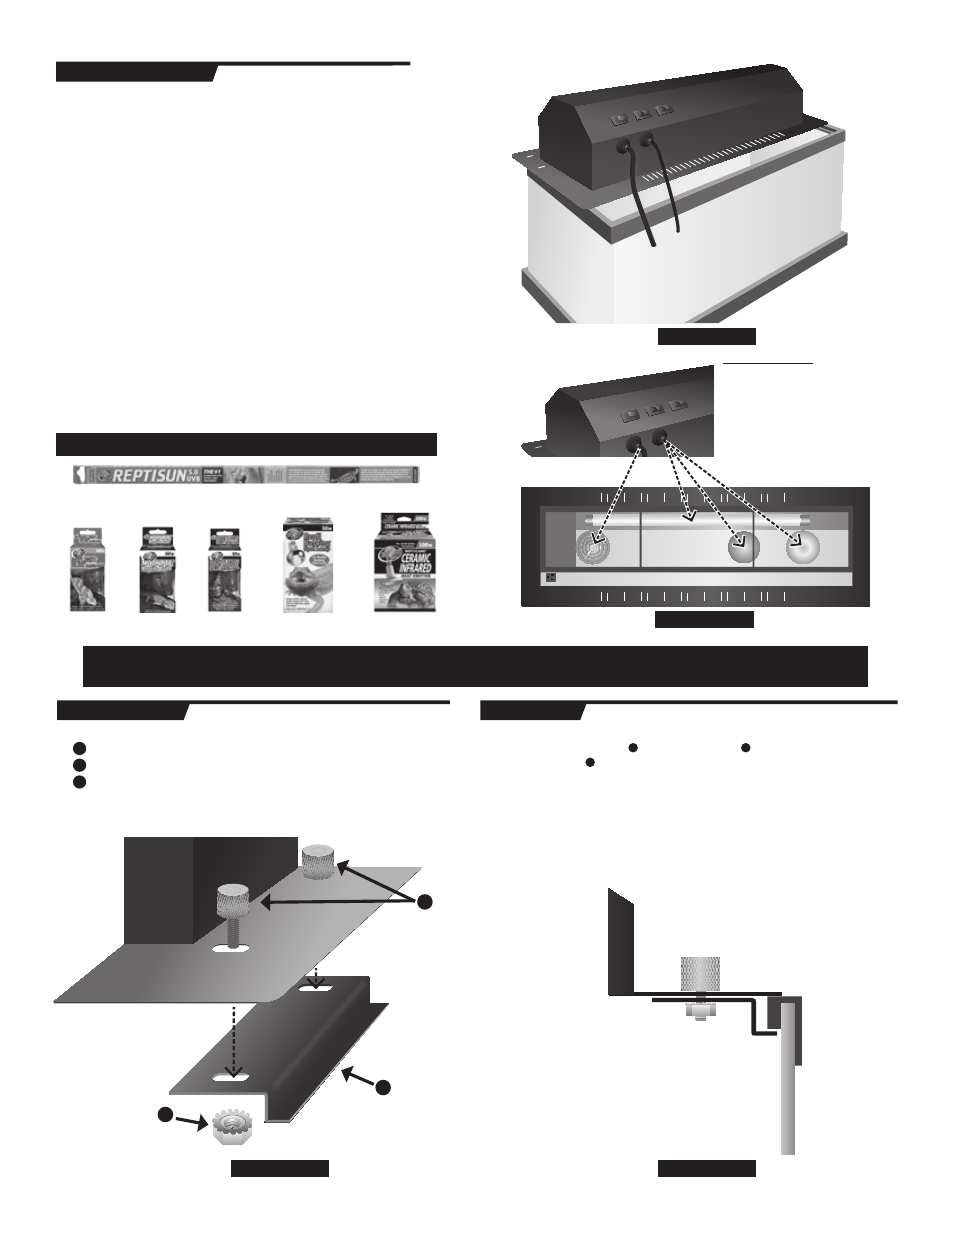
Note:
The Slider Hood is equipped with an independent rocker switch for each
individual fixture. Toggle the switch to turn the lamps on or off.
The Slider Hood is equipped with two power cords. The left power cord
powers the far left incandescent fixture
(see figure 4). This incandescent
fixture can be used for 24 hour or nighttime heating lamps such as
Zoo
Med’s Repticare
®
Ceramic Heat Emitters. This can also be used with a
thermostat such as
Zoo Med’s ReptiTemp
®
500R, which allows for
thermostatic control of heat sources. The right power cord powers the
fluorescent fixture as well as all the remaining incandescent fixtures
(see
figure 4). These fixtures can be used with daytime and basking lights. This
allows for daytime and basking lights to be connected to a timer.
Left power cord powers the
left incandescent socket
Right power cord powers
remaining incandescent
sockets
HARDWARE LIST:
ITEM
DESCRIPTION
AMOUNT
Slider Bracket
2
K-Lock Nut
4
Thumb Screw
4
DIRECTIONS:
(FIGURE 5)
1. Using two Thumb Screws , attach Slider Bracket to the underside of Slider Hood
using K-lock nut .
Do not fully tighten Thumb Screws!
(FIGURE 6)
3. Place Slider Hood on the tank, fitting the Slider Bracket under interior lip of plastic
tank frame.
4. Repeat steps 1 & 2 for other side of hood.
5. Adjust brackets for a snug fit against tank frame by pushing bracket outward and
tighten nuts. Properly adjusted, the hood will be centralized on the tank and should
slide back smoothly.
SLIDER BRACKET ASSEMBLY INSTRUCTIONS
USE THESE AND OTHER ZOO MED PRODUCTS
FIGURE 6
FIGURE 3
FIGURE 4
ReptiSun
®
5.0 UVB
ReptiCare
®
Ceramic
Infrared Heat Emitters
Repti Basking
Spot Lamp™
Daylight Blue™
Reptile Bulb
Nightlight Red™
Reptile Bulb
Moonlite™
Reptile Bulb
C
A
C
A
B
B
FIGURE 5
C
A
B