Hawkeye Gauge Board Decal Application User Manual
Page 2
Hawkeye Industries Inc.
2
Gauge Board Decal Application Complete
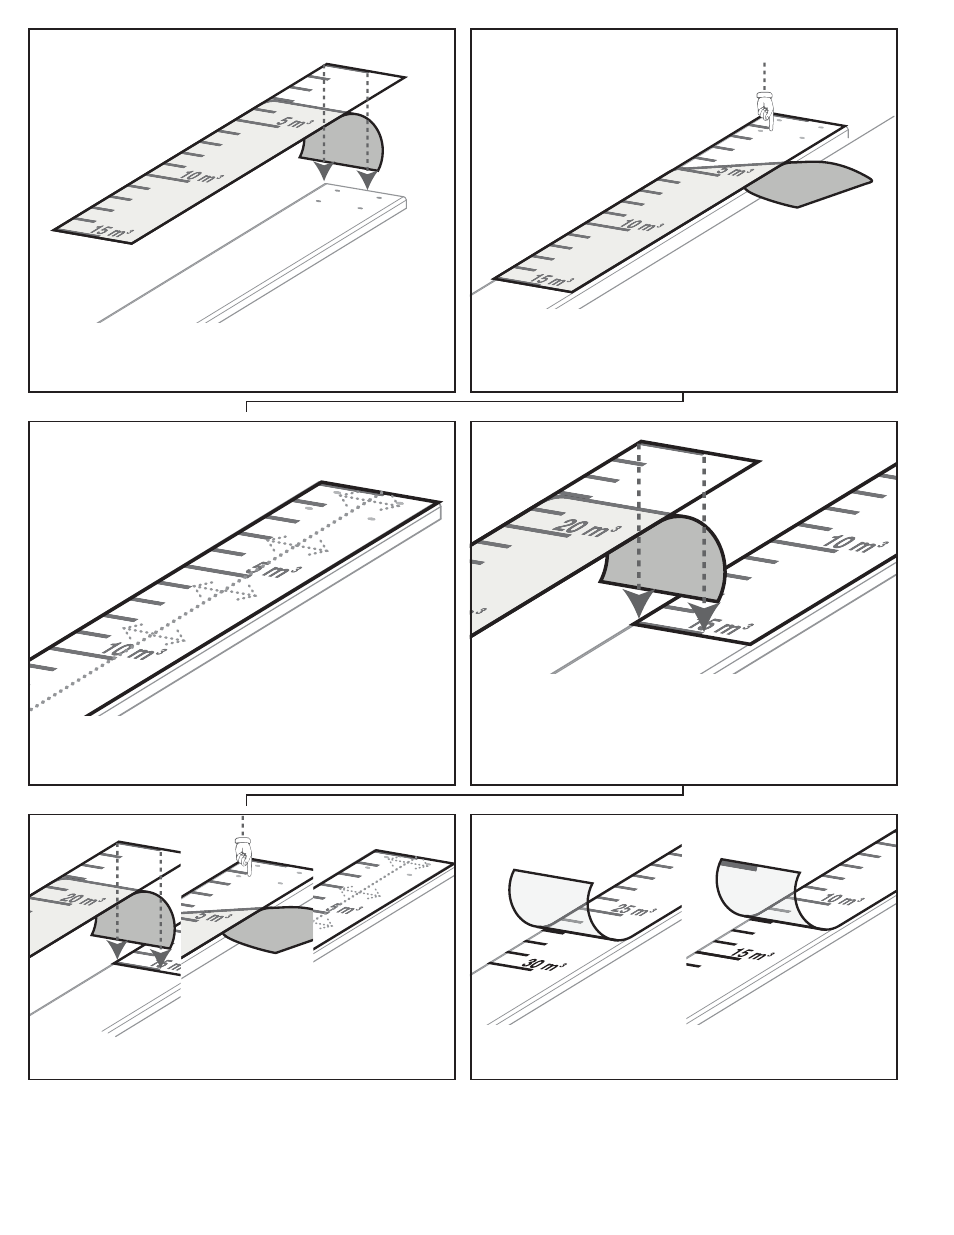
5.)
Place the top tick flush with the top and left sides of the gauge board sur-
face. Press the decal and pre-masking tape firmly in place
6.)
Gradually peel the backing off while aligning the left of each tick with the
left of the gauge board surface and pressing the decal and premask firmly
in place.
PRESS DECAL + PREMASK
TO SURFACE
7.)
Once the backing is completely removed, use the hard squeegee to press
the decal and premask in place. Starting along the centreline, drag the
squeegee towards the edges to work out any trapped air bubbles.
8.)
Subsequent decal sections come with an extra tick for alignment. When
adding the next decal sections, peel the back per step 5, and align the top
tick of the next decal section so it overlaps completely the bottom tick on
the previous decal section. Ensure the top tick from the next section is
applied to the premask.
10.)
Carefull peel off and discard the premask. Duplicate ticks will come off
with the tape.
9.)
Repeat steps 6 - 8 until all decal sections have been applied.
►
►
►
►
►