Agri-Fab 45-02102-101 User Manual
Page 8
8
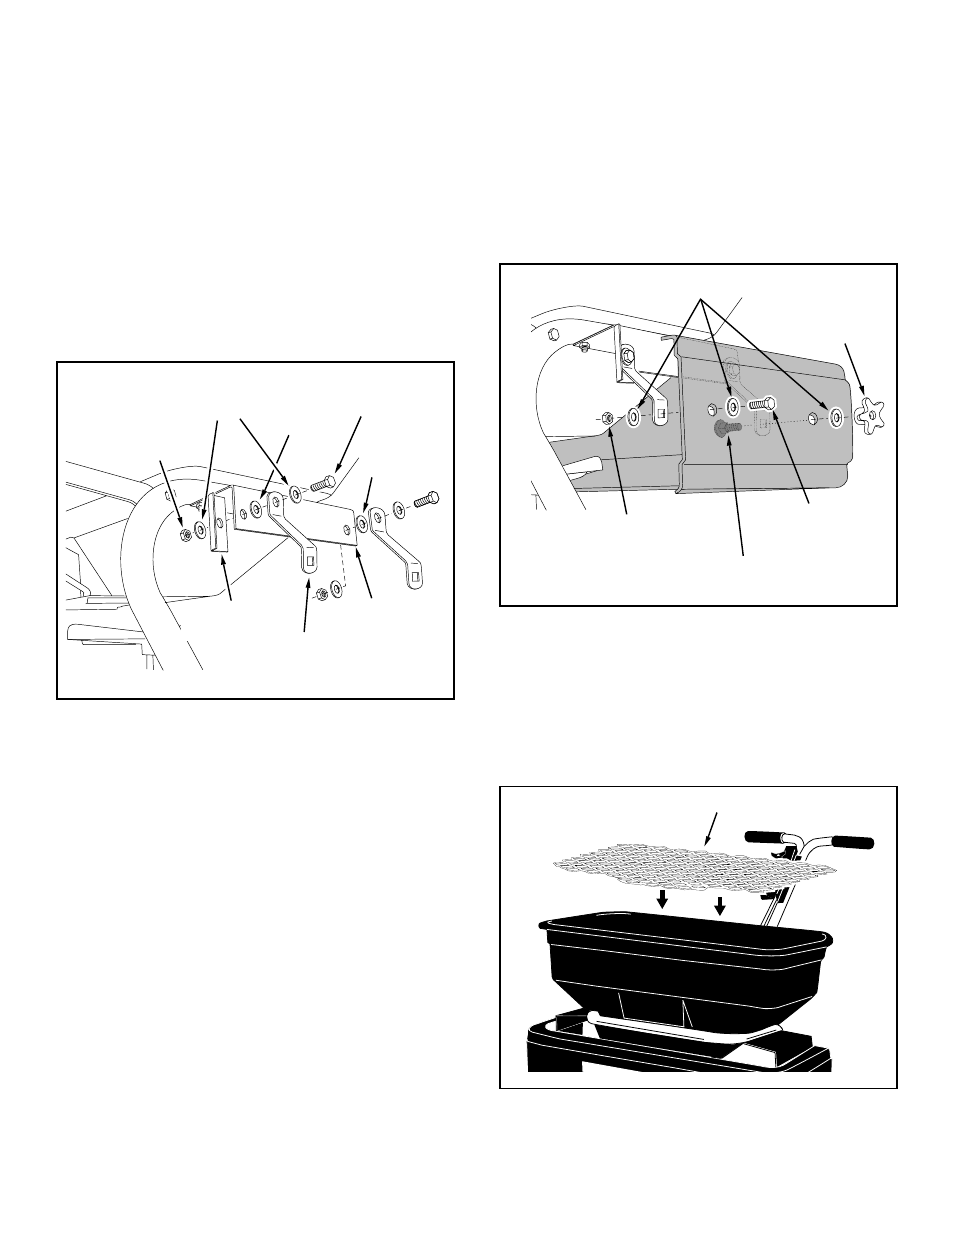
26. Assemble the spreader shield to the front swivel
brackets using two 1/4" x 3/4" carriage bolts, 5/16"
washers and the two 1/4" plastic knobs. See figure
14.
27. Assemble the spreader shield to the rear swivel
brackets using two 1/4" x 3/4" hex bolts, four 5/16"
washers and two 1/4" hex lock nuts.
Tighten
the
locknuts so that the swivel bracket can still pivot
freely. See figure 14.
28. Place the hopper screen down into the hopper
to help break up clumpy material and to prevent
large clumps from reaching the bottom of the
hopper and clogging the opening. See figure 15.
24. Attach an angle stop bracket and a swivel bracket
to the rear hole in the R.H. shield bracket using
a 1/4" x 3/4" hex bolt, two 5/16" washers, a ny-
lon washer and a 1/4" hex lock nut. Place the
angle stop bracket on the inside and the swivel
bracket on the outside.
Tighten
the locknut so
that the swivel bracket can pivot freely. See fig-
ure 13. Repeat step on L.H. shield bracket.
25. Attach a swivel bracket to the front hole in the
R.H. shield bracket using a 1/4" x 3/4" hex bolt,
two 5/16" washers, a nylon washer and a 1/4"
hex lock nut.
Tighten
the locknut so that the
swivel bracket can pivot freely. See figure 13.
Repeat step on L.H. shield bracket.
SWIVEL
BRACKET
ANGLE STOP
BRACKET
1/4" x 3/4"
HEX BOLT
5/16"
WASHER
1/4" HEX
LOCK NUT
NYLON
WASHER
SHIELD
BRACKET
NYLON
WASHER
1/4" x 3/4"
HEX BOLT
5/16" WASHER
1/4" LOCK NUT
PLASTIC
KNOB
1/4" x 3/4"
CARRIAGE BOLT
SHIELD
UP
HOPPER SCREEN
FIGURE 14
FIGURE 15
FIGURE 13