Vaisala TCI101 NiteStar User Manual
Page 20
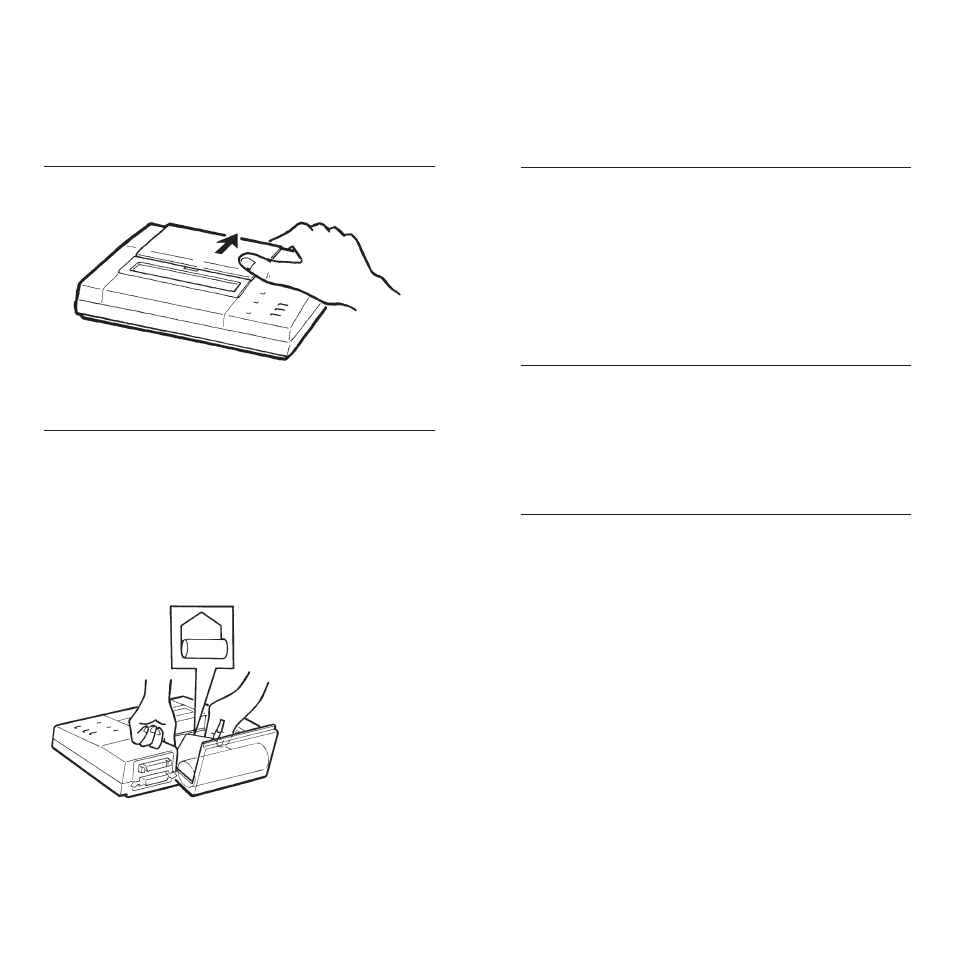
OPENING THE PAPER HOLDER
STEP 1 : Using your thumb, pull paper holder cover towards back
of the printer. (Unlock it.)
STEP 2 : Lift cover upwards.
When closing and locking the paper holder cover, follow the
above instructions in reverse
LOADING THE PAPER
STEP 1 : Turn on power switch.
STEP 2 : Cut the paper in an inverted V (see figure)
STEP 3 : Open paper holder cover.
STEP 4 : Push top of paper into inlet, and feed it by hand until you
can see top of paper from paper cutter. The paper is easier to feed
if placed on the cover.
STEP 5 : Keep pressing the paper feed switch until the paper
feeds straight and smoothly. When the paper is correctly set, the
off line lamp stops flashing and stays lit instead.
NOTE : Red lines appear on both sides of the paper when paper is
about to run out. The outside of the thermal paper is at the front.
36
PRINTER SPECIFICATIONS (DPU-414)
Printing Method: Thermal serial dot
Character: 9 high x 8 wide dot matrix
Columns: 40
Printing Direction: unidirectional, bi-directional logical seek
Total number of dots: 8 x 320 dots / line
Printing Direction: unidirectional
Bi-directional logical seek
Printing width: 89.6mm
Printing speed: 37.5 cps
External Dimensions: 162 x 240 x 58.5 mm
Mainframe weight: 950g
PAPER
Jujo Paper Co. TP411-28CL
Paper width 112 mm, roll diameter 48mm, roll length 28m
OPERATING CONDITIONS
1. Operating temperature and humidity 0-40°C, 30-85% RH
2. Storage temperature and humidity -20-60°C, 5-90% RH
This section was an overview of the DPU-414 and contains enough information
to conduct a typical survey using the Nitestar. For more detailed information
about the DPU-414 please refer to the Printers Operation Manual.
TROUBLESHOOTING
If your Nitestar DMI appears to be inoperative, the following steps
should be taken in order to determine if you have an installation
problem, a sensor problem or an instrument problem.
1. Both +12 Volts and Ground to the terminal block MUST be
obtained directly from the vehicle’s battery terminals. Check to
make sure your black & red wires are connected direct to the
vehicle battery. (Remember the In Line Fuse is required). Always
wear safety goggles and protective clothing.
2. Make sure power is going to the instrument by checking with
a meter or continuity tester. Refer to the Operating Manual,
Installation Procedures which will show the pin’s location. If you
do not have power, check for a loose connection or blown fuse.
Always wear safety goggles and protective clothing.
3. Plug in the Nitestar and turn it on. It should begin its Self-
Check, when completed (0) should be displayed in the Speed &
Count windows. COUNT HOLD will flash in the function window.
37