Maxsa Innovations Solar-Powered 30 Watt Motion-Activated Outdoor Security Floodlight User Manual
Page 3
6
3
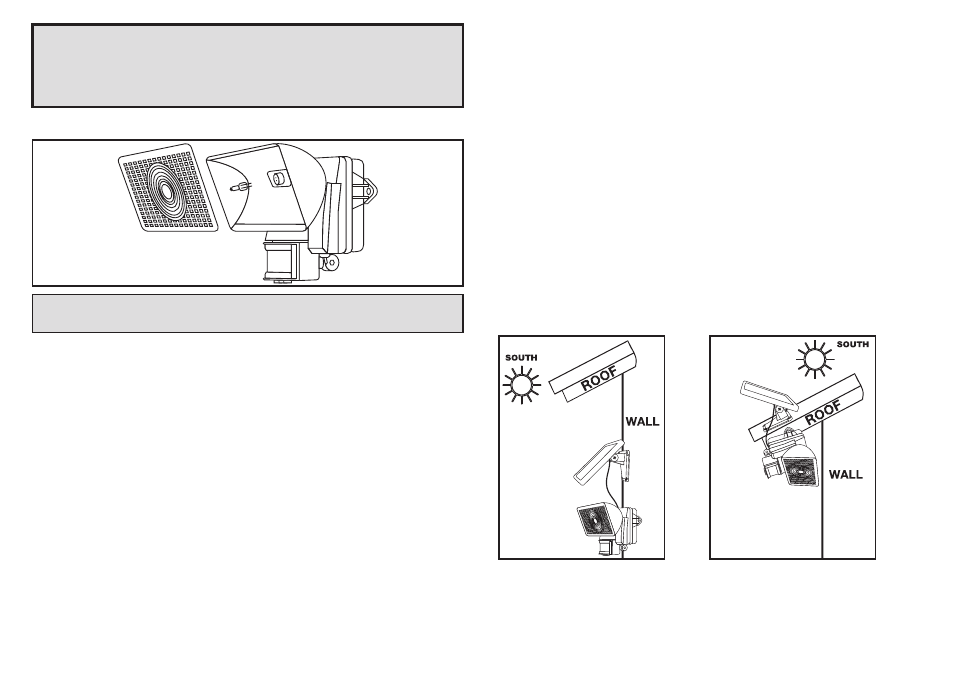
CHOOSING A LOCATION FOR YOUR SOLAR SECURITY LIGHT
This Solar Security Light comes complete with a solar cell charge panel attached to a 15
foot power cord. For optimum sun exposure and longer light output, place the solar
panel, when attached to the Security Light, in a position that receives at least 6-8 hours
of direct sunlight per day. Ideally, it should face south. Placing the solar cell charge
panel in a shaded location will not allow the battery to charge fully. This will reduce the
number of hours the Solar Security Light will operate per evening. In choosing a location
for your Solar Security Light, ensure that the solar cell charge panel is not placed near
night time light sources such as porch lighting or street lighting.
This Solar Security Light is ideal for areas where electricity is not available, including
driveways, carports, garages and entrance doors, for safety and security around your
home. In addition to the safety and security benefits of this Solar Security Light, it can
also be used for convenience lighting and is ideal for use on backyard sheds, farm
sheds, RV's and other remote areas where electricity is not available.
When deciding where to mount the light, keep in mind that the motion sensor that
activates this light has a field of vision of 180˚ (horizontal) at a distance of 40 feet when
the surrounding temperature is 75˚ F.
HOW TO INSTALL YOUR SOLAR SECURITY LIGHT
1. Mount the Security Light onto a solid surface, using the two (2) wood/sheet metal
screws supplied. You may mount the Security Light vertical or more horizontal.
2. Use the four (4) wood/sheet metal screws supplied to mount the solar cell charge
panel onto a solid surface. You can adjust the angle of the solar cell by gently rotating
the solar cell to a different locking position. Remember to face the panel south for
direct sunlight exposure.
REPLACING THE 30 WATT HALOGEN BULB
1. Turn the power switch to the OFF position and wait for the light to cool down.
2. Remove the light cover using a small flat head screwdriver.
3. Gently remove the old bulb, taking care and ensuring that the bulb is cool to touch.
4. Using a clean soft cloth or tissue, replace the bulb with a new 30W halogen bulb by
inserting the prongs into the holes. DO NOT TOUCH THE HALOGEN BULB DIRECTLY
WITH FINGERS SINCE ANY OIL OR DIRT WILL DAMAGE THE BULB.
5. Replace the light cover back onto the main unit.
6. Turn the power switch to the AUTO position.
MAINTENANCE TIPS
To keep your Solar Security Light looking new, keep the lens free of dust and deposits by
wiping occasionally with a dry cloth or with warm soapy water if necessary.
Importantly, ensure that the solar cell charge panel is kept free of dirt and debris at all
times. A dirty solar panel will not allow the battery to fully charge and this will shorten
the life of the battery and may cause the light to malfunction.
STORAGE
If you wish to store your light indoors for more than two or three days, turn the power
switch to the OFF position to prevent damaging the battery. Battery capacity may be
reduced during prolonged storage. For optimal performance, we recommend that you do
not store your Solar Security Light for prolonged periods of time.
NOTE: Do not dispose of battery in general household trash or into a fire since the
battery may explode. Consult your local regulations for correct disposal of
batteries. The battery may also be returned to MAXSA Innovations at 8412
Cathedral Forest Dr., Fairfax Station, VA 22039. Do not take apart the battery
since it contains corrosive chemicals.
NOTE: Bulb gets hot. Do not touch. Wait for the bulb to cool and use a clean soft
cloth to remove or change the bulb.