Maxsa Innovations LED Shed Light User Manual
Maxsa Innovations Lighting
Model #: 40440
IMPORTANT:
Read all instructions carefully before use.
ASSEMBLY AND INSTRUCTION GUIDE
Light up the inside of your shed. See better. Find what you need.
Your MAXSA Solar Powered Shed Light converts sunlight into
electricity during the day, enabling you to have light in your shed at
night by simply pulling on a cord. With this light, searching for tools in
the dark will no longer be a problem. You can also save the environ-
ment by conserving energy with this Solar Powered Shed Light
Your Solar Powered Shed Light can light for up to 5 hours when the
battery is fully charged. The 3 sealed rechargeable Ni-MH batteries
included with this product should last for many years before they
need to be replaced.
Carefully remove and identify all the parts from their protective
packaging and lay them out in front of you.
ABOUT YOUR SOLAR SHED LIGHT
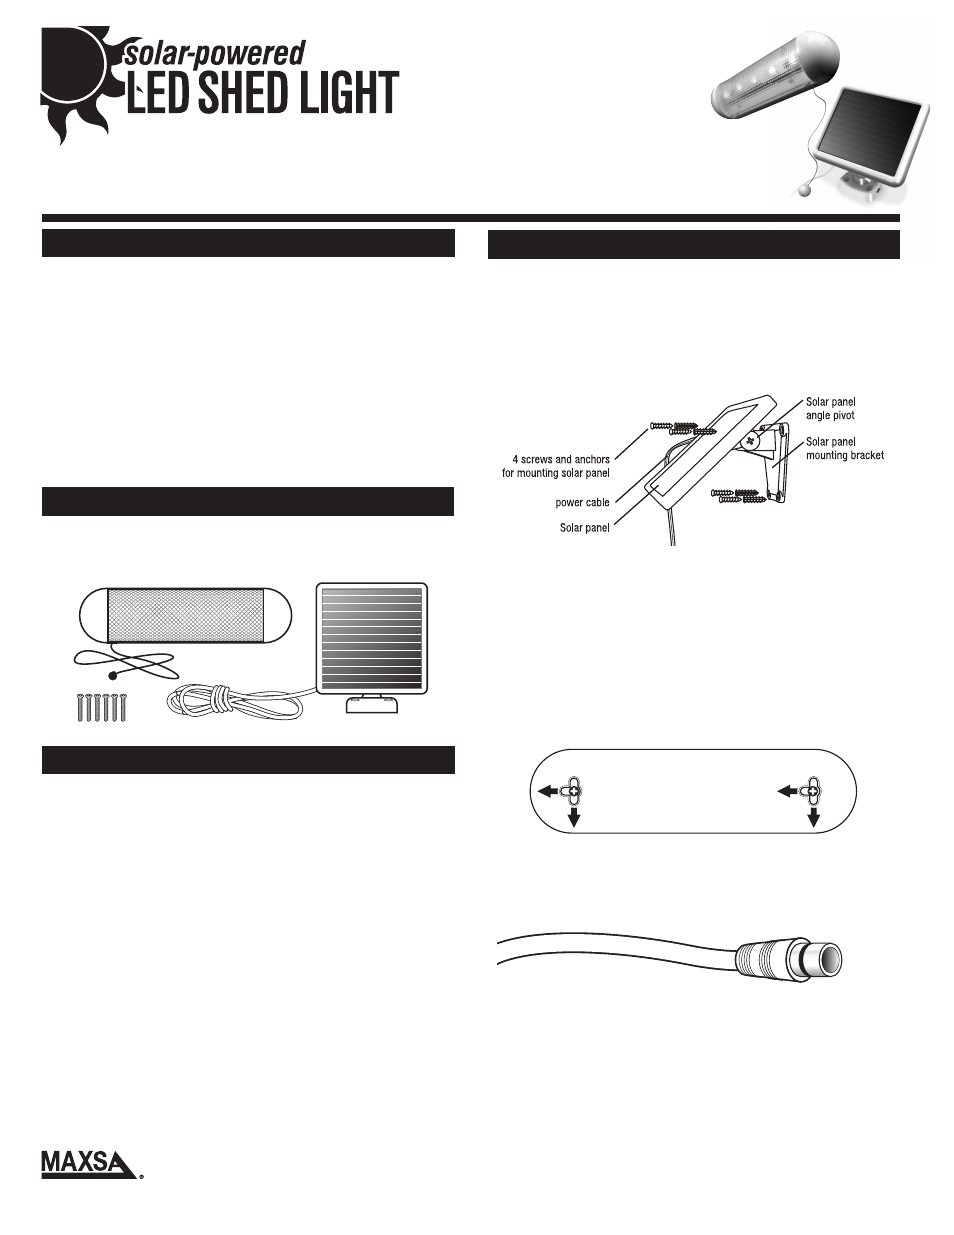
Your Solar Powered Shed Light comes complete with a solar panel
and a 14-foot power cord. For optimum sun exposure and longer light
output, place the solar panel where it will receive 6-8 hours of direct
sunlight per day. Mount the solar panel with the enclosed screws.
Placing the panel in a shaded location will not allow the batteries to
charge fully, reducing the number of hours the light will operate per
evening.
CHOOSING A LOCATION
Page 1
Carefully remove and identify all the parts from their protective
packaging and lay them out in front of you.
INCLUDED PARTS
MOUNTING THE SOLAR PANEL
Use the four wood/sheet metal screws supplied to mount the solar
panel onto a solid surface. The solar panel is fully adjustable in all
directions, simply and gently rotate to the desired locking position.
Remember to mount the panel facing South, which will maximize the
direct sunlight exposure.
MOUNTING THE LIGHT TO A WALL OR CEILING
The light must be installed inside the shed or in a place protected
from rain or snow. Once you have a suitable location, estimate where
the two holes on the back of the light would be on the wall or any
mounting surface. Use a marker to mark these two spots. You now
have the spots where the screws will go. After the screws are
secured in place, gently fit the holes on the back of the light so that
the screws keep the light stable and secured.
The Solar Powered Shed Light is equipped with pull-on/off switch.
For best performance, ensure that the Shed Light is OFF when not in
use.
Now that you have had all parts in place, connect the solar panel to
your Solar Powered Shed Light by plugging the cord into the outlet
on the bottom of the Solar Shed Light. Firmly press the cord into the
outlet to ensure a tight connection.
HOW TO INSTALL
BACK OF LIGHT
Fit screwheads into openings
and slide into place to secure.