Wixey WR365 Digital Angle Gauge User Manual
Page 2
2
Proper Measuring
1. Set the gauge flat on a reference surface such as a table saw, miter saw,
or jointer table. On a band saw or drill press the blade or bit will be the
reference surface. Keep the back of the gauge in a plane perpendicular to
the surface being measured. FIG 6
2. Turn on and press the ON/ZERO button to set the gauge to 0.0 degrees
which calibrates the reference surface.
3. Attach to the saw blade or jointer fence using the imbedded magnets. The
back of the gauge must always be kept in the same plane perpendicular to
the reference surface for all measurements. FIG 7
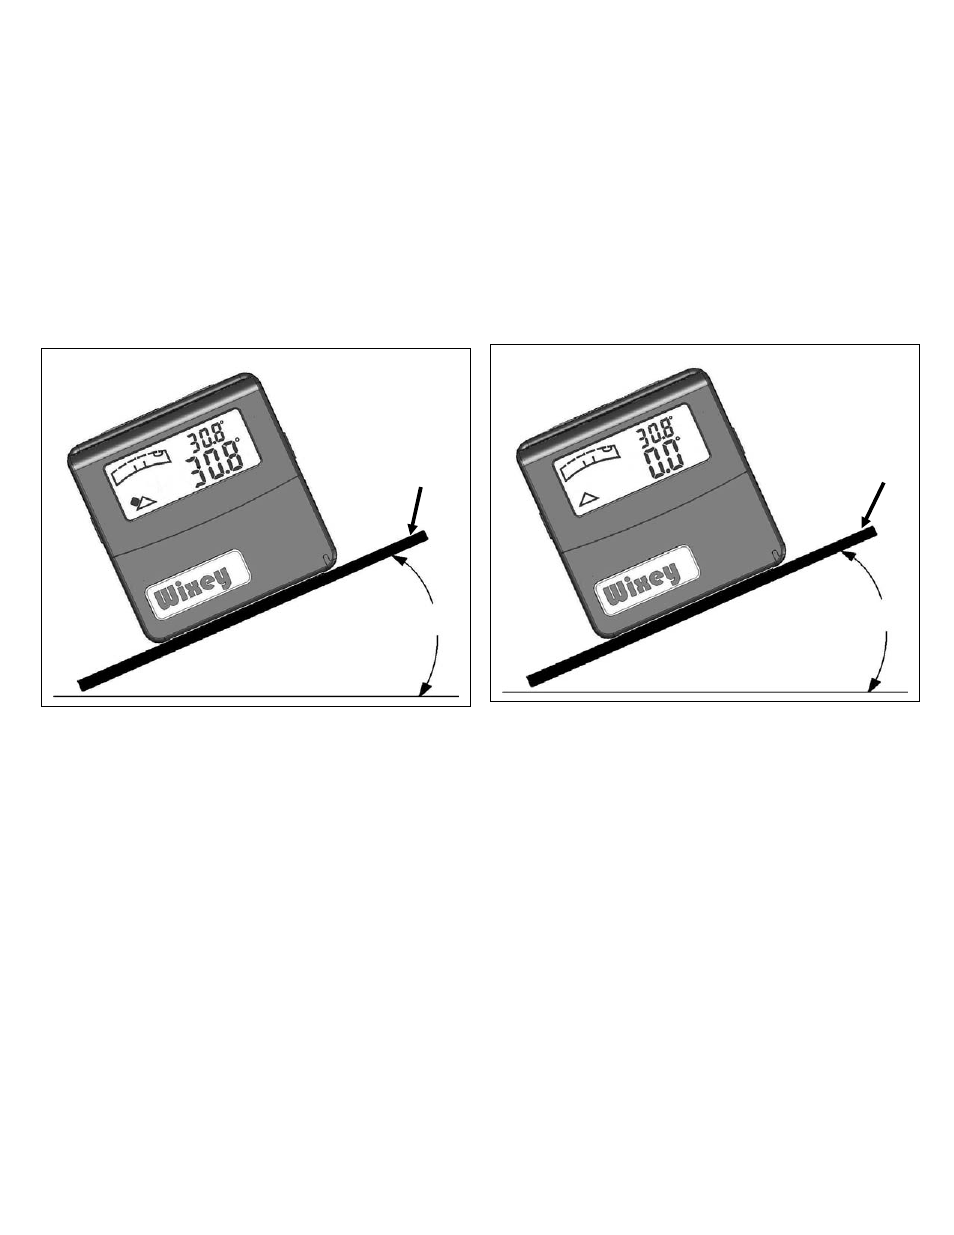
Level surface
30.8°
Reference
surface
If the relative angle has been set to 0.0 on a level
surface and then placed on a non level reference
surface, both the relative angle measurement and
the Dead Level
TM
display will be the same FIG 4
FIG 4
Level surface
30.8°
Reference
surface
Pressing the ON/ZERO button calibrates the
relative angle to the reference surface and
displays 0.0. The Dead Level
TM
display
continues to measure the FIG 5
FIG 5