Installation of the ac chassis and dc chassis, Ac side dc side – Outback Power Systems FLEXware 500 Users Guide User Manual
Page 11
T M
T M
11
Plastic bushing,
DC side
Figure 11: DCA bushing
Note: The DCA will be held firmly in place when the DCC (FX cover) is secured at the end of the
installation.
To install an ACA:
• Follow the separate ACA instructions for mounting to the FX.
• Line each ACA up with its conduit hole in the AC chassis.
• When aligned, move the AC chassis snug against the ACAs after the ACA installations.
• Press a 1” plastic bushing from inside the AC chassis out to the ACA through each previously
removed knockout, sliding the AC chassis against the ACAs until snug.
• Install two M5 X 25mm screws (provided in ACA hardware kit) in each ACA and tighten securely.
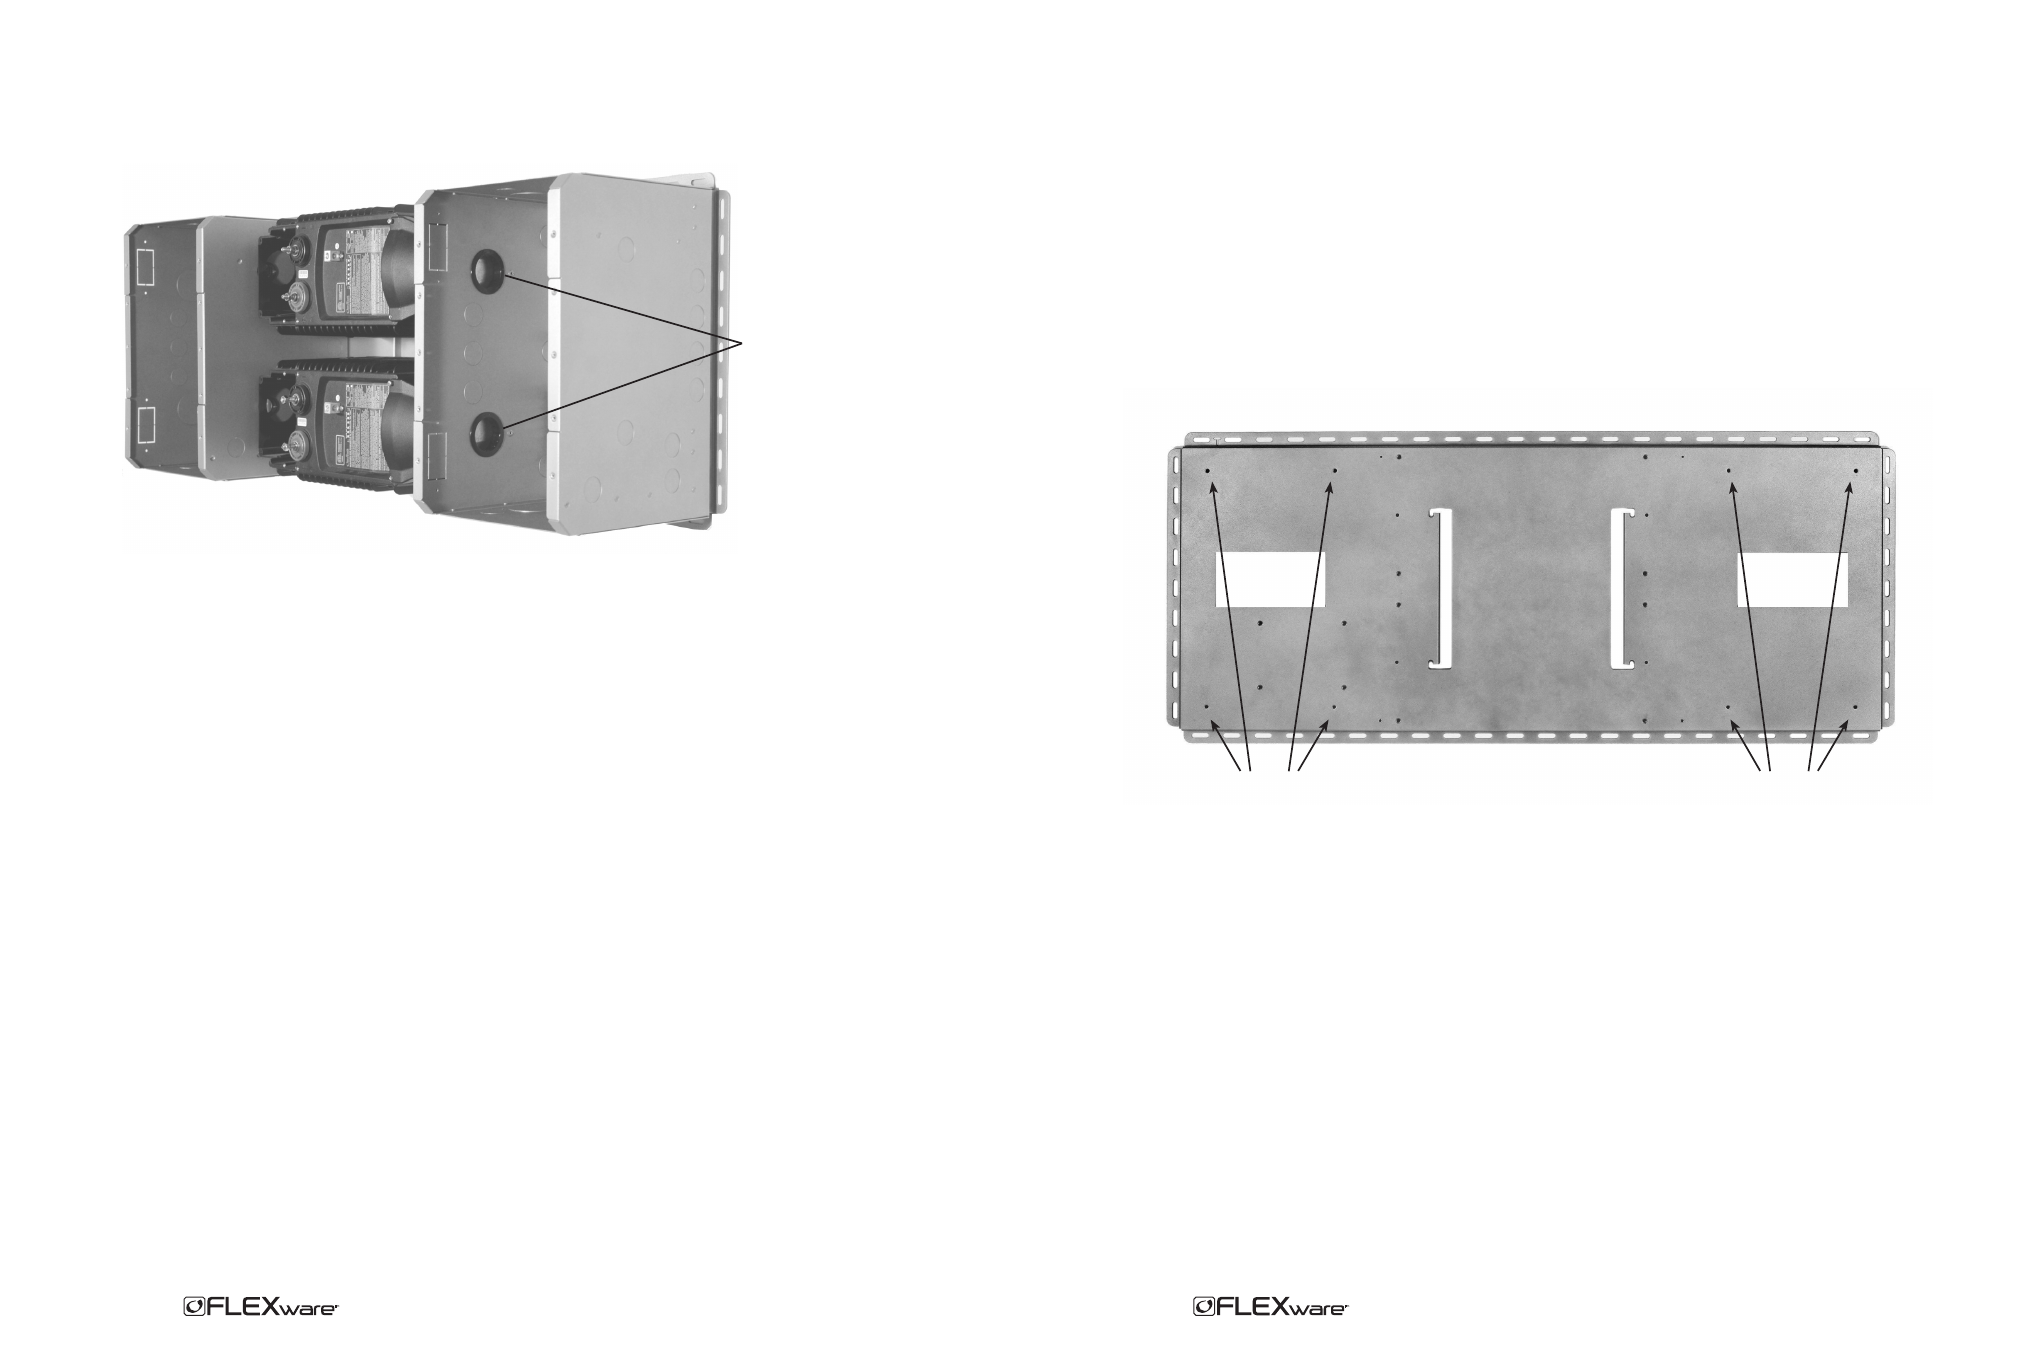
Installation of the AC Chassis and DC Chassis
To install the chassis:
• Hold each chassis up to its respective mounting holes on the FW-MP.
• Place one M6 X 10mm machine screw (provided with the FW-MP) in each corner, tightening
only enough to keep the chassis in place.
AC side
DC side
Figure 7: Chassis Mounting Holes
AC Chassis
Mounting Holes
DC Chassis
Mounting Holes
8
- GS8048 (44 pages)
- GTFX2524 (2 pages)
- VFX 3524M (65 pages)
- FX2012MT (2 pages)
- Systems (24 pages)
- Sealed FX (2 pages)
- VFX Series (2 pages)
- Hitch DOM-OBK03 (32 pages)
- GFX Series Inverter/Charger Installation Manual (40 pages)
- GFX Series Inverter/Charger Operators Manual (64 pages)
- GFX International Series Installation Manual (40 pages)
- GFX International Series Operators Manual (64 pages)
- GS8048 Installation Manual (44 pages)
- GS8048 Operator Manual (60 pages)
- GS Load Center Installation Manual (48 pages)
- GS Load Center Installation Manual (60 pages)
- Radian Series Inverter/Charger Service Instructions (8 pages)
- GS8048 Quick Start Guide (4 pages)
- GS7048E Installation Manual (48 pages)
- GS7048E Operators Manual (76 pages)
- GS7048E Quick Start Guide (4 pages)
- GS8048A Quick Start Guide with GSLC (4 pages)
- GS8048A Installation Manual (48 pages)
- GS8048A Operators Manual (76 pages)
- FX Series Installation Manual (60 pages)
- FX Series Programming Manual (59 pages)
- FX Series Circuit Board Replacement Instruction (9 pages)
- FX Series International Installation Manual (47 pages)
- FX Series Export Inverter/Charger Programing Manual (56 pages)
- GTFX Series Inverter/Charger Programing Manual (32 pages)
- GTFX Series Inverter/Charger Programing Manual (64 pages)
- GTFX Series Inverter/Charger Installation Manual (88 pages)
- PV 8 Combiner (28 pages)
- FW-X240 Installation Manual (16 pages)
- PSX-240-Relay Installation Manual (8 pages)
- FLEXware 250 - Users Guide (16 pages)
- FW-IOB-S-120VAC Input/Output/Bypass Assembly - Installation Instructions (8 pages)
- FW-IOB-S-230VAC Input/Output/Bypass Assembly - Installation Instructions (8 pages)
- FLEXware ACA AC Conduit Adapter Users Guide (8 pages)
- FLEXware Mounting Plate Users Guide (12 pages)
- FW-IOB-D-120VAC Input/Output/Bypass Assembly - Installation Instructions (8 pages)
- FW-IOB-D-120/240VAC Input/Output/Bypass Assembly - Installation Instructions (8 pages)
- FW-IOB-D-230VAC Input/Output/Bypass Assembly - Installation Instructions (8 pages)
- FLEXware MATE3 Mounting Bracket - Installation Instructions (2 pages)