Step 3: system general configuration (manual) – Night Owl X100-DVR16-2TB startup User Manual
Page 5
5
Step 3: System General Configuration (Manual)
If you have chosen a manual network configuration you should configure the
basic settings on your NVR/DVR to ensure that it will display the information
in the correct, time and date.
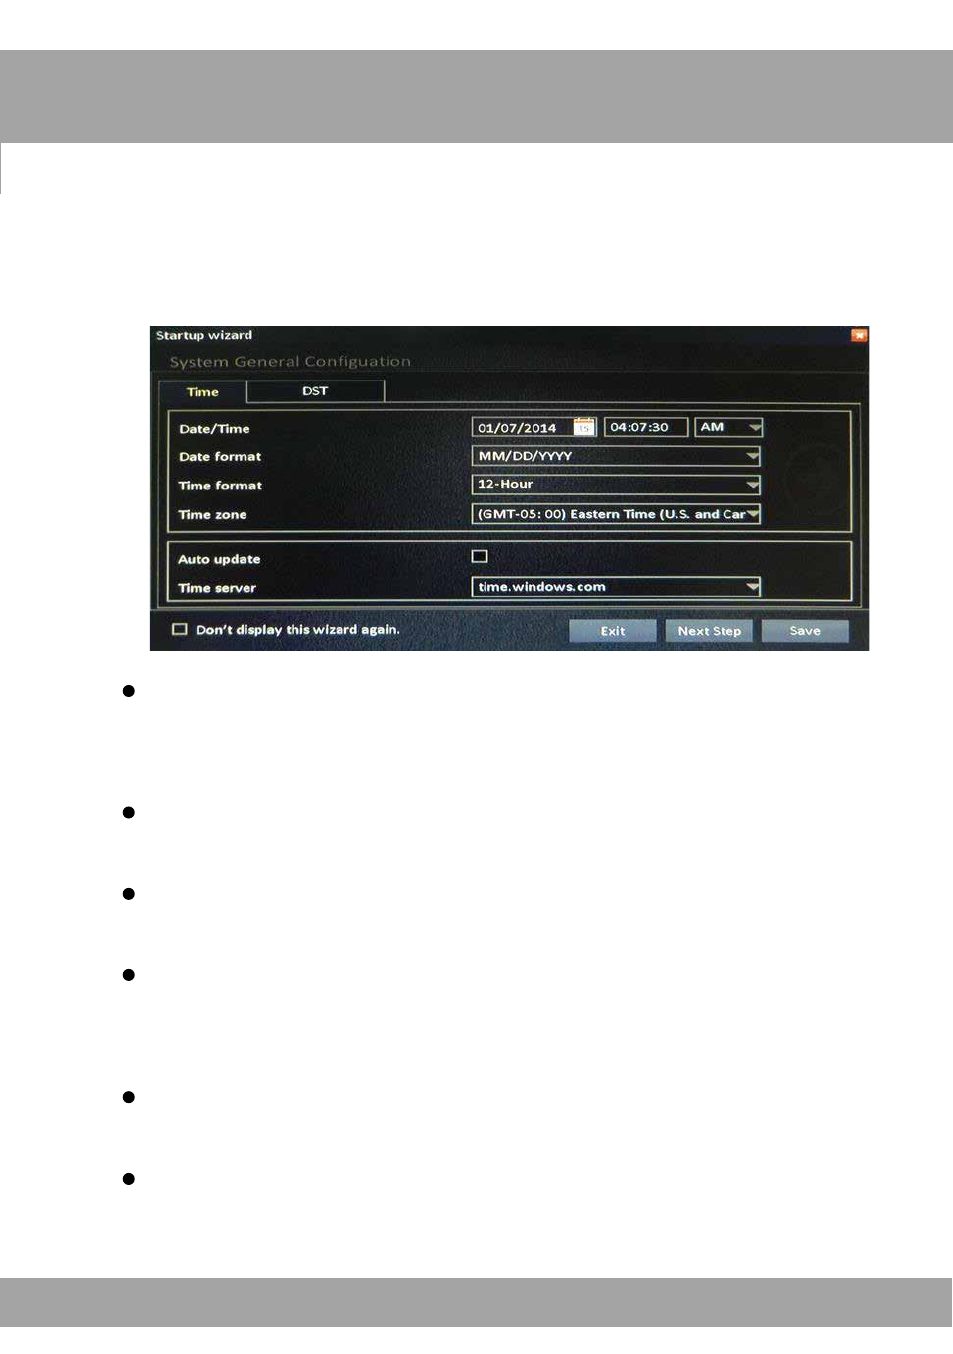
Time Tab
Date/Time: Select a date format and the current date. Select a time
format and enter the current time. If you select the 12-hour format,
you will need to differentiate between AM and PM.
Date format: Use the drop-down menu to choose the way you
would like the date displayed.
Time format: Use the drop-down menu choose the way you
would like the time displayed.
Time zone: Use the drop-down menu to choose the time zone in
which you are located. If you have already manually changed the
date/time, it will change again to reflect the time zone you chose.
Auto update: Check this box if you would like the NVR/DVR to
automatically update the date/time if your network is configured.
Time server: You will generally not need to change this setting.
This is the web address that retrieves the date and time for
automatic updates.
- X100-DVR16-1TB startup X100-DVR16 startup X100-DVR8-5GB startup X100-DVR8-1TB startup X100-DVR8 startup X100-DVR4-5GB startup X100-DVR4 startup X9-168-4DM-2TB startup X9-168-1TB startup X9-88-1TB startup X9-84-1TB startup B-X81-8 startup B-X81-49-4DM9-BB startup B-X81-4 startup X9-44-500 startup X9-42-500 startup