Yetter Avenger 30 Coulter User Manual
Page 7
7
ASSEMBLY INSTRUCTIONS
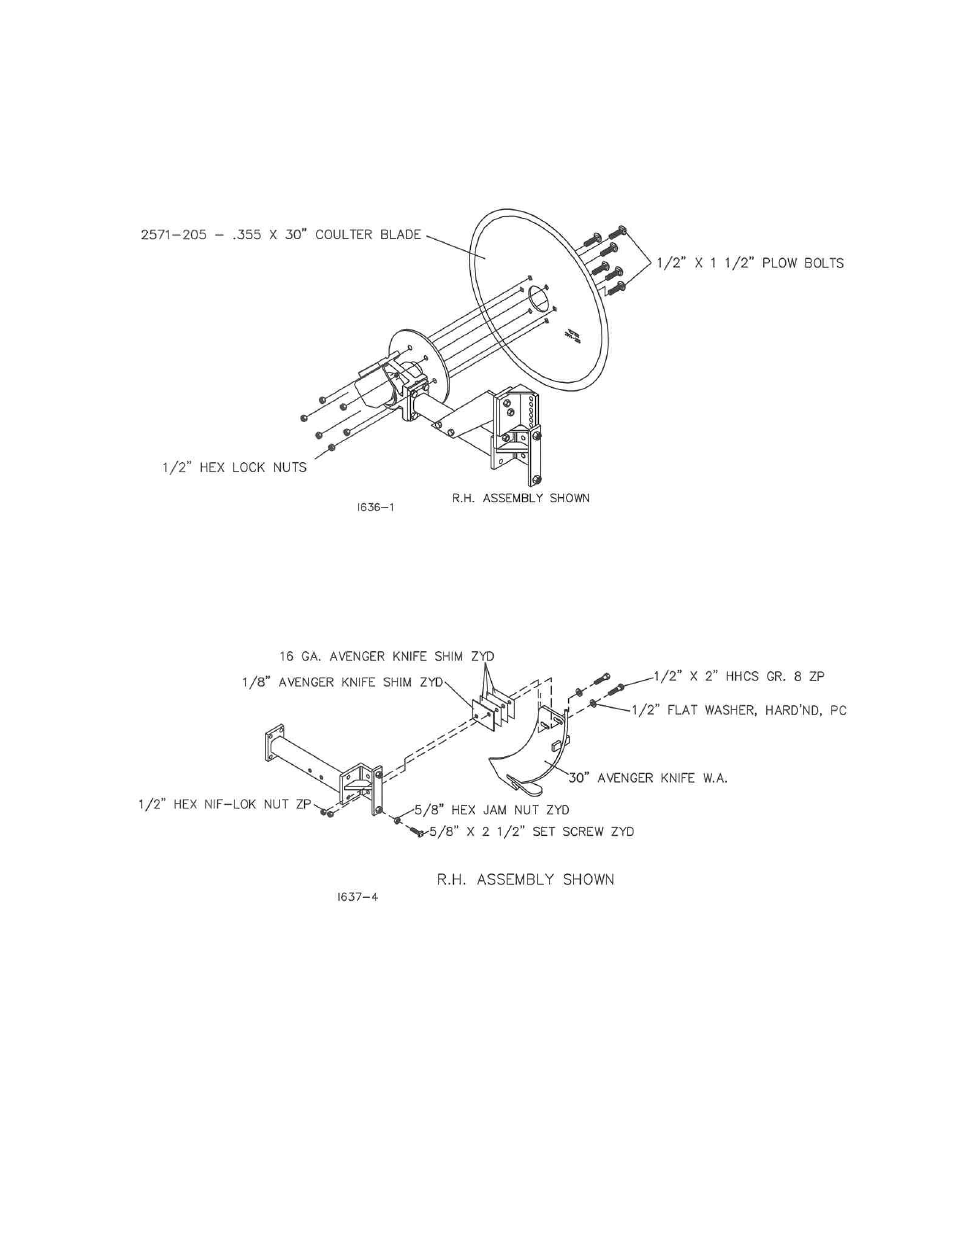
STEP 5. Attach the 30” blade 2571-205 to the 2986-111 hub assembly using (6) ½” x 1 ½” plow bolts and
½” hex lock nuts.
NOTE: The blade must be centered on the spindle. Bolts are to be just slightly tightened. At STEP 7
they are to be tightened securely and torqued to 90-96 FT/LBS.
STEP 6. Attach the Avenger Knife 2986-214 to the Knife Arm 2986-211 using shims as needed to align
the knife point with blade and using (2) ½” x 2” hex head bolts, hardened flat washers and ½” NIF-LOK
nuts.
STEP 7. Center the blade on the spindle, check by rotating blade and watching clearance between knife
and blade. Move the blade on the spindle as required until the blade runs concentric. Tighten (6) ½” lock
nuts, torque to 90-96 ft/lbs. THE BLADE MUST RUN CONCENTRIC.
STEP 8. Adjust knife clearance to blade as close as possible. The high point of the blade should clear
the knife no more than 1/64” max. as the blade is rotated. The blade should rotate freely. Tighten (2) ½”
x 2” hex bolts to 120 ft/lbs. Re-check clearances by rotating blade one full revolution after all bolts are
tight. Lock the knife in place by using the 5/8” x 2 ½” setscrew and 5/8” hex jam nut to prevent the knife
from moving rearward.