Speedtech A Body Rear Coilover User Manual
Page 6
6 |
P a g e
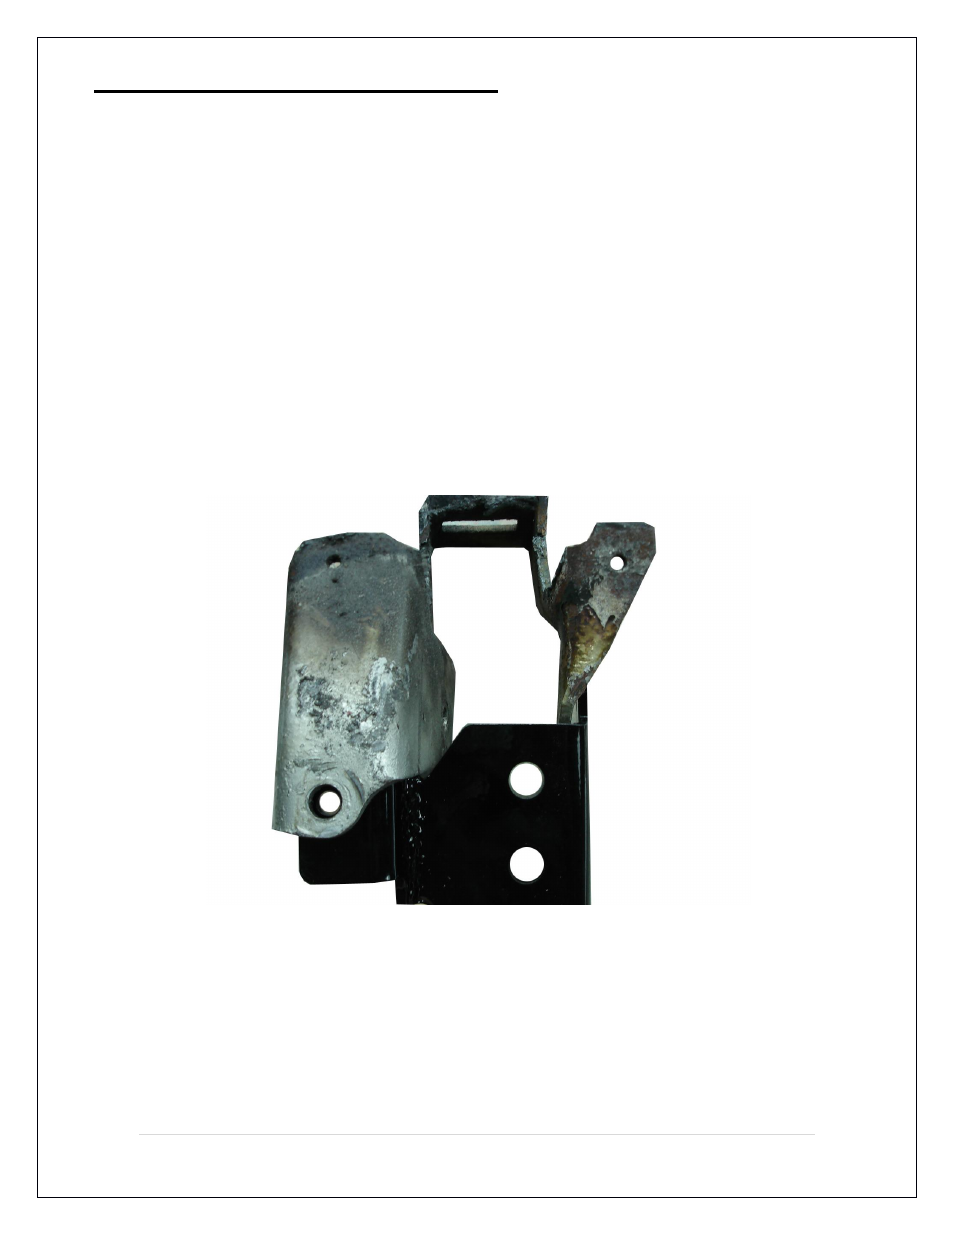
Lower Brackets for Factory Style Axles
4. Attach the new lower conversion bracket to the factory shock mount/ trailing
arm bracket. First, bolt down the outer tab using a 3/8 x 1 ¼” bolt, (2) 3/8”
washers and a
3/8” Nylock nut through the original lower shock mount hole.
Note: The tab is installed to the forward side of the shock mount! For determining
left and right sides, the tabs go towards the outside of the car. Only snug the bolt,
do not tighten completely.
Using the upper 3/8” hole in the Speedtech bracket as a guide, drill a 3/8” hole in
the side of the factory trailing arm bracket, just above the trailing arm mounting
hole (see diagram on page 5)
. Using a 3/8 x 1 ¼” bolt, (2) 3/8” washers, and a
3/8” Nylock nut, bolt down this part of the bracket. Now go back and tighten the
other 3/8” bolt. Reattach the lower trailing arm to the bracket using the new ½ x 4
1/2” bolt, washers, and nut.
Left side bracket assembly as seen from the back of the car.