Rubbermaid 1800384 User Manual
Page 6
24
25
50”
G
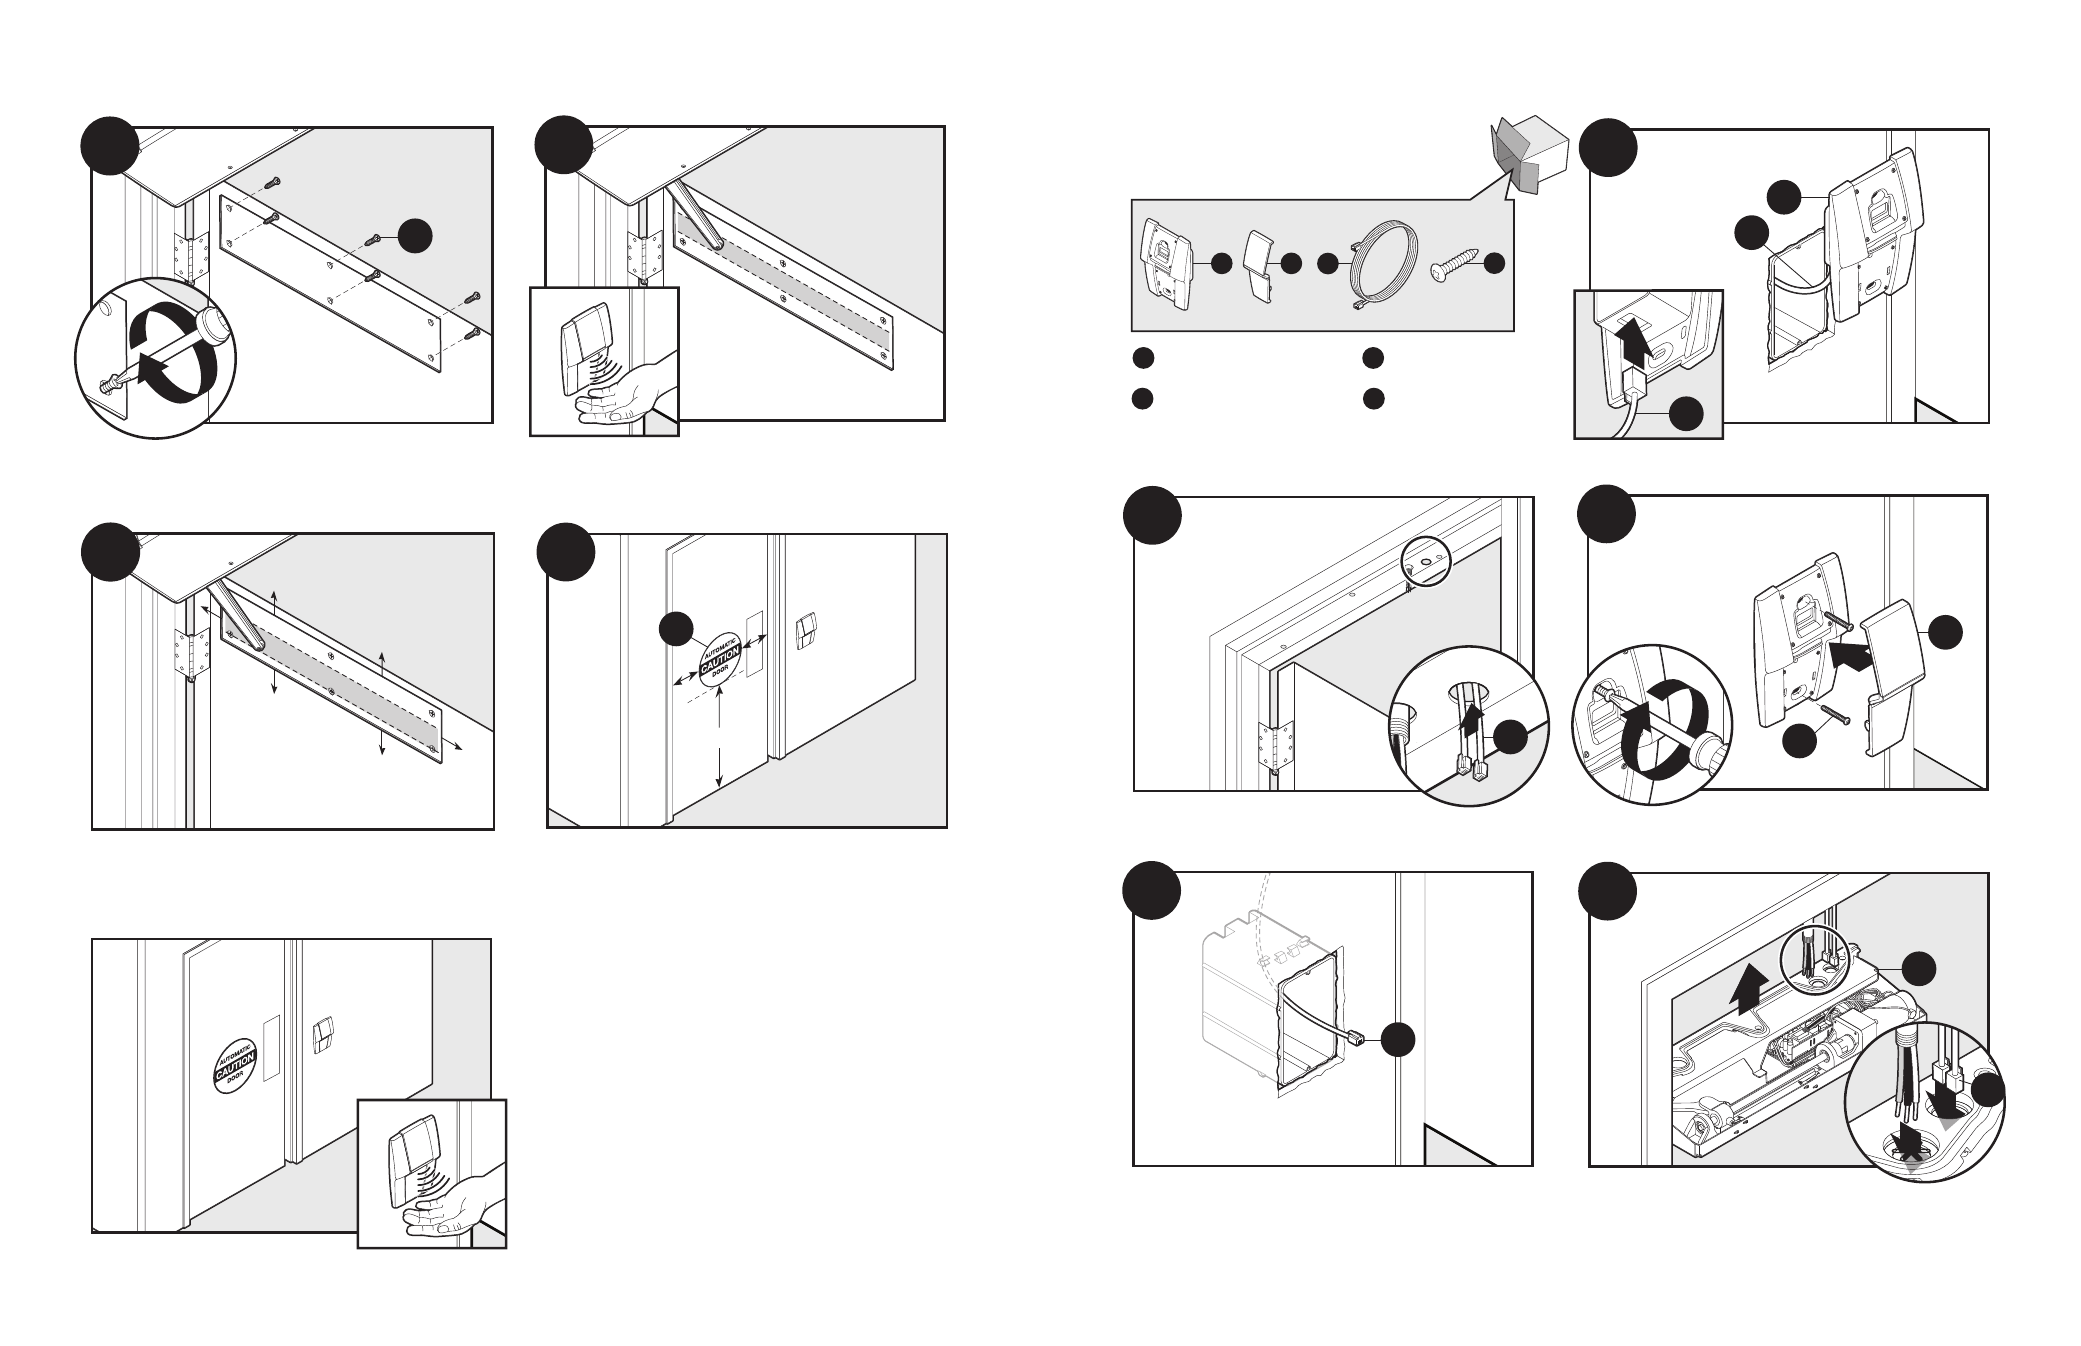
If roller rides off the plate or over screw heads, adjust
placement of roller plate.
9
22
K
23
With unit on, wave hand in front of sensor. Observe path of
roller on the roller plate (it should ride between the screw
heads and stay on the plate).
Installation
Affix “Caution” labels on both sides of the door. Labels should
be centered across the width of the door and 50” from
the floor.
Attach plate to door with six screws.
3
B
E
E
11
5
2
3
E
A
Connect sensor cable to the back of sensor plate.
Position Auto Door unit near door jamb and pass all cables
through respective holes into unit.
10
1
F
G
E
E
2
E
Additional Entrance Sensor Installation
Install the sensor plate to the cut-in box with two screws and
snap the sensor cover into place.
Insert sensor cables through the “G” hole in left hand doors
(or “D” hole in right hand doors).
Feed sensor cable from hole in the door jamb to the cut-in box.
Pass cable through box and install box into wall (be sure the box is
properly grounded). If longer sensor cable length is needed, connect
the sensor extension cable (#1800383) to the provided sensor cable.
2
4
1
C
J
Wave hand in front of sensor to open door.
Operation
J
E
x2
B
C
sensor plate
sensor cover
20’ sensor cable
1/4”-14 x 1-1/2”
Phillips pan head
screw type AB
B
C
E
J
sensor plate
sensor cover
20’ sensor cable
1/4”-14 x 1-1/2”
Phillips pan head
screw type AB
B
C
E
J